
WooCommerce Installation and User Guide
Installation Overview
- Install the plugin from Github
- Create an Automatic FFL account
- Add a payment method
- Create a store
- Obtain a Google Maps API Key
- Configure the plugin
Video Instructions
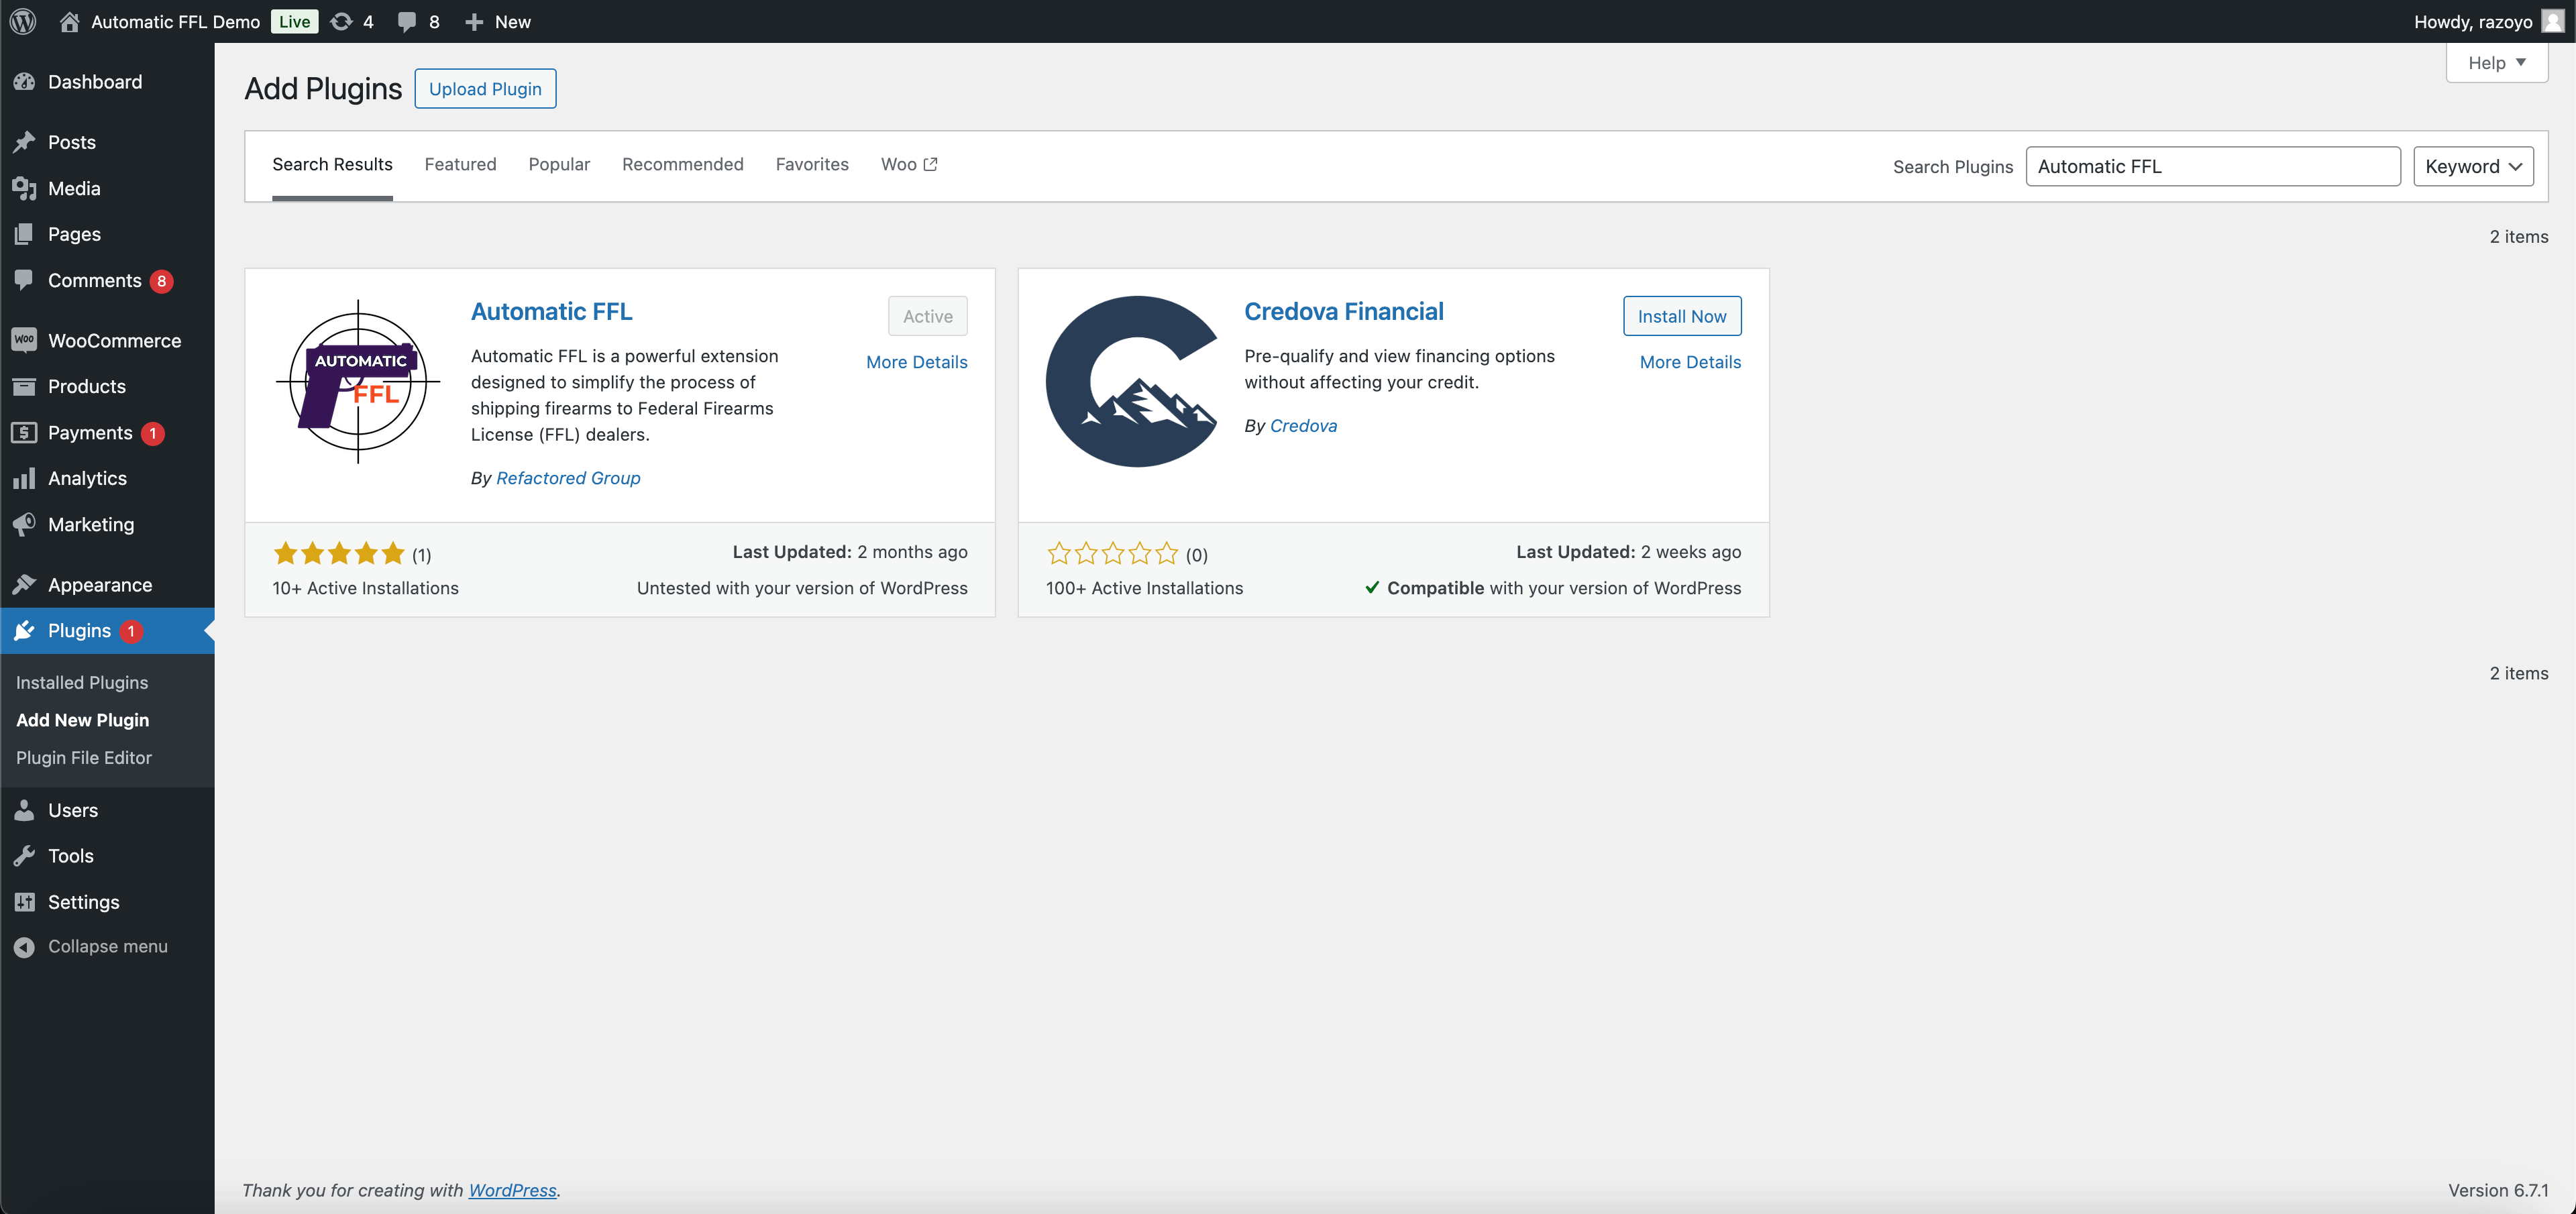
Install the plugin from the WordPress marketplace
Go to your WordPress admin panel and click on the Plugins tab. Then, click on the Add New Plugin button. In the search bar, type Automatic FFL and click on the Install Now button.
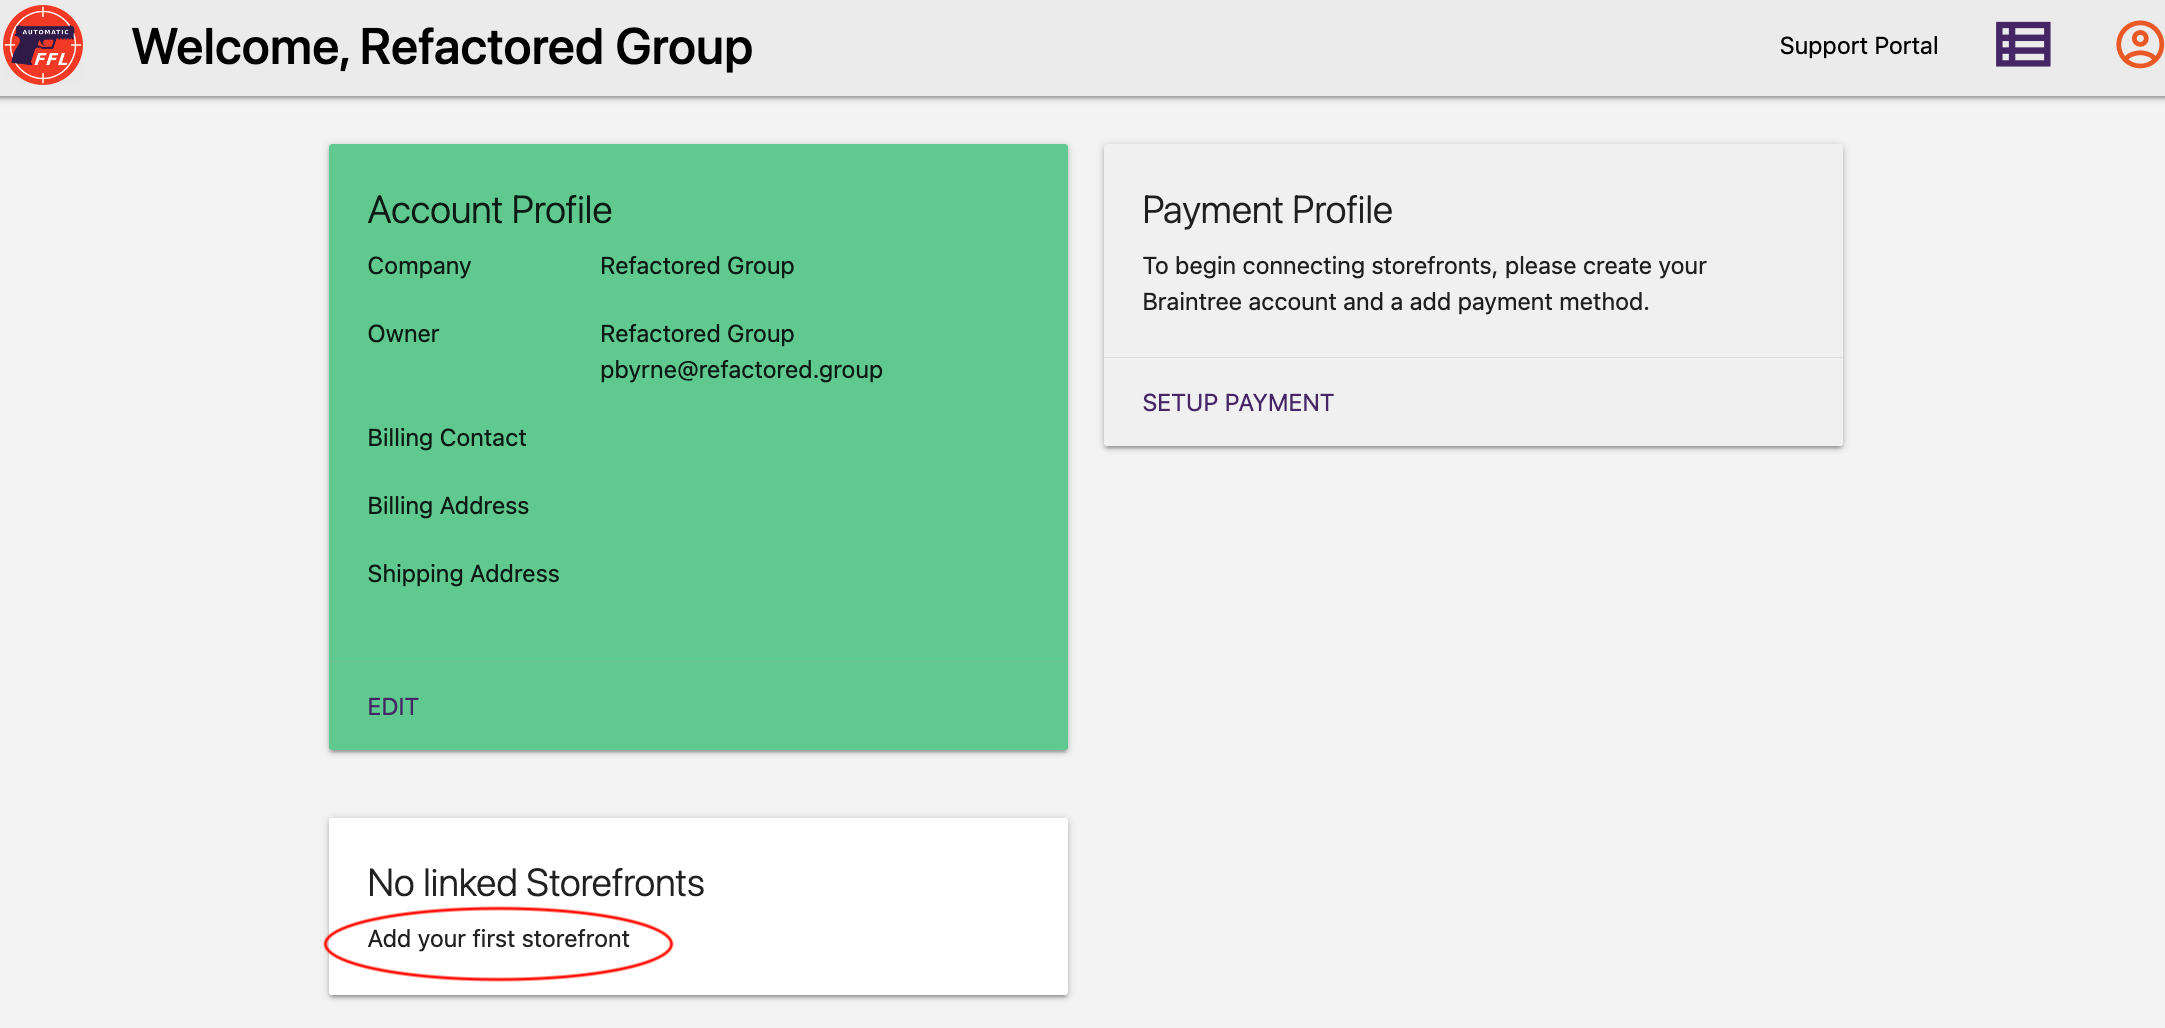
Create Admin Account
Visit the Automatic FFL admin home to create an account.

Add a Payment Method
Click the SETUP PAYMENT link and follow the instructions to save your payment method in our payment portal.

Create a Store
Click the Add your first storefront button and follow the instructions to create your first store.
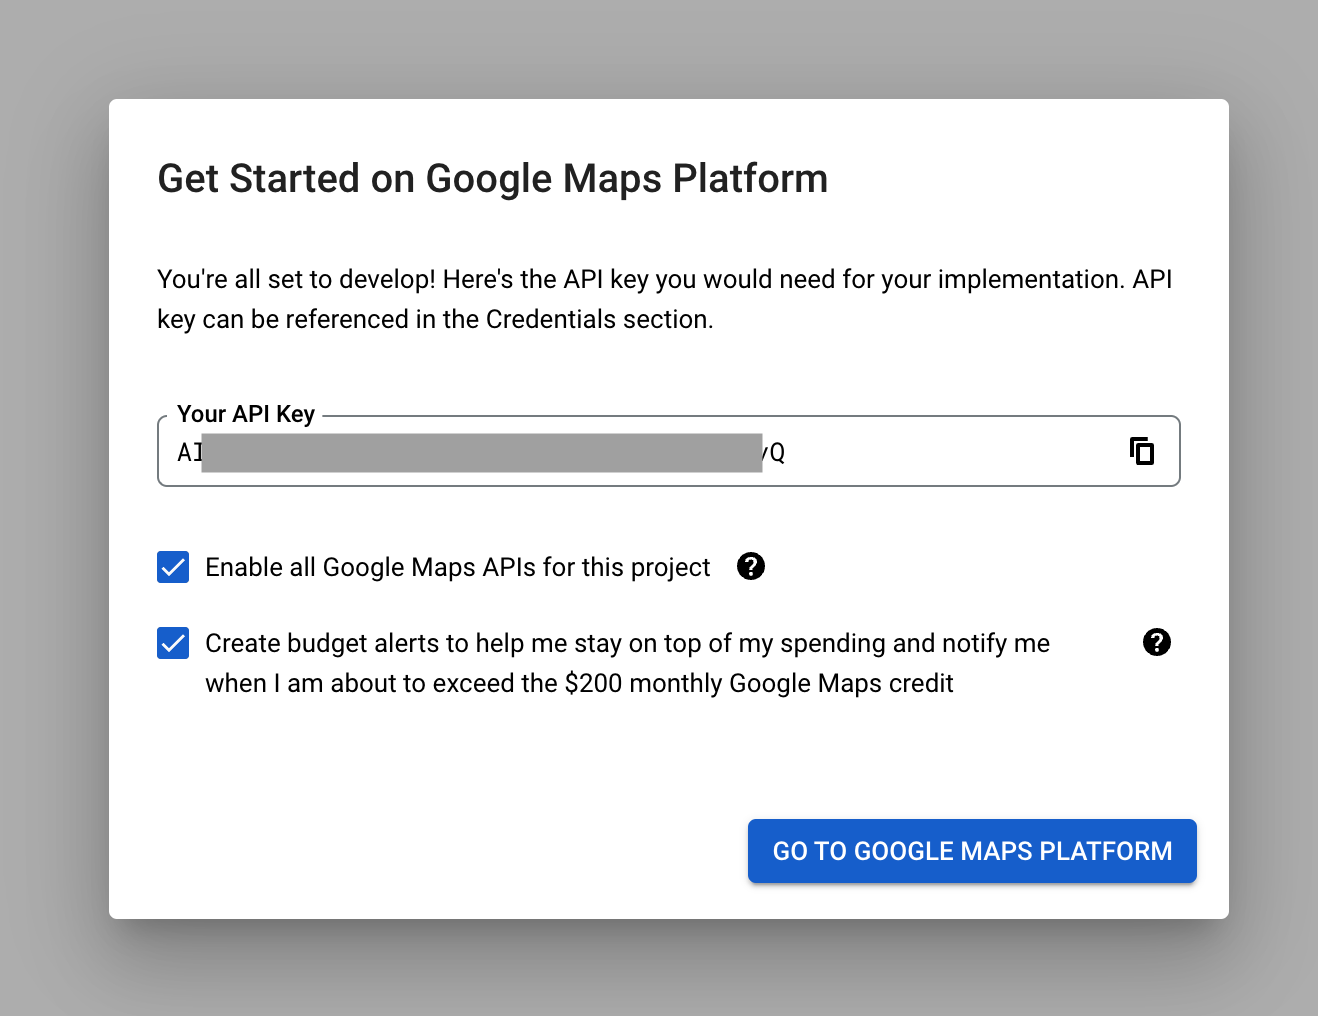
Obtain a Google Maps API Key
If you do not have a Google developer account already, visit Google Maps Platform and click the Get Started button to obtain a key.
Google offers a generous number of free requests. If your site experience extremely high traffic, you may need to pay for additional requests.
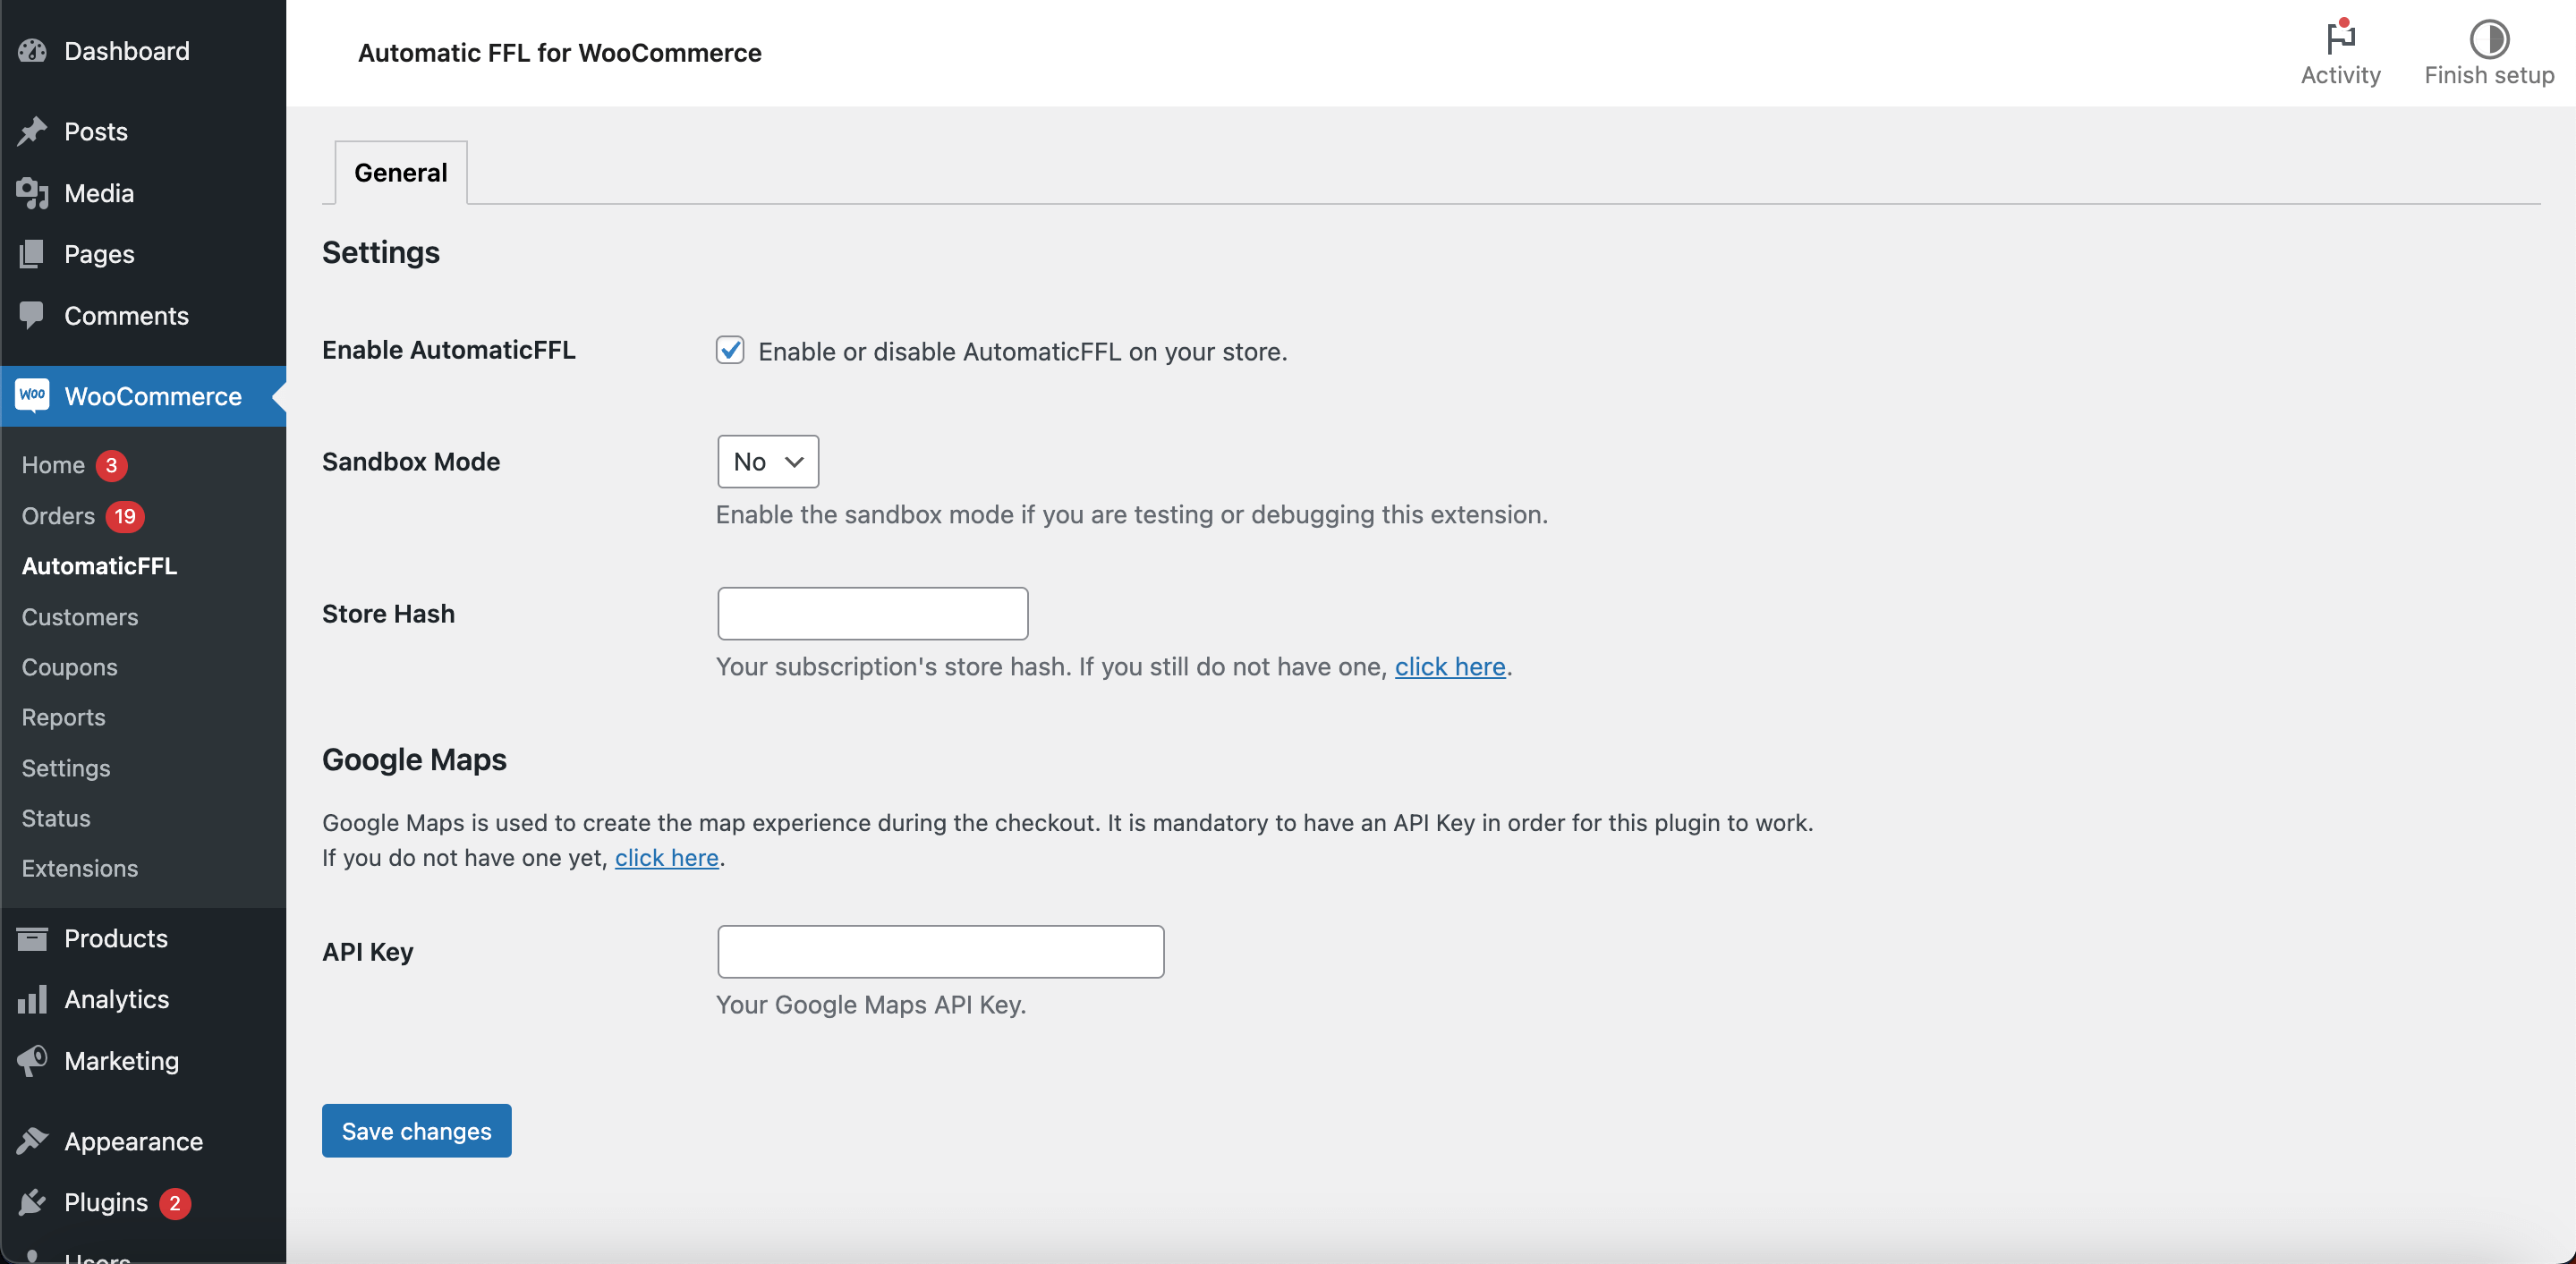
Configure Wordpress Plugin
From the Automatic FFL admin, click Edit on the store tile to give you access to the Store Hash and the Store Secret.
In your Wordpress admin panel, hover over the WooCommerce icon in the left side panel and click on Automatic FFL. Then, copy and paste the Store Hash and the Google API Key into the appropriate fields.
⚠️ If you have a new store, make sure you have configured a shipping zone. ⚠️
Use Classic Checkout
Automatic FFL requires the use of WooCommerce’s Classic Checkout. If you are using the block-based checkout, follow the steps below.
- Go to your WordPress admin panel.
- Hover over Pages in the left side panel and click on Add New Page.

- Where it says Add title, name your new page something like Classic Checkout.
- Where it says Type / to choose a block, copy and paste the following shortcode:
[woocommerce_checkout] - Click Publish twice to create the page.
- Go back to your WordPress admin panel.
- Hover over WooCommerce in the left side panel and click on Settings.

- Click on the Advanced tab.

- Click on the dropdown for Checkout Page, search for the new page you just created, and select it.

- Scroll to the bottom of the page and click Save changes.
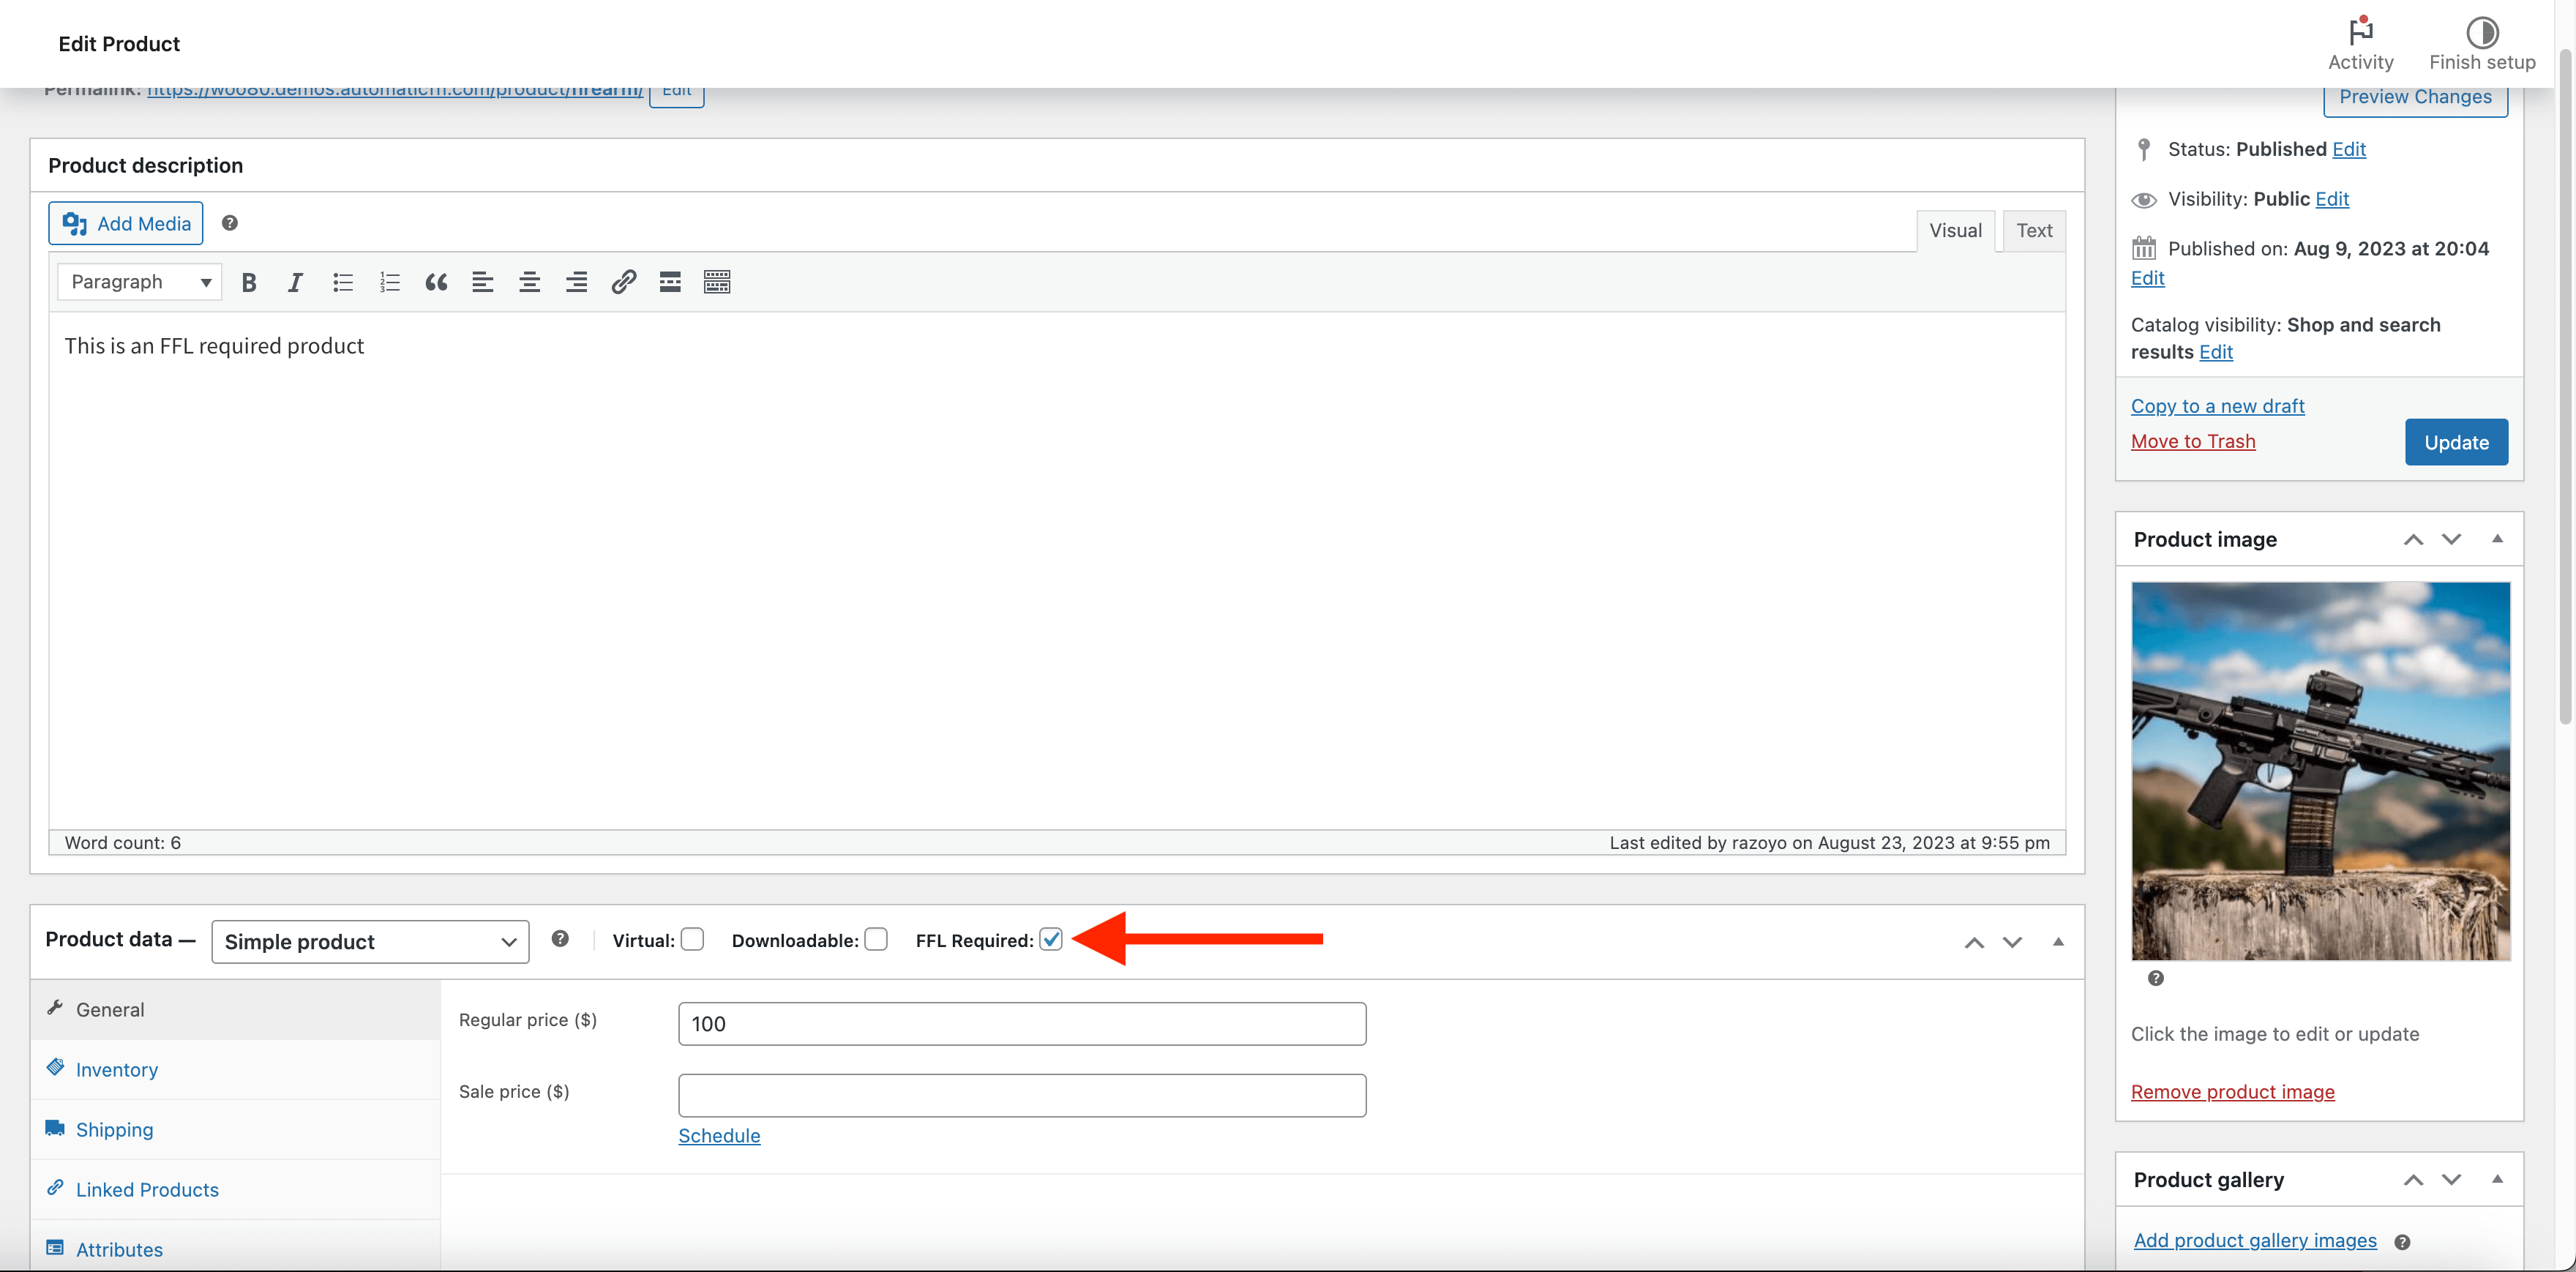
Mark Firearm Products
When you install Automatic FFL, a new product data type will apear for your WooCommerce products called FFL Required.
On each firearm product in your catalog, check the FFL Required checkbox. This can be done using bulk edit in the admin panel or through a product import as well.
Dealer Management
Automatic FFL gives you the ability to customize the list of dealers that will be available for checkout. See Documentation for complete details.