




Automatic FFL works on your WooCommerce storefront. When a customer checks out with a firearm or with ammunition you have flagged, it asks them to pick an FFL dealer and ships the order there. Orders that do not require an FFL check out as usual.
Step 1 Install the plugin
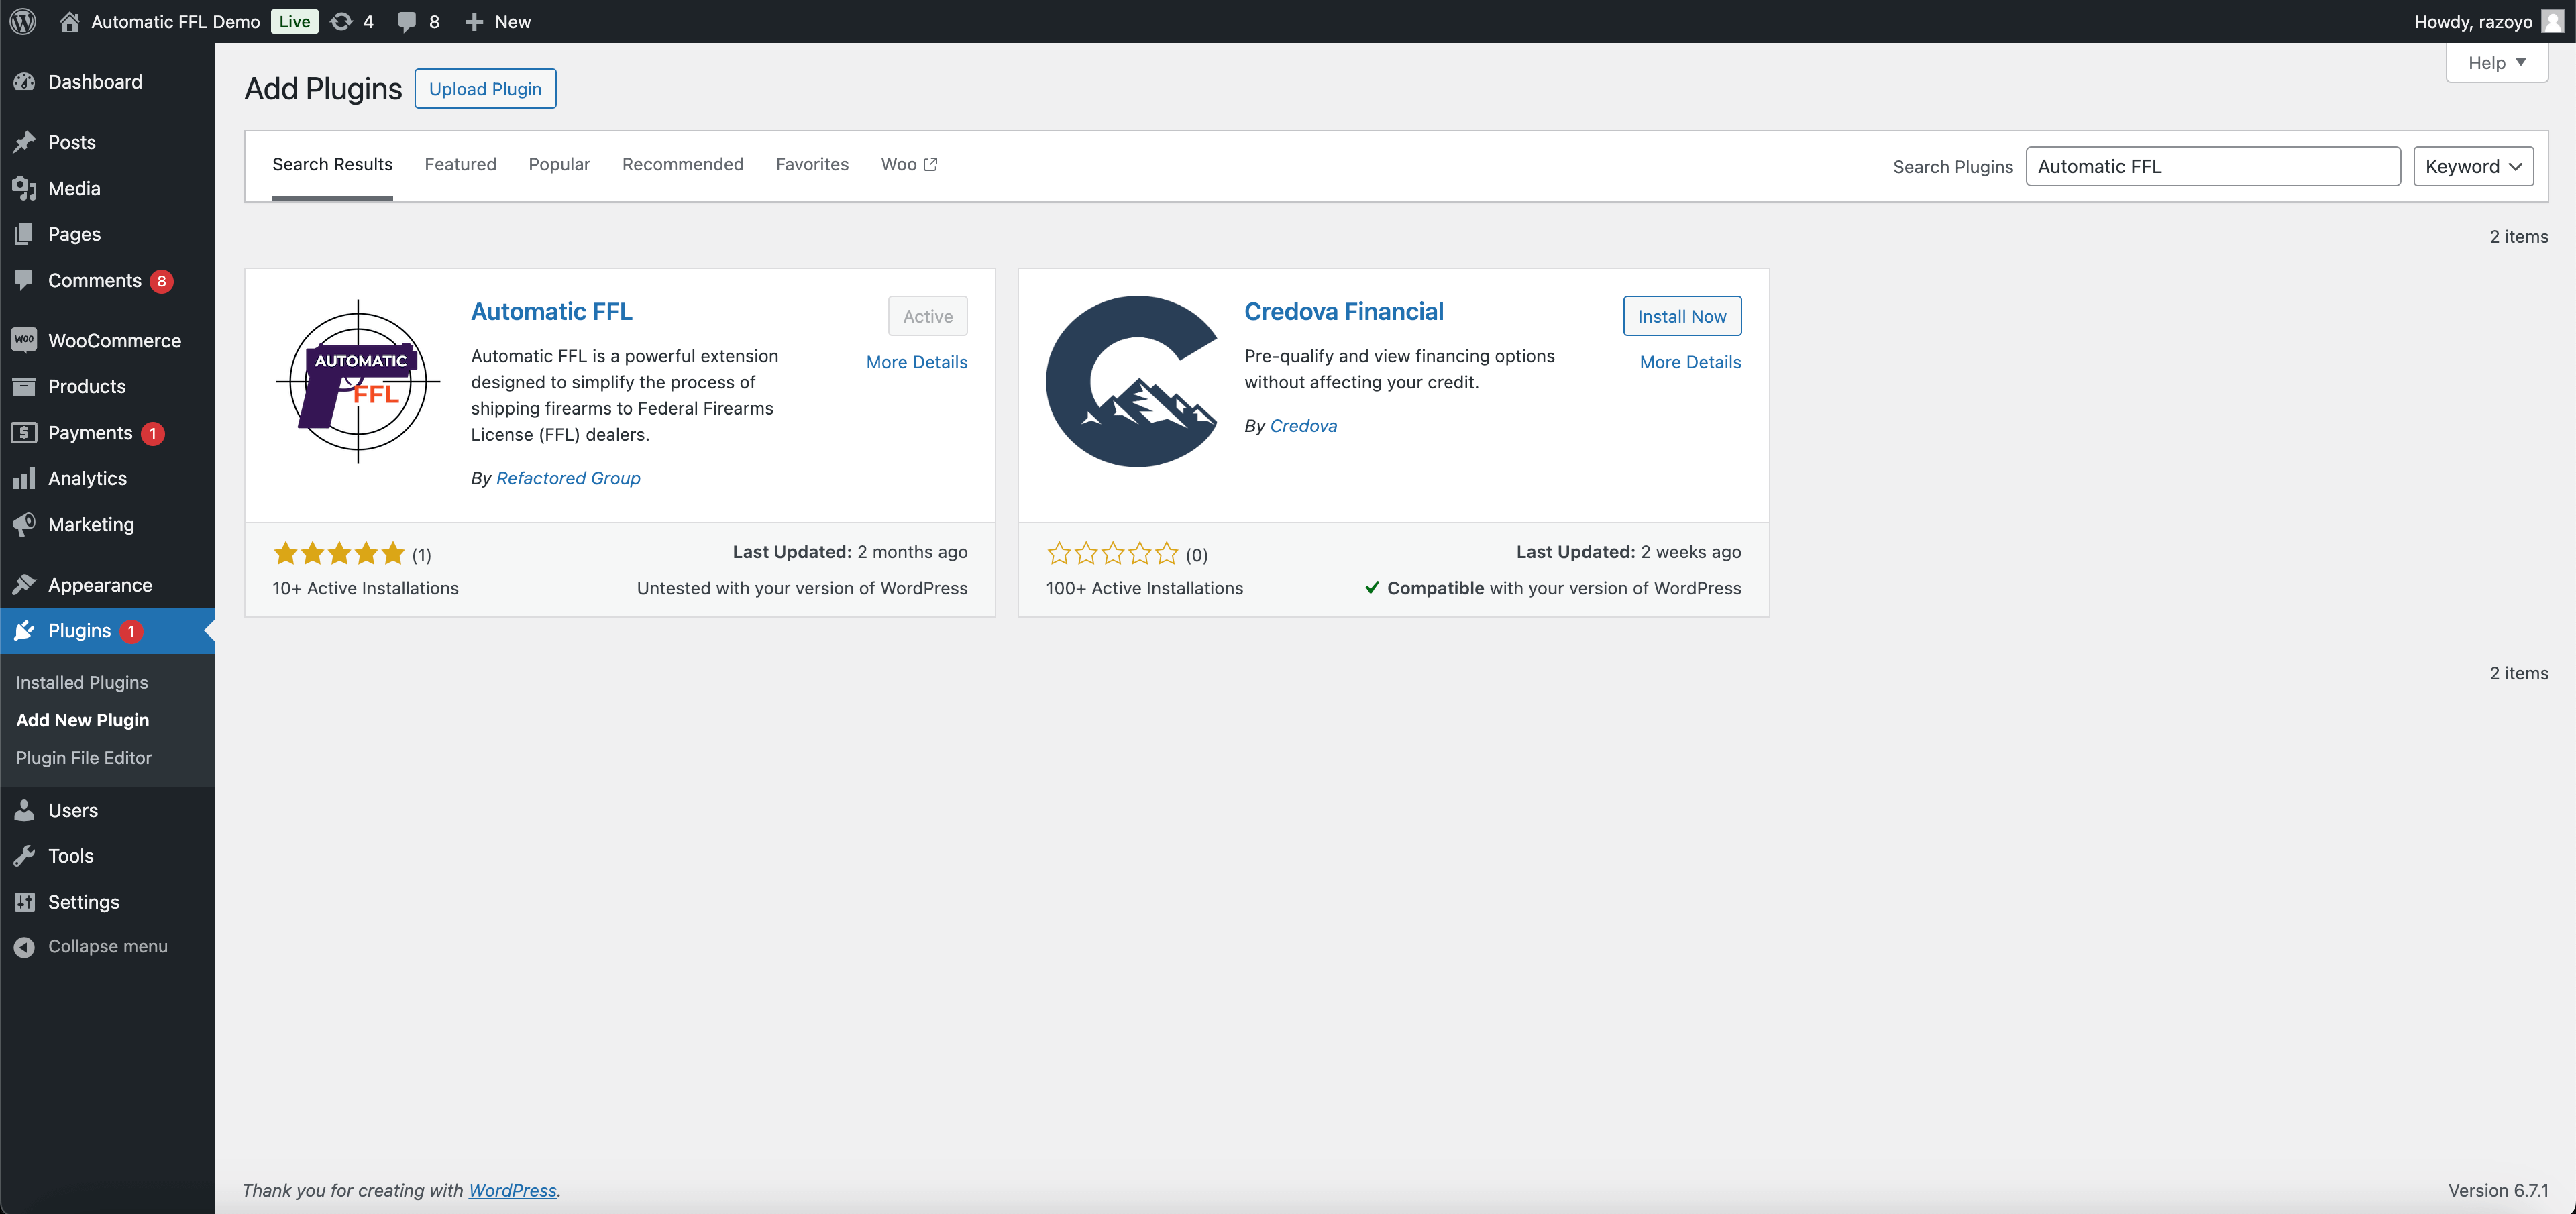
- In your WordPress admin panel, go to Plugins and click Add New Plugin.
- Search for Automatic FFL.
- Click Install Now, then activate the plugin.
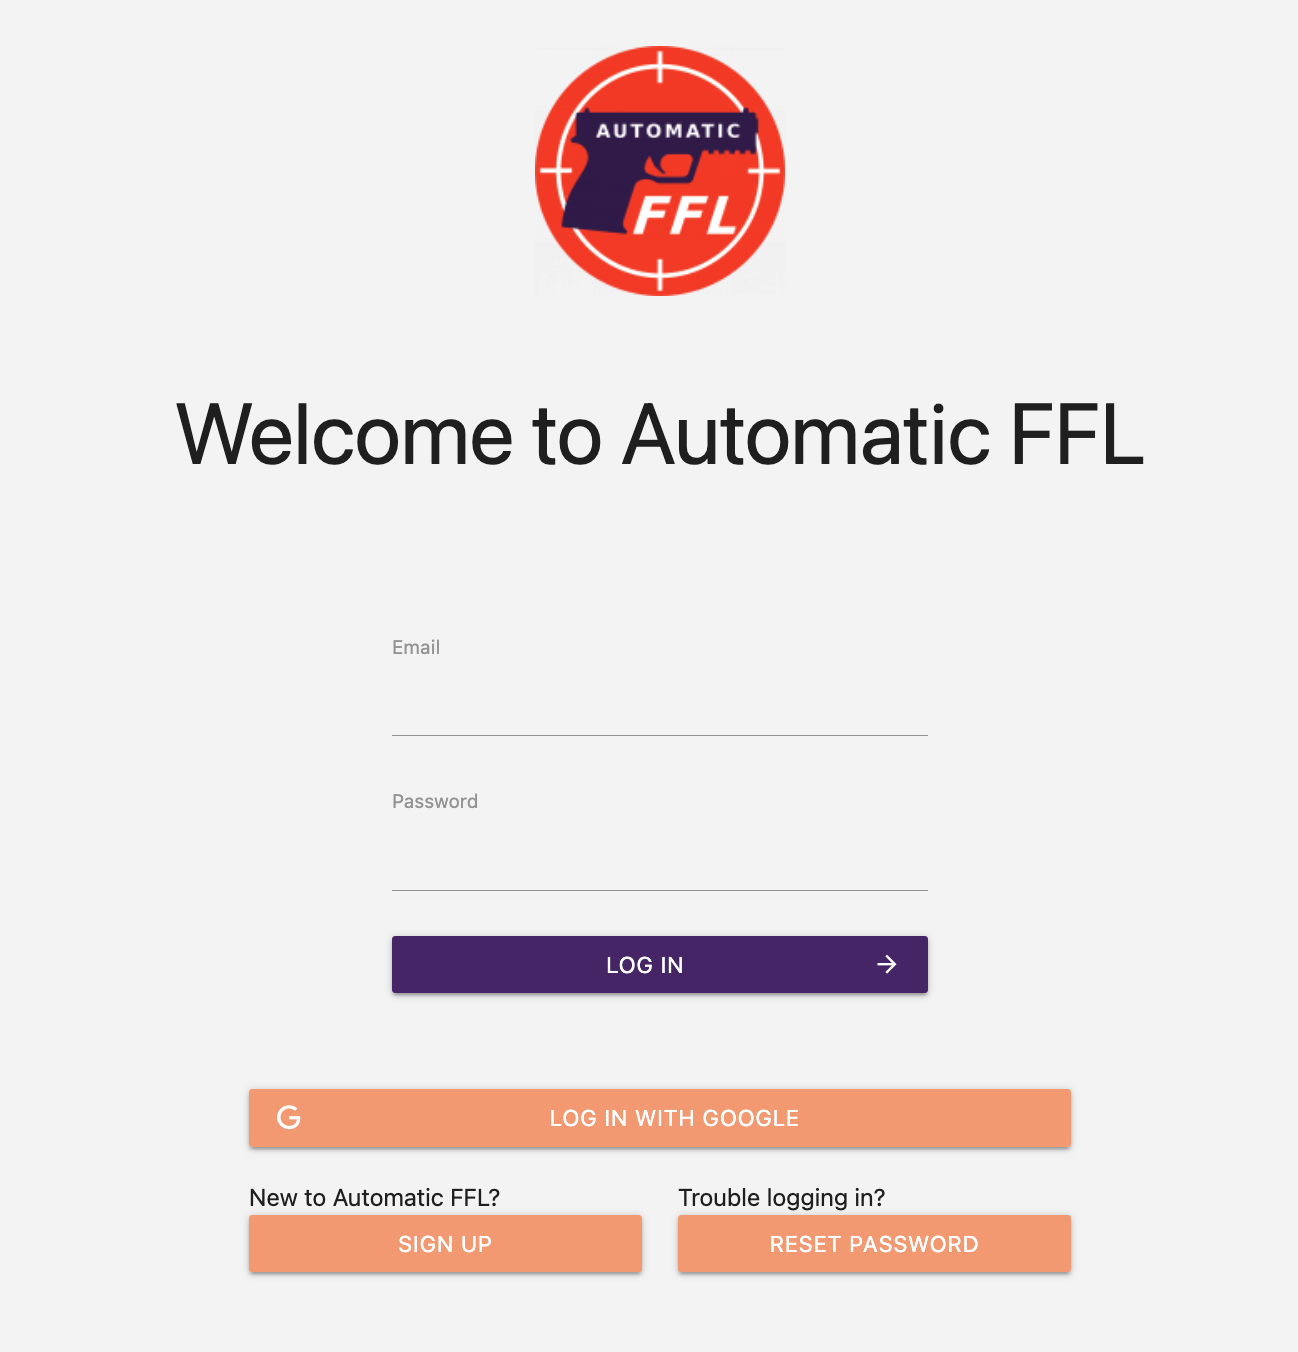
Step 2 Create an Automatic FFL account
Visit the Automatic FFL admin and create an account.
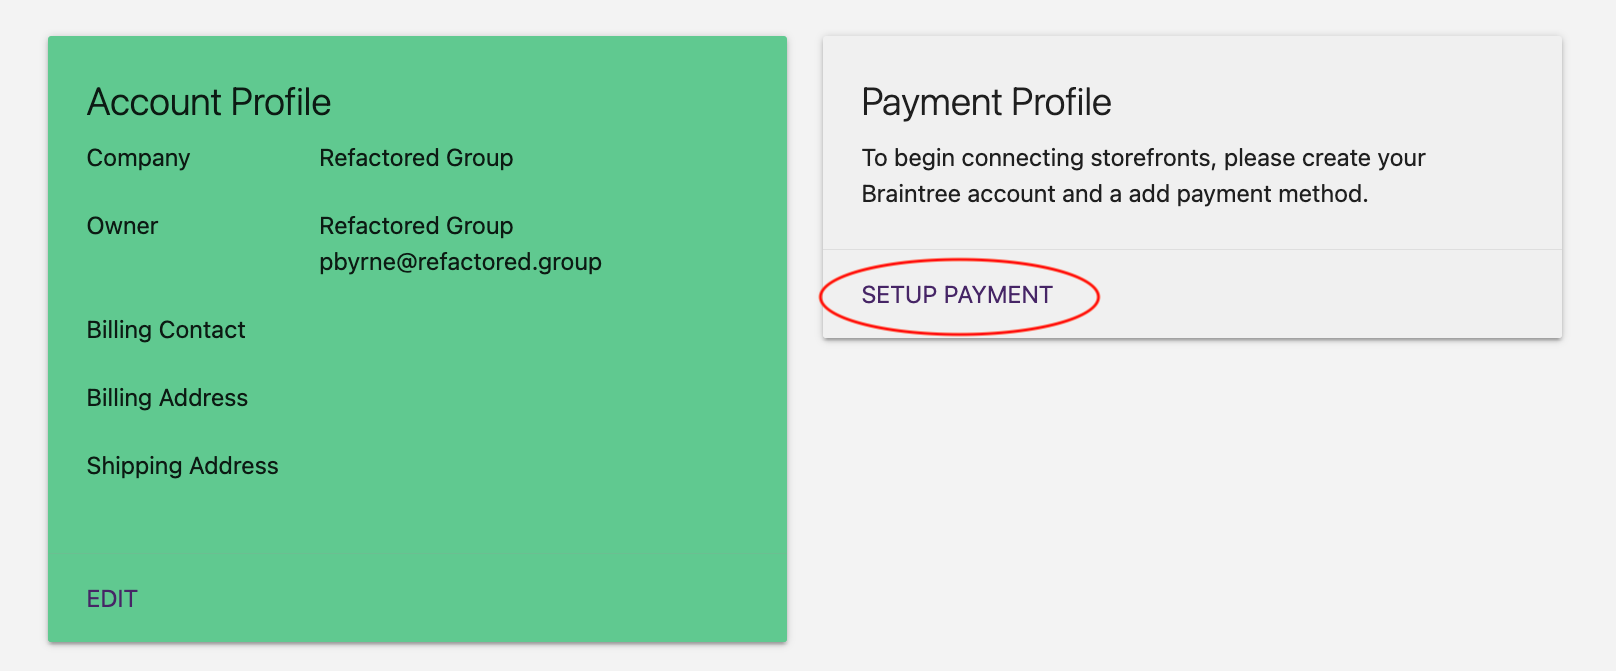
Step 3 Add a payment method
Click SETUP PAYMENT and follow the instructions to save your payment method in our payment portal.
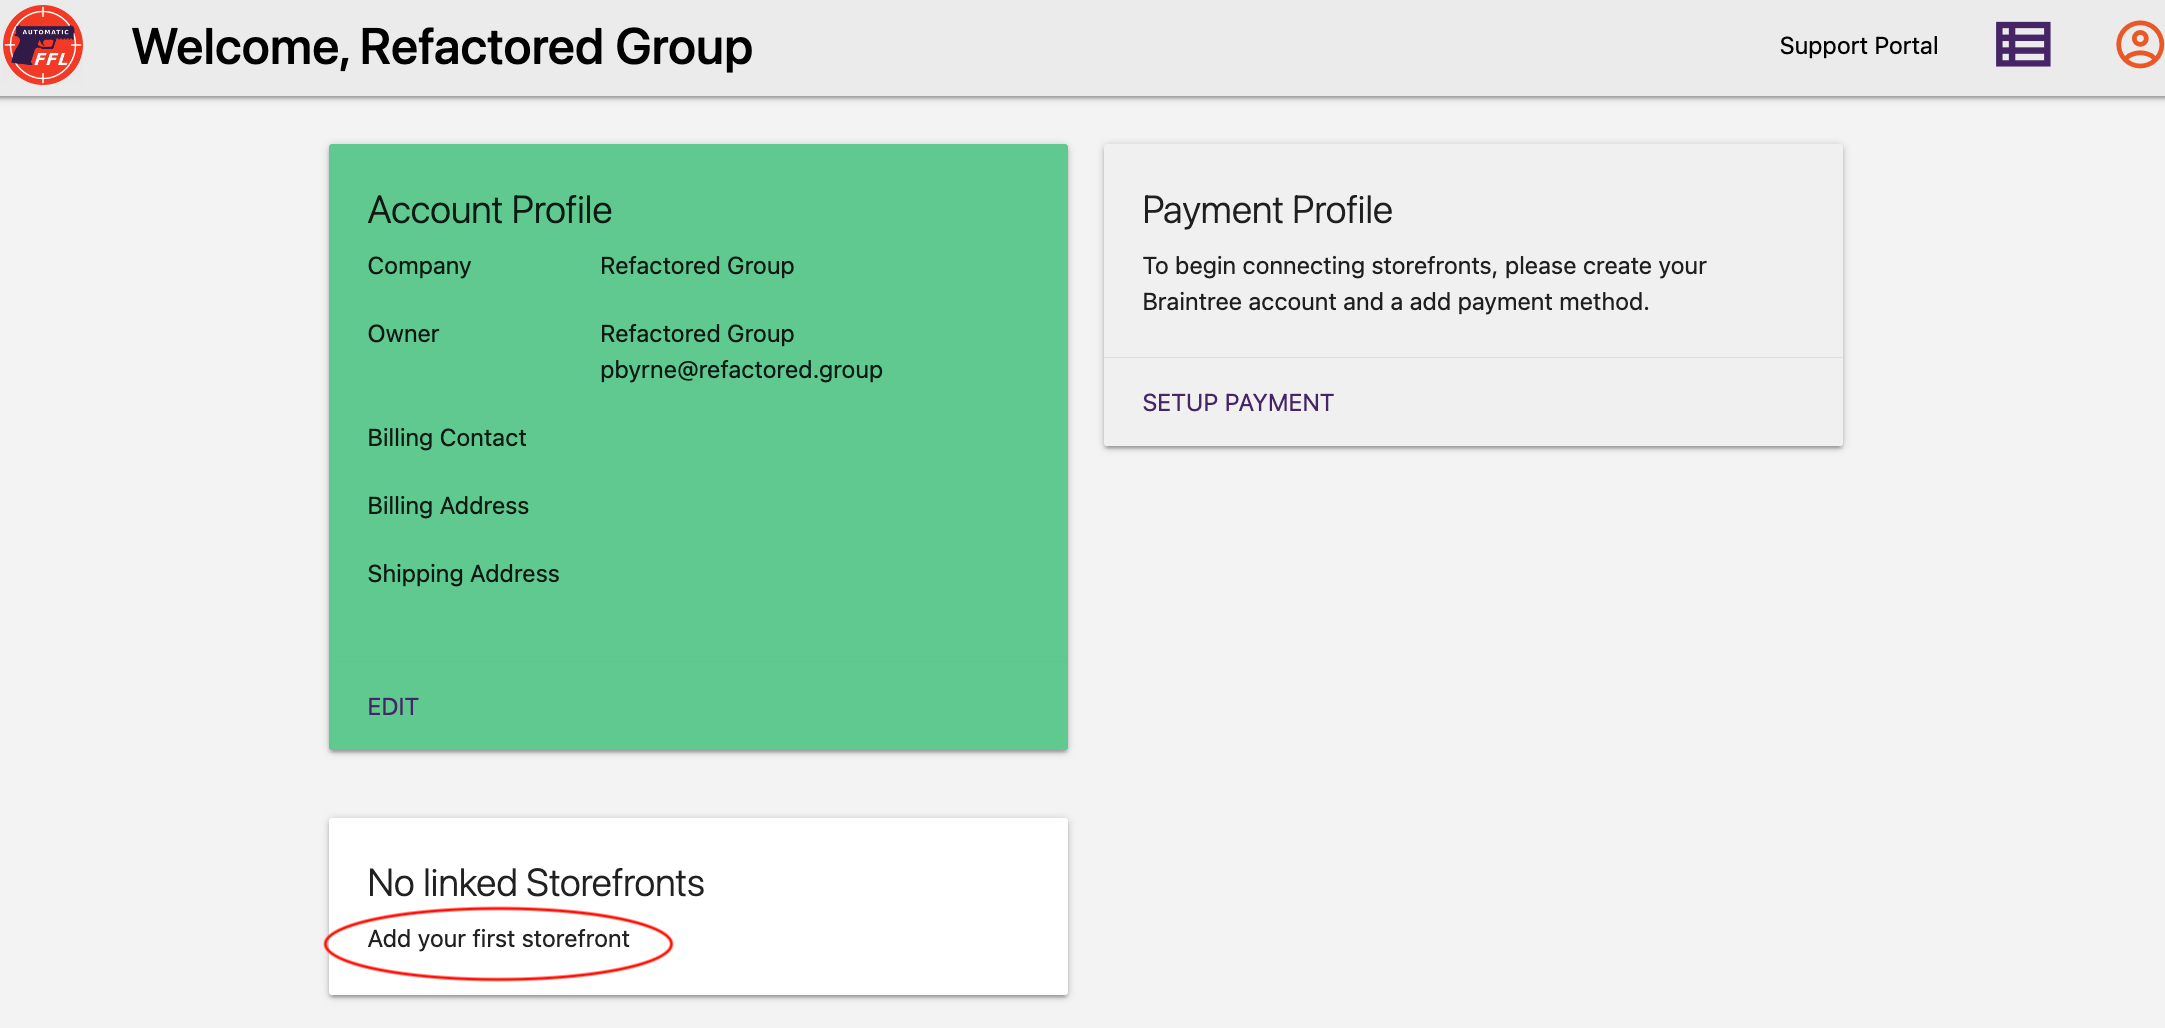
Step 4 Create a store
Click Add your first storefront and follow the instructions to create your first store.
Step 5 Get a Google Maps API key
If you do not already have a Google developer account, visit Google Maps Platform and click Get Started to obtain a key.
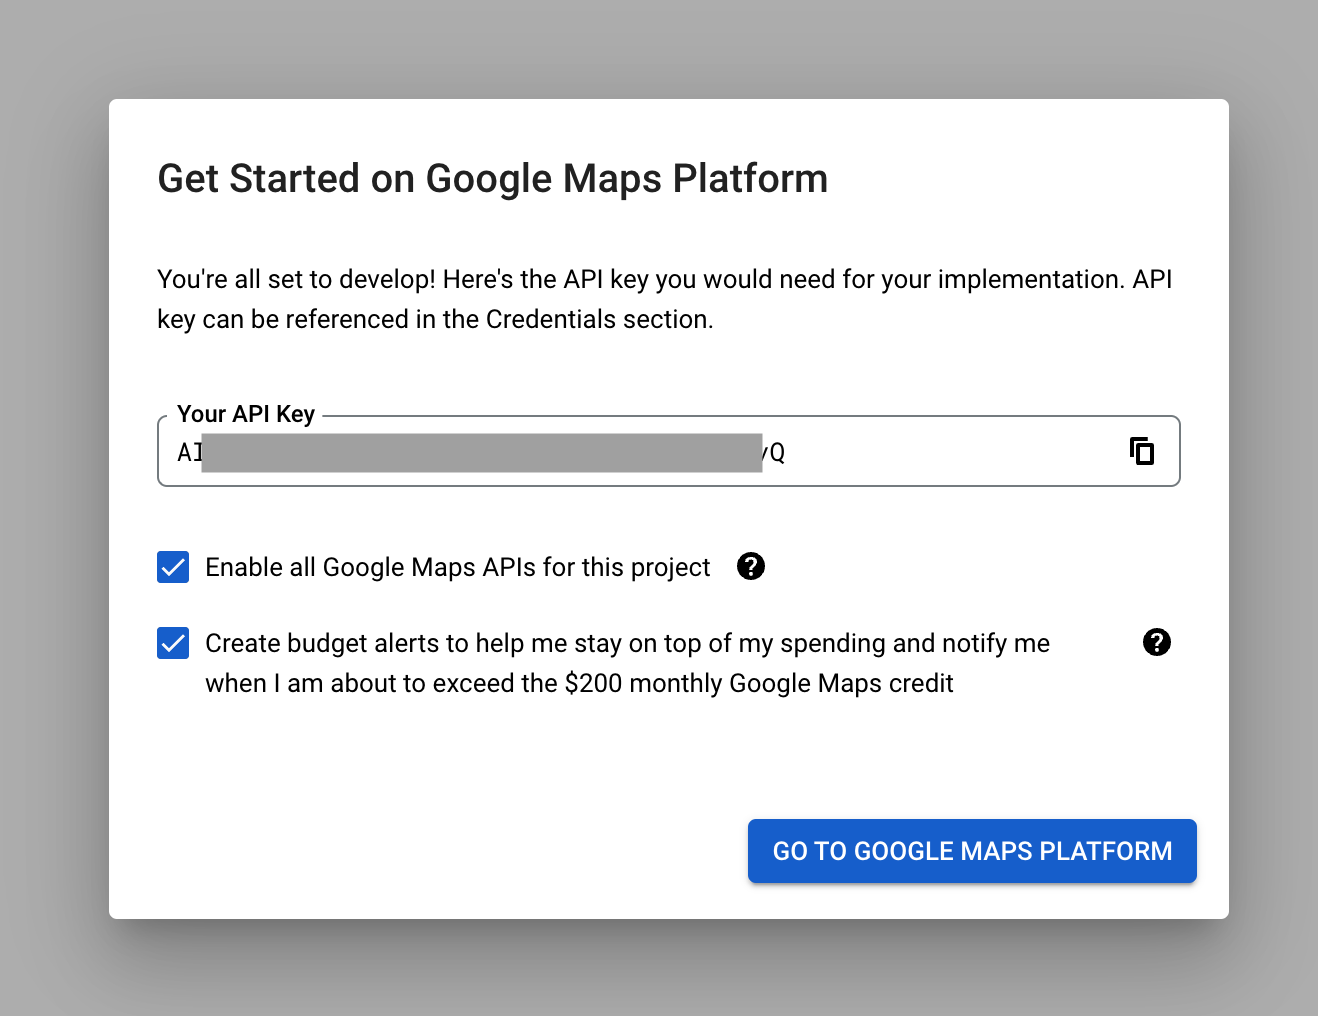
Step 6 Configure the plugin
-
In the Automatic FFL admin, click Edit on your store to reveal the Store Hash and Store Secret.
-
In your WordPress admin panel, hover over the WooCommerce icon in the left sidebar and click Automatic FFL.
-
Paste in the Store Hash and your Google API key.
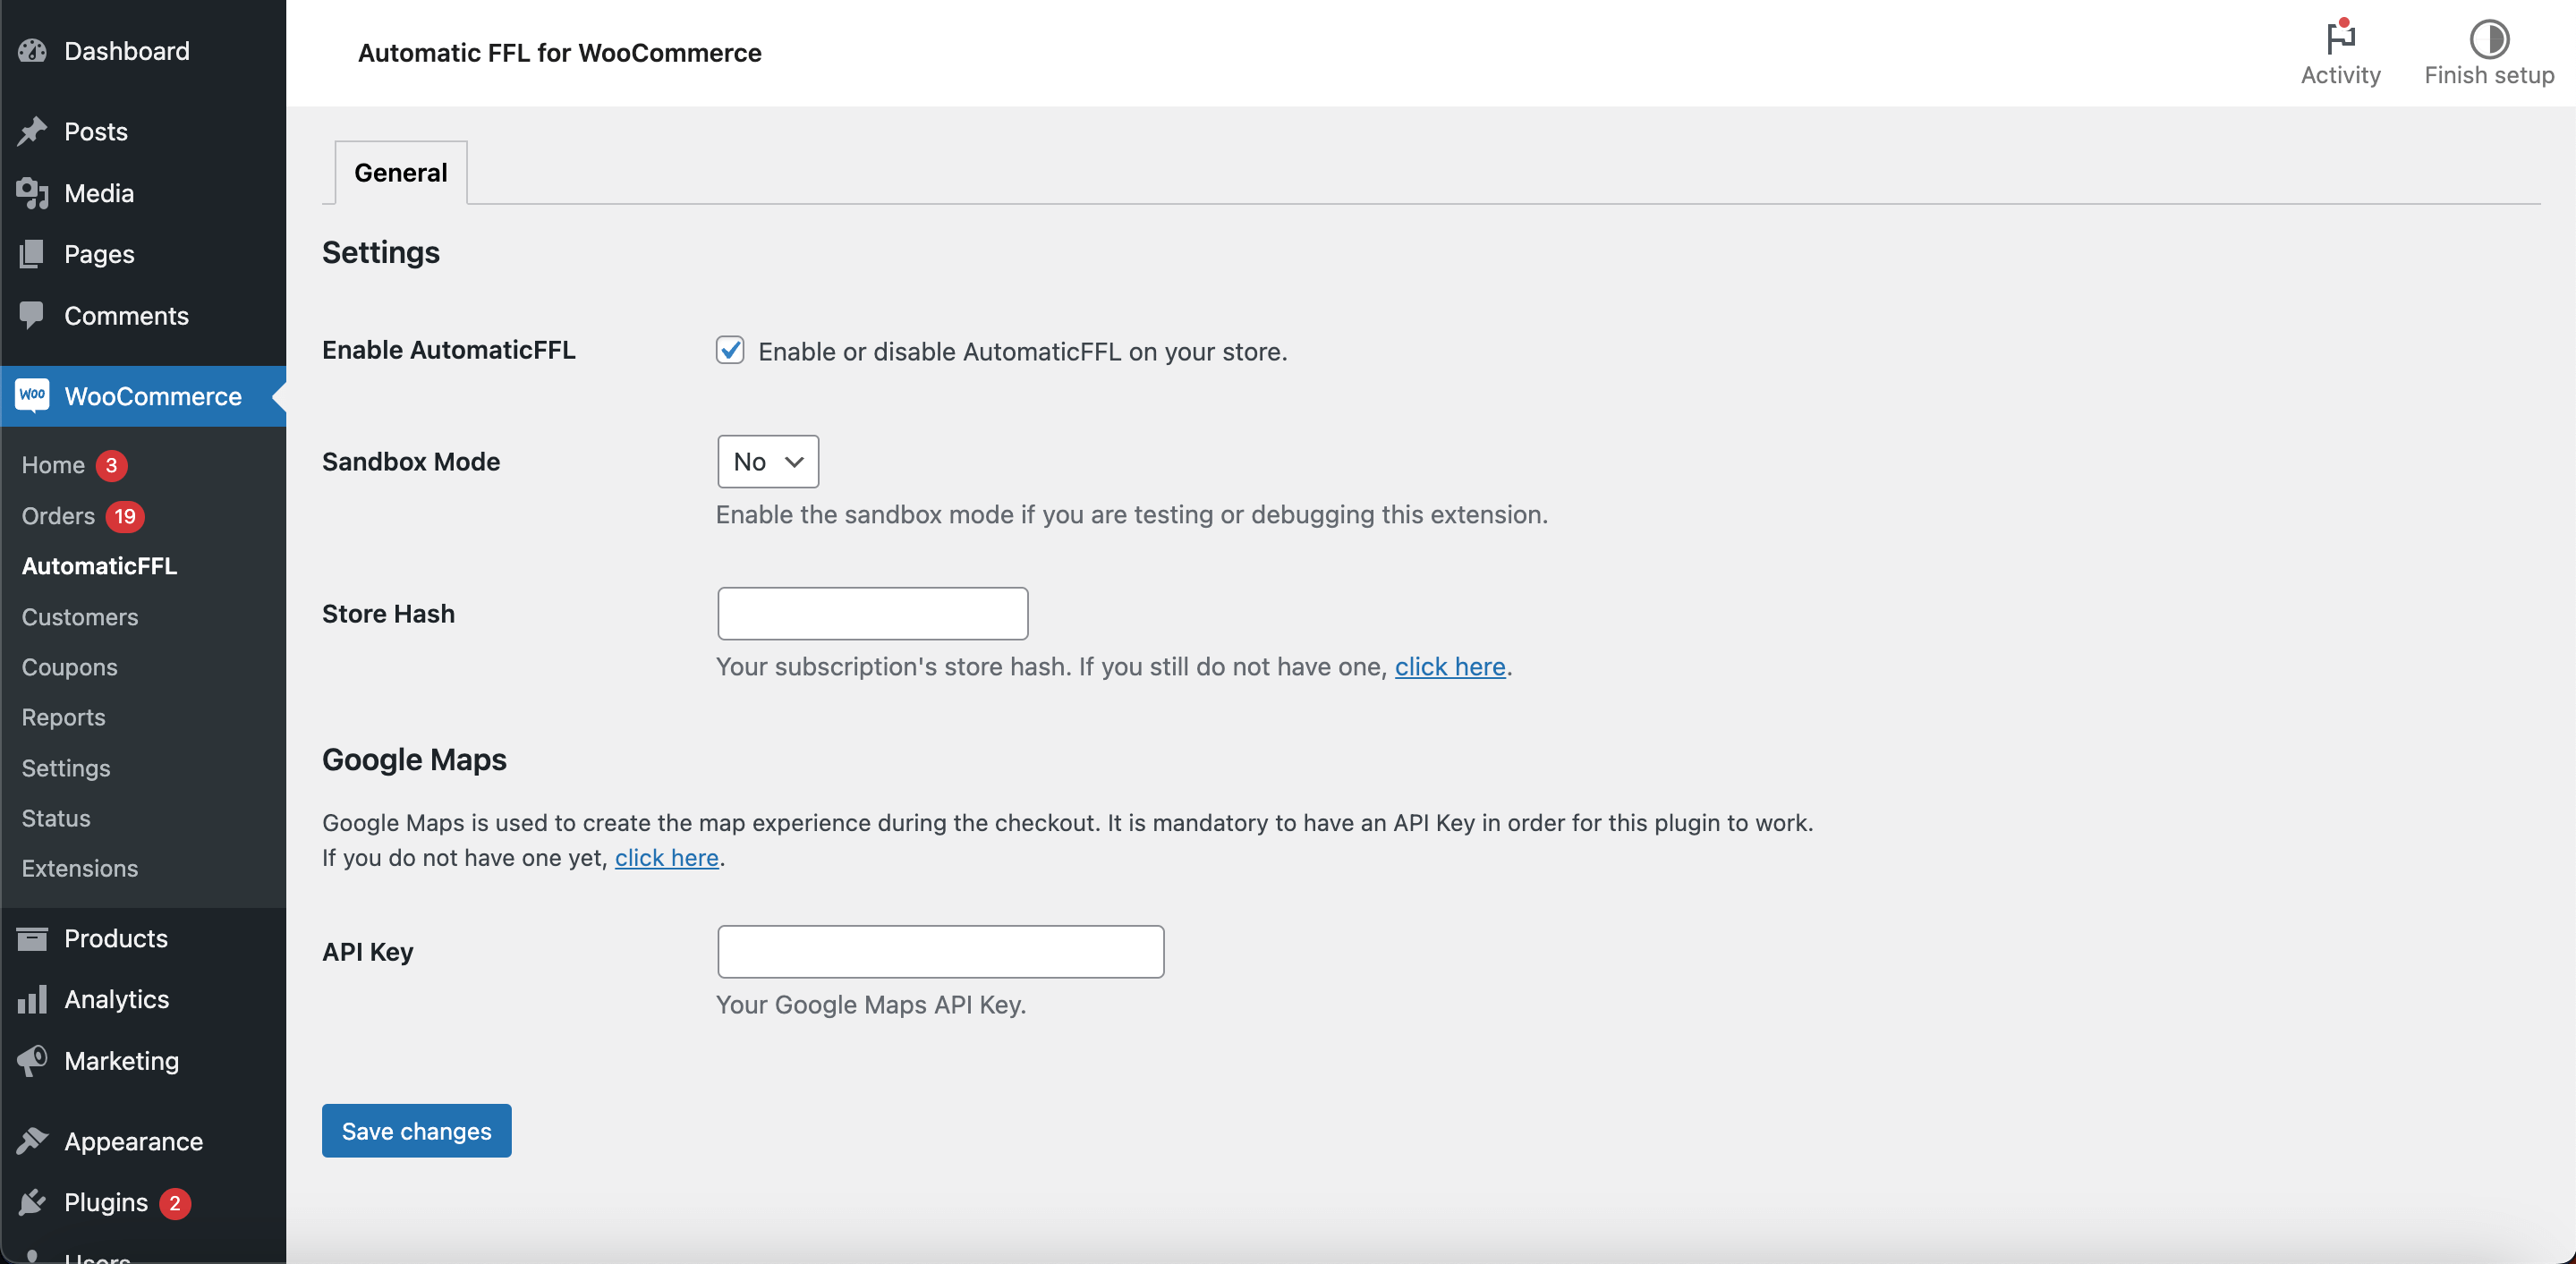
The Automatic FFL settings screen in your WordPress admin.
Step 7 Mark your firearm and ammo products
-
Go to the Automatic FFL dashboard.
-
Click Edit on your store.
-
Check the categories you want to mark as Firearms or Ammo.
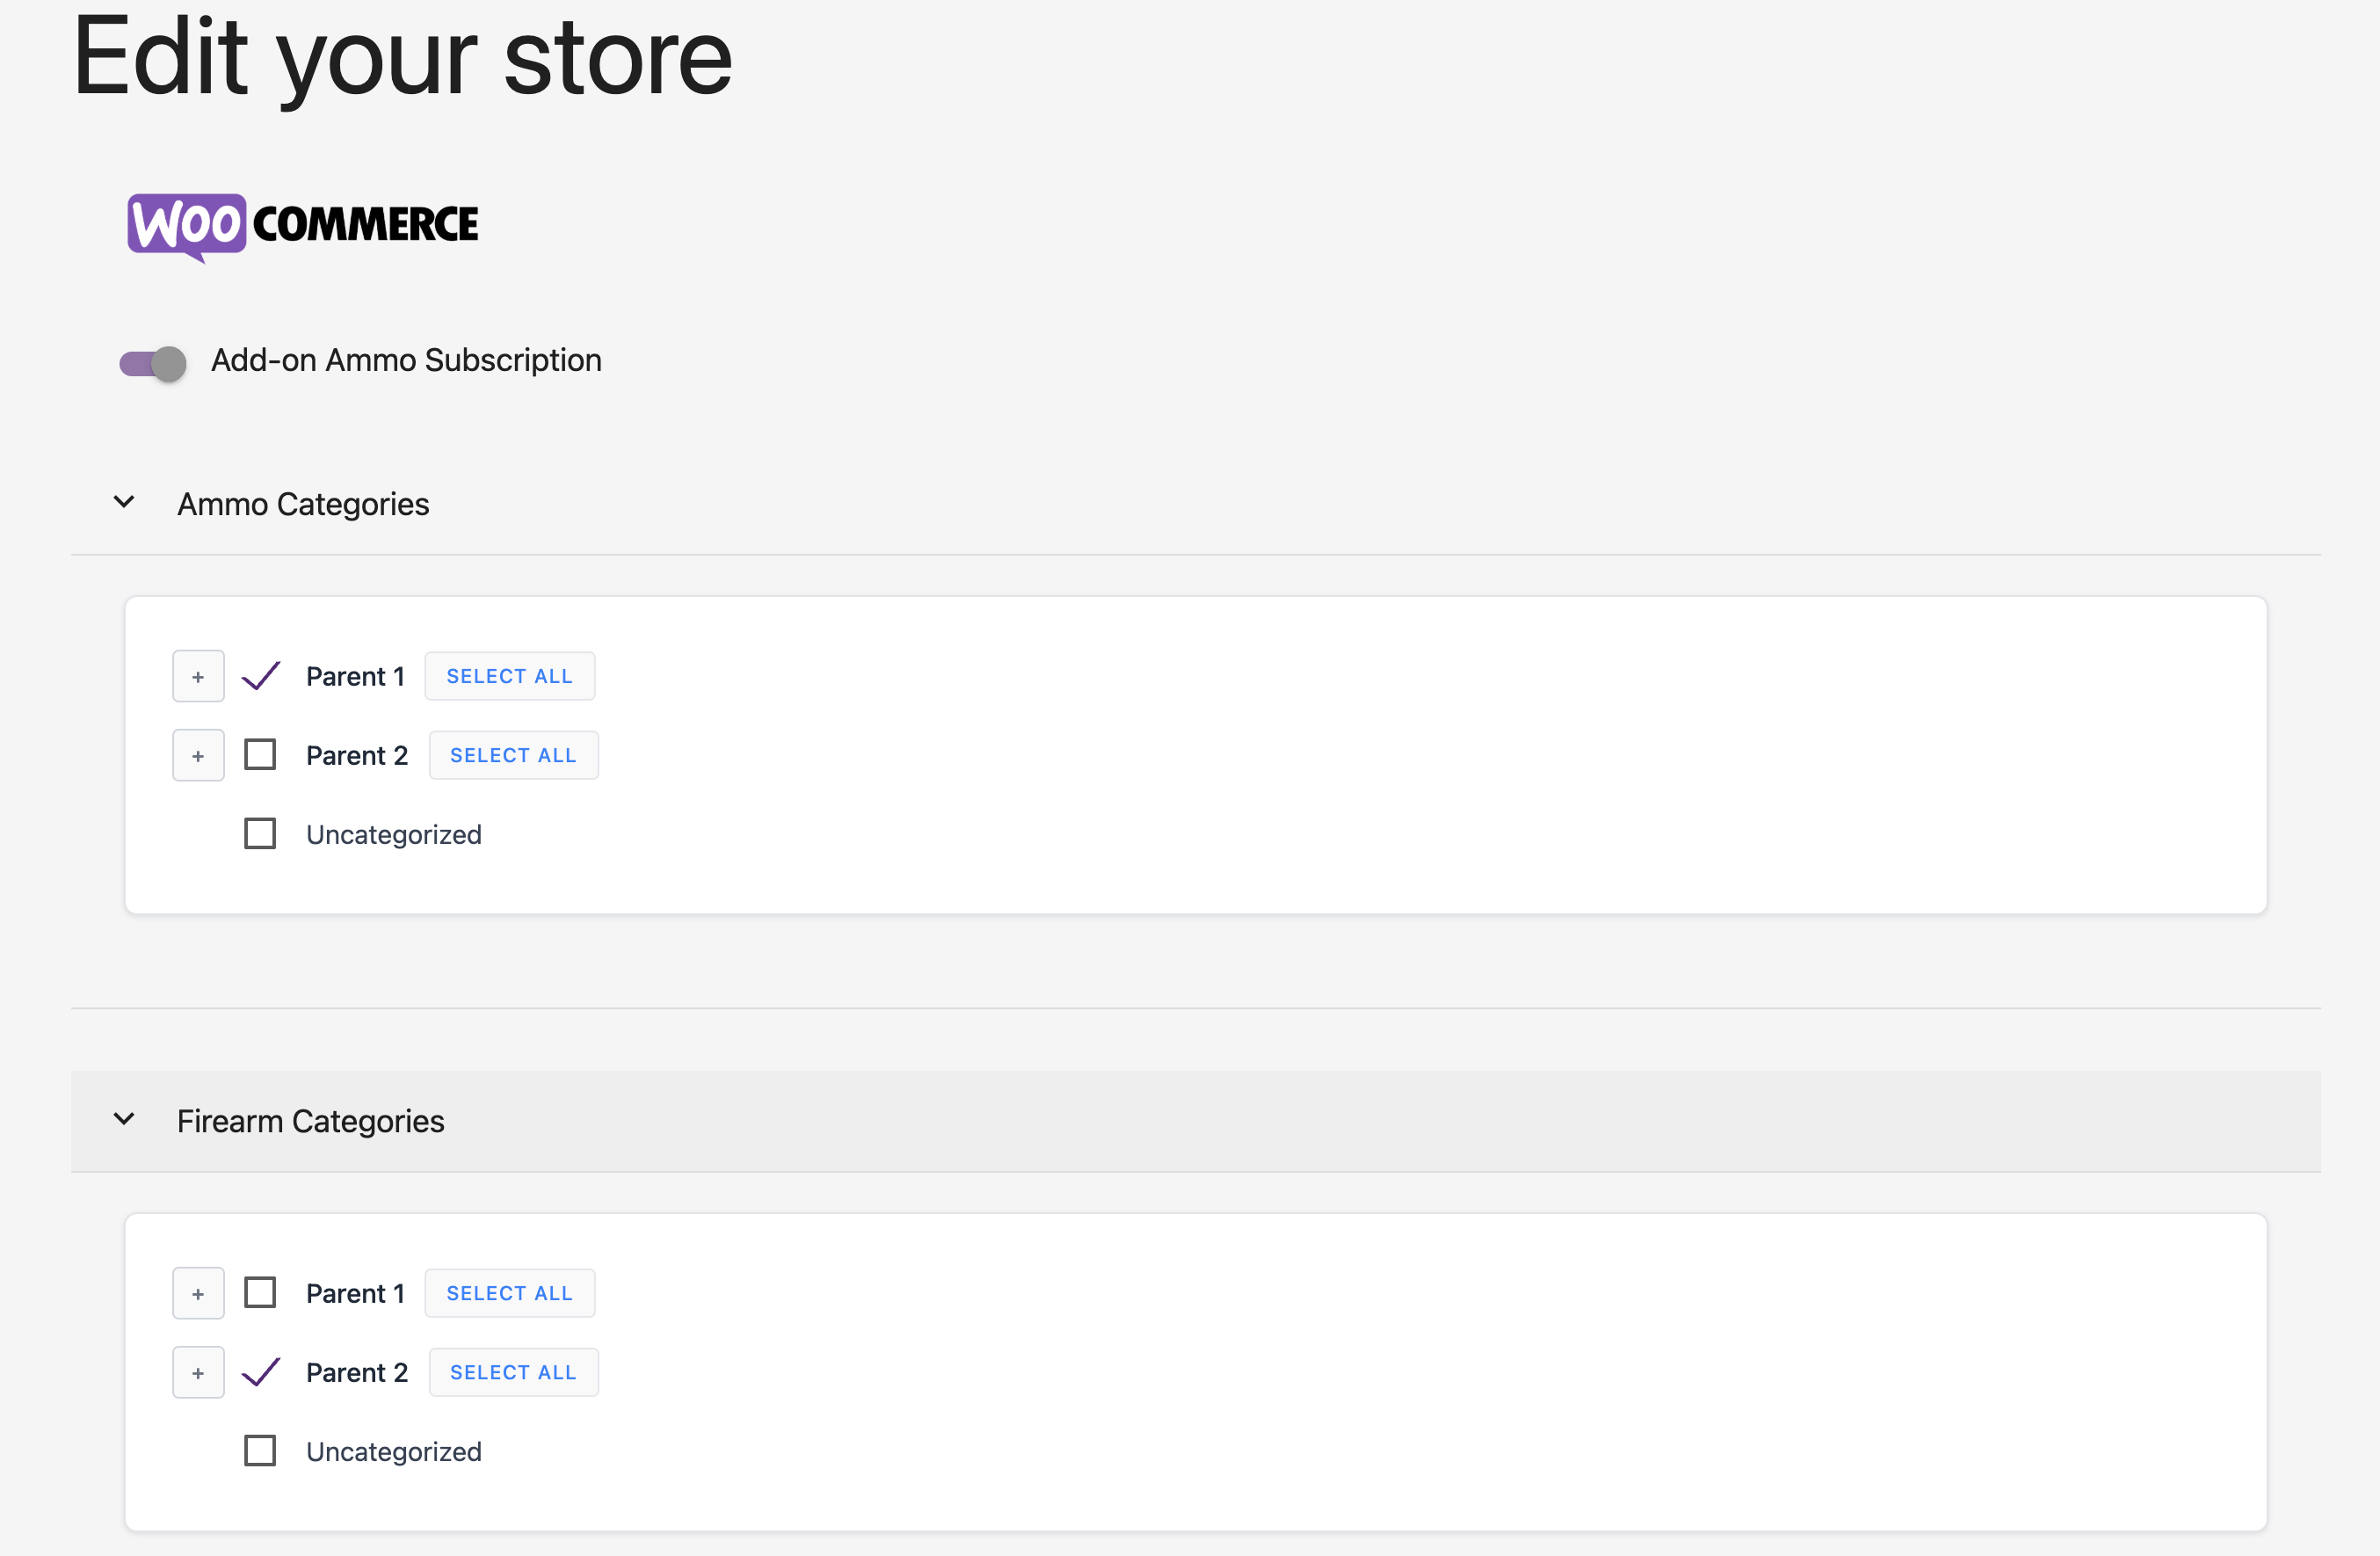
Marking WooCommerce categories as Firearms or Ammo. -
For ammo, turn on the Add-on Ammo Subscription setting.
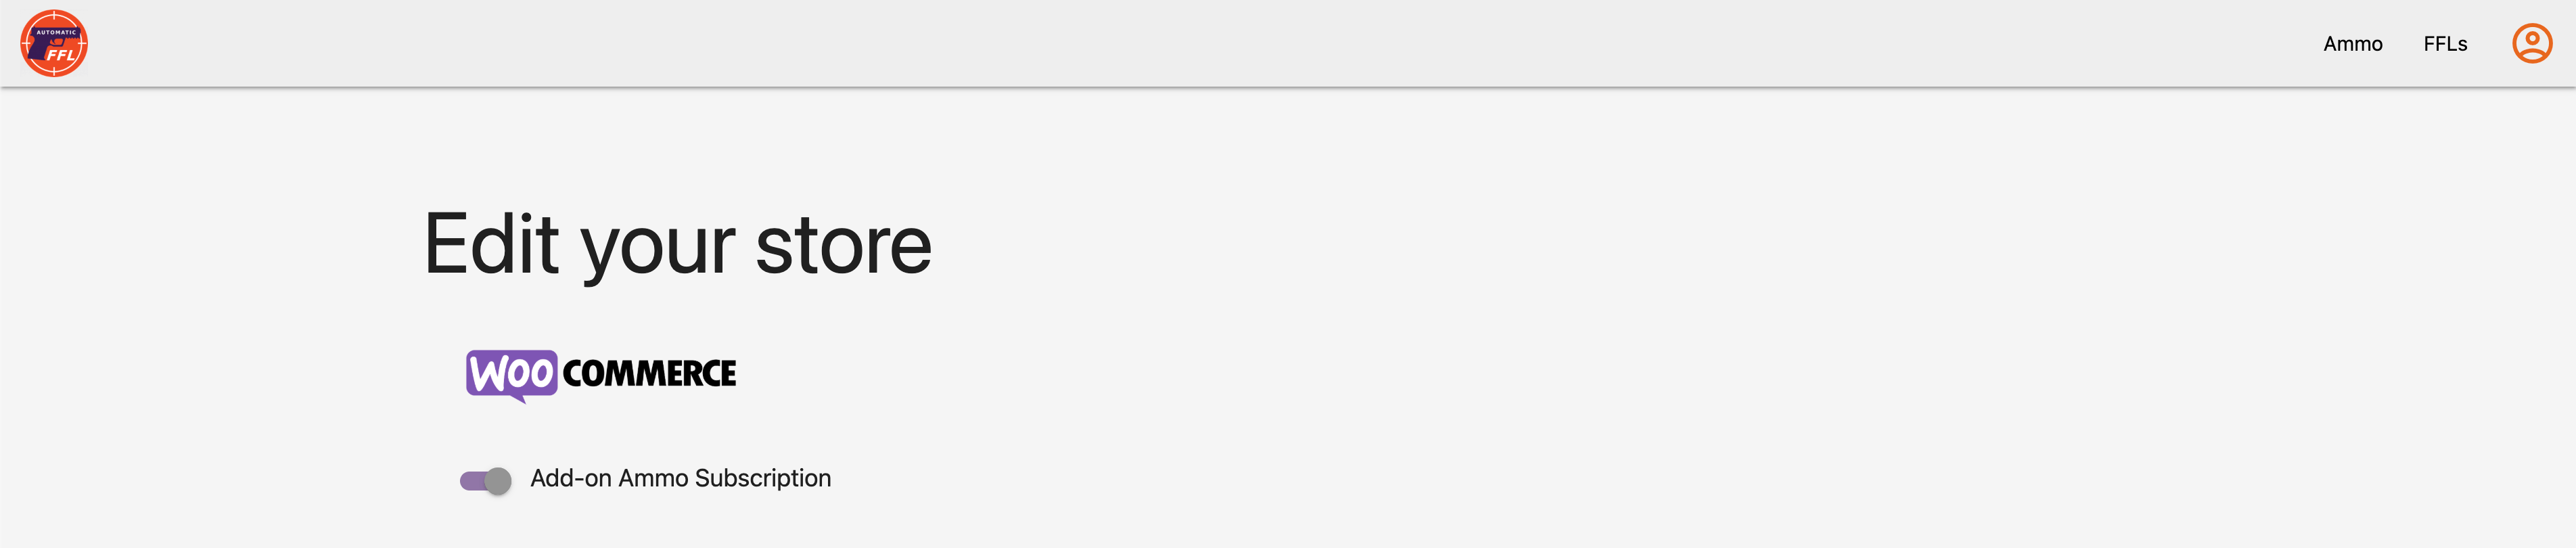
The Add-on Ammo Subscription setting. -
Select which states require ammunition to ship to an FFL.
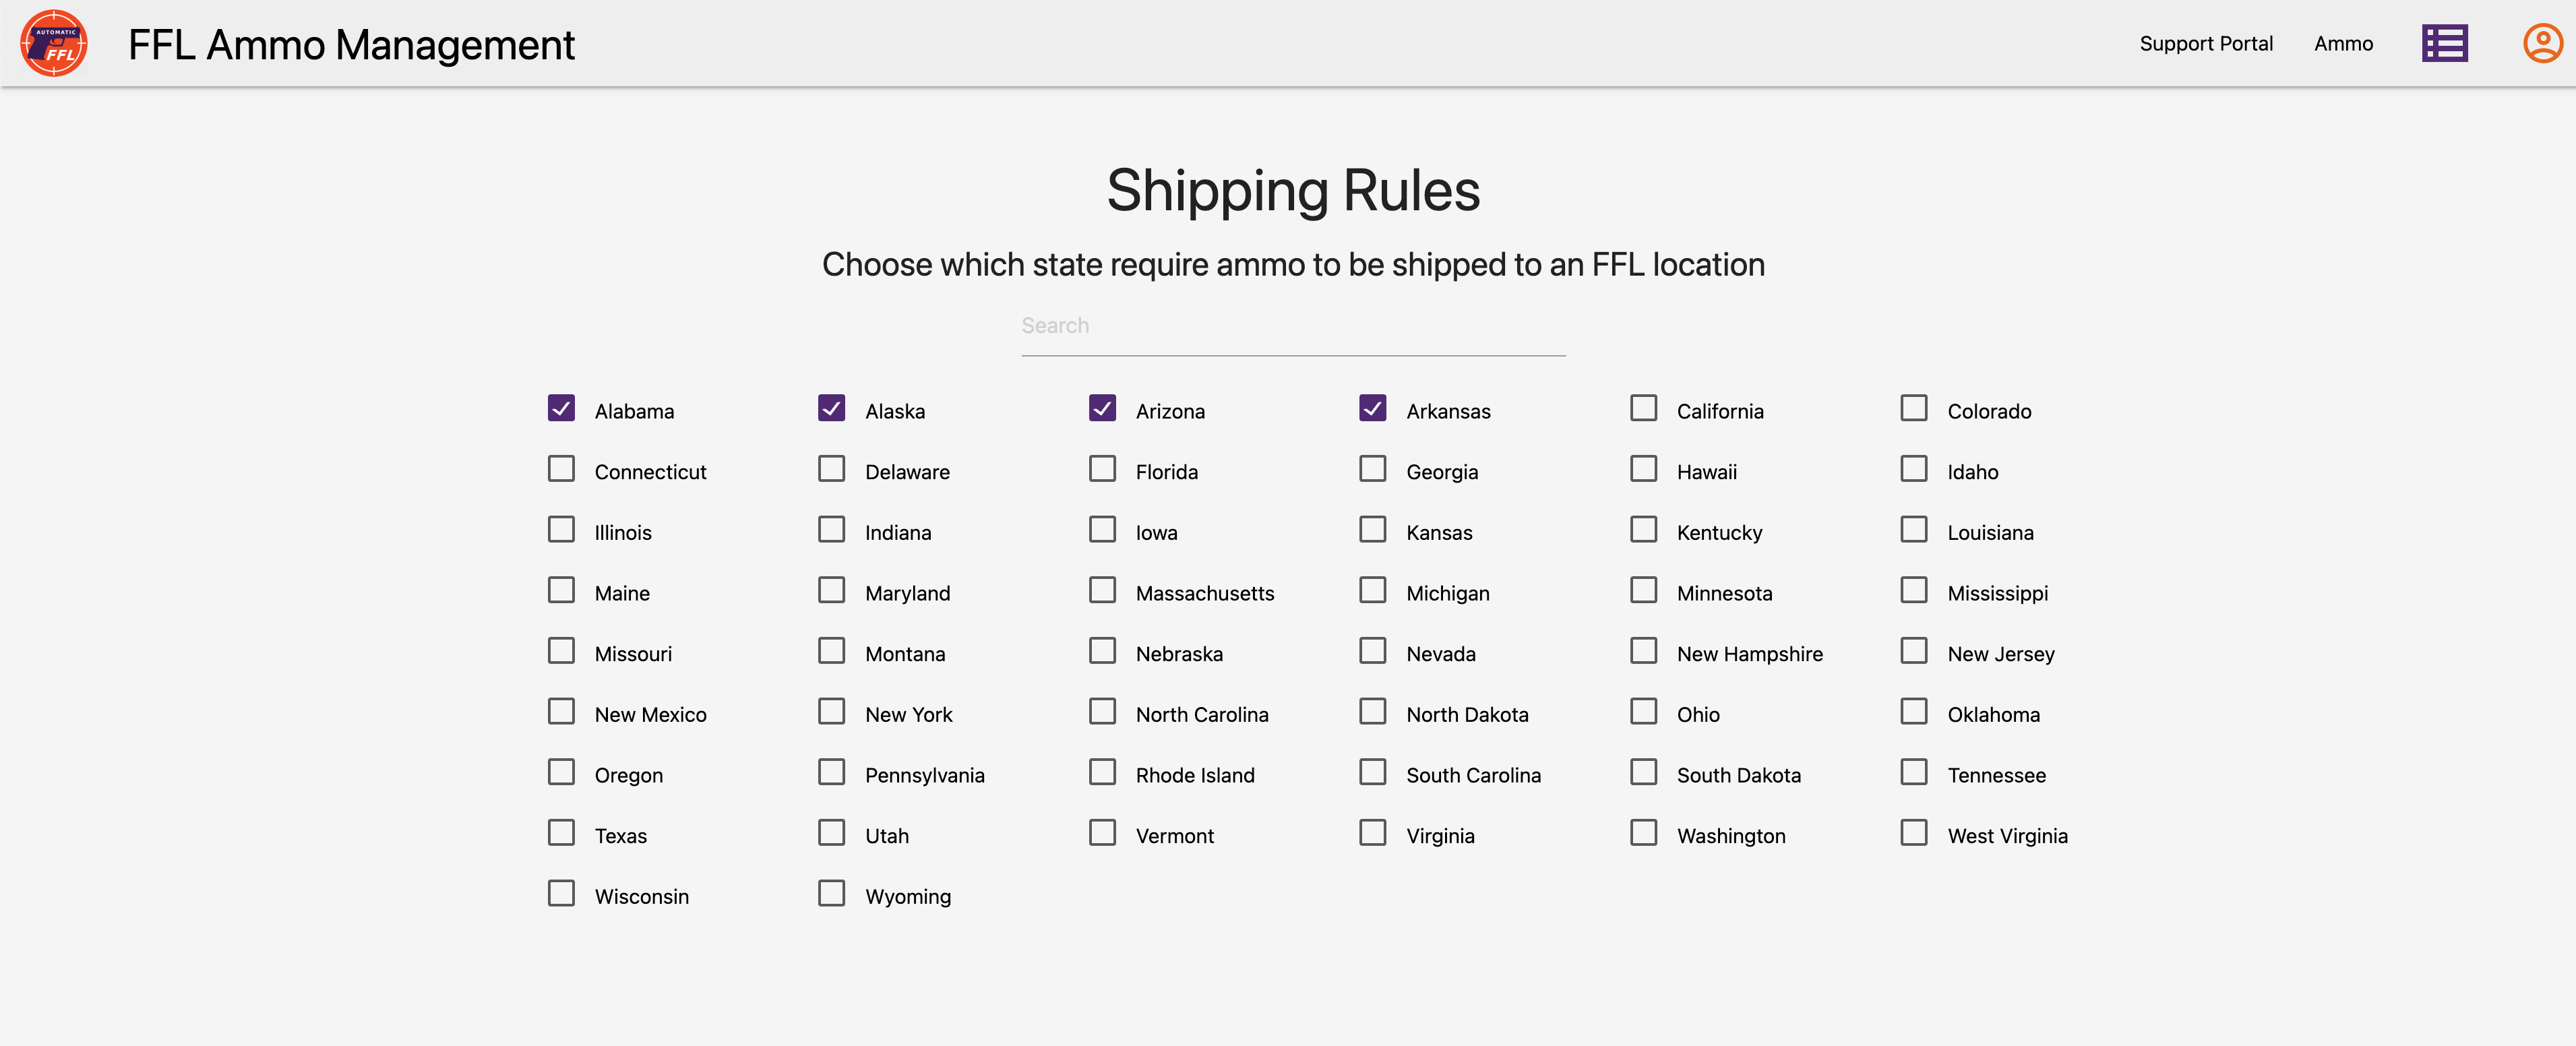
Selecting the states where ammo must ship to an FFL.
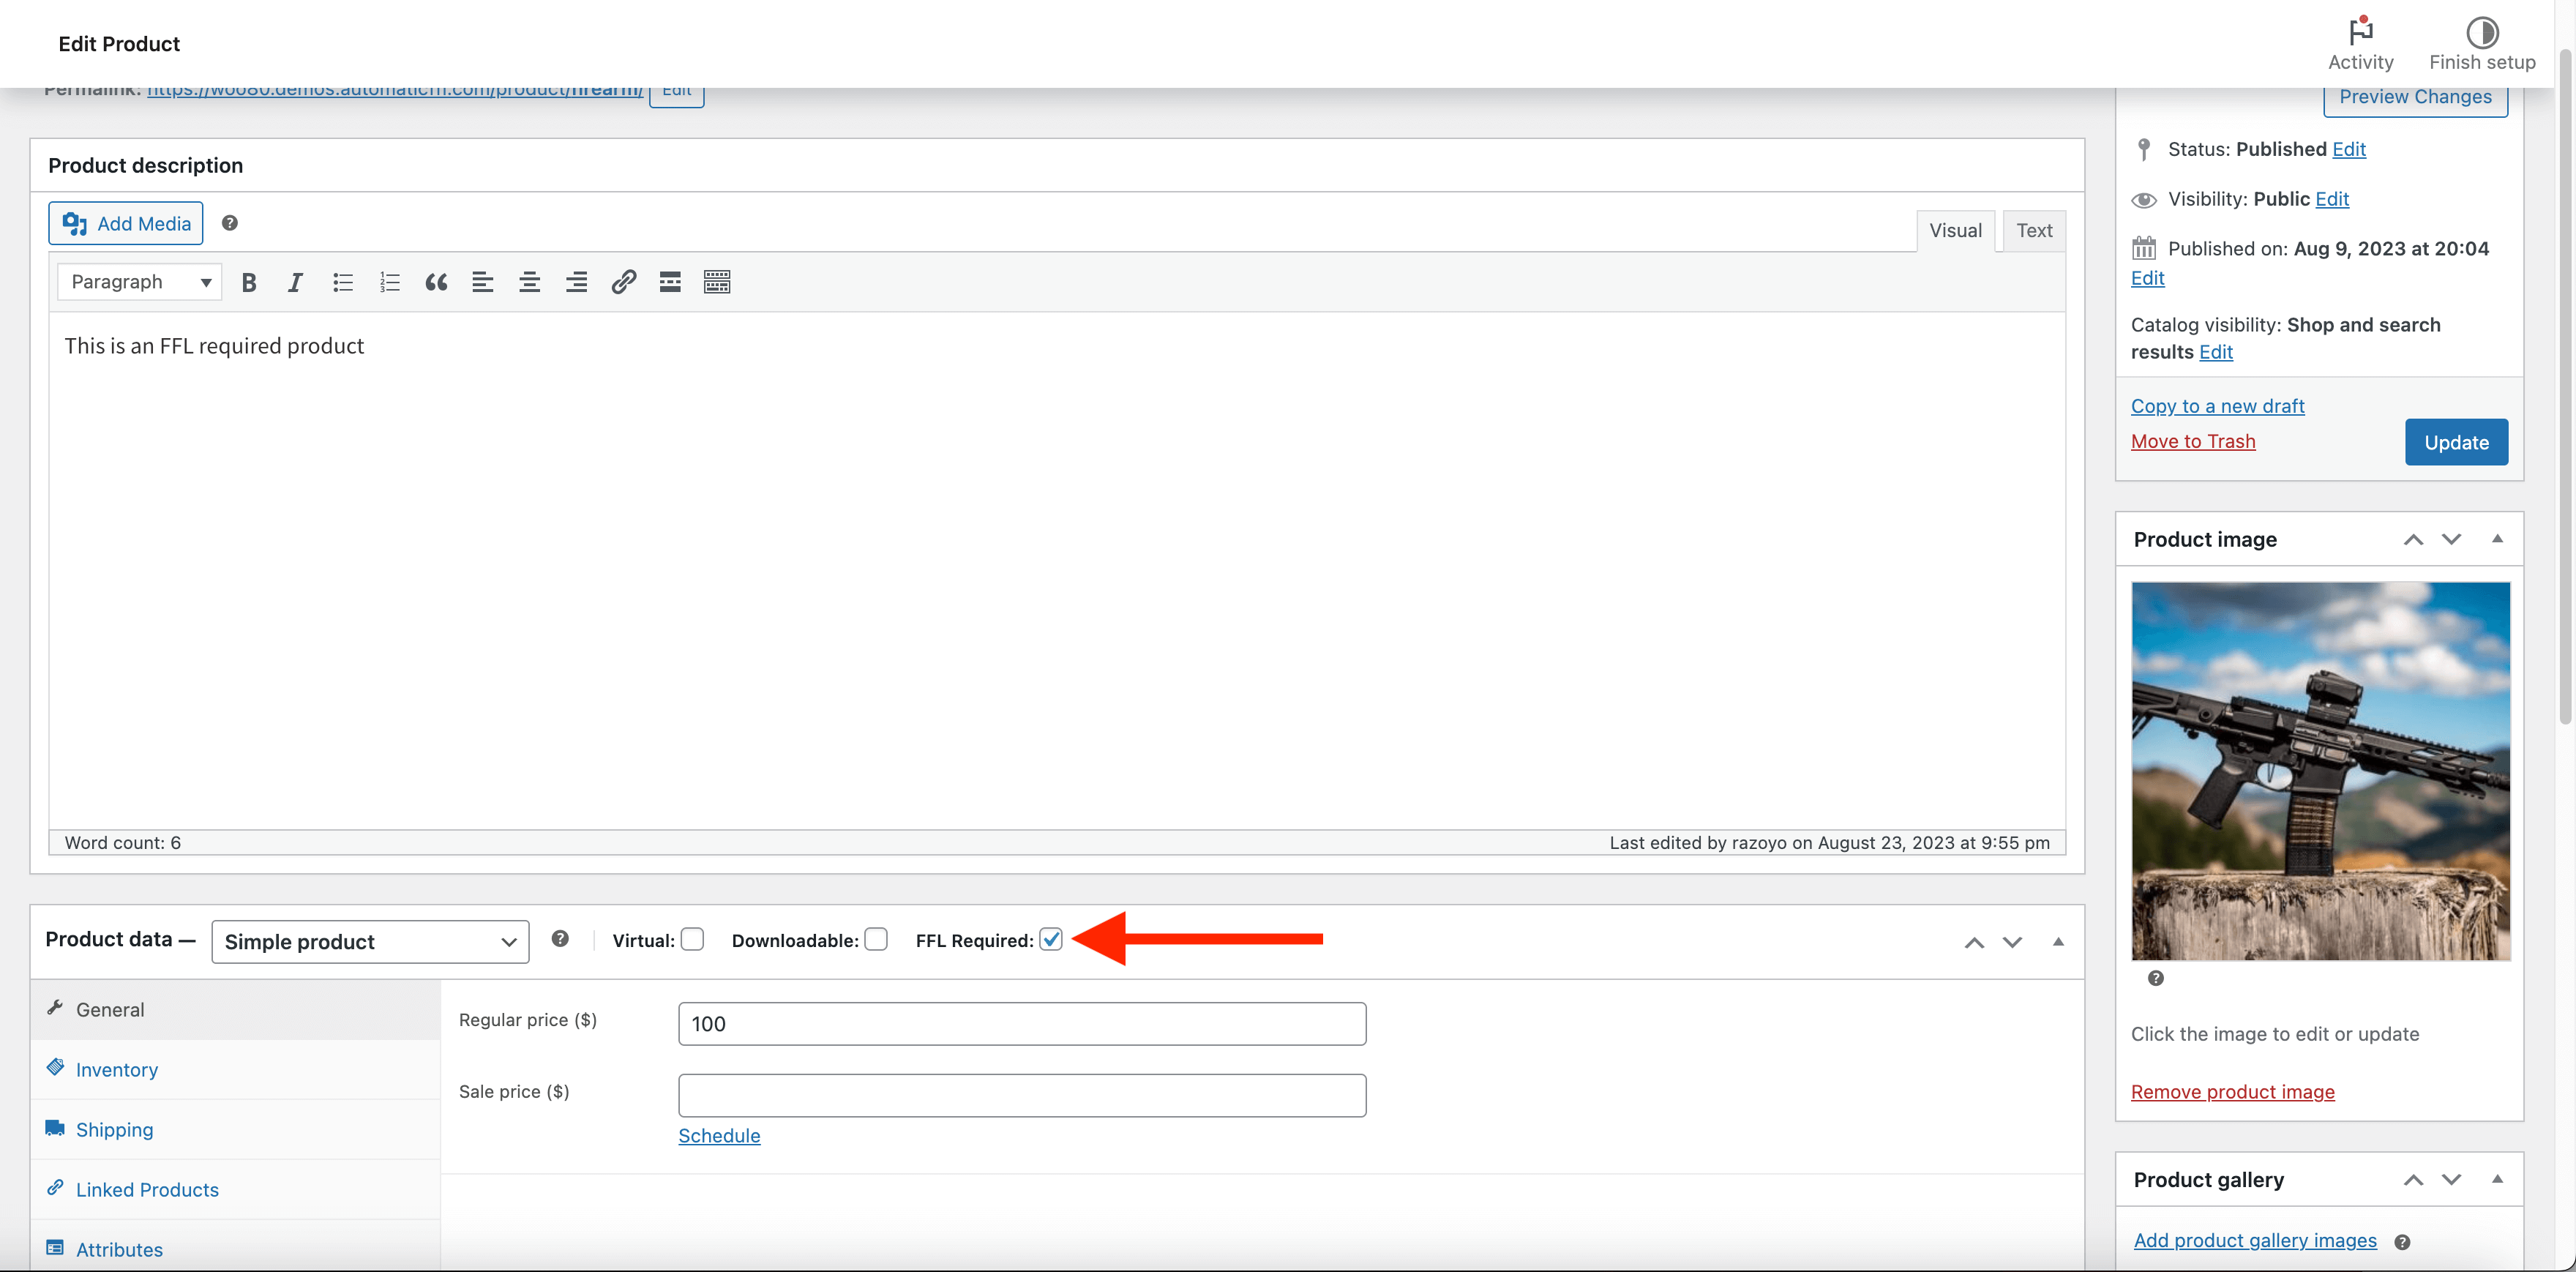
Marking firearms per product
You can also mark products individually instead of by category.
Installing Automatic FFL adds a new product data type to your WooCommerce products called FFL Required. Check the FFL Required box on each firearm in your catalog — this works with bulk edit and product imports too.
Dealer management
Automatic FFL gives you the ability to customize the list of dealers available during checkout. See the Automatic FFL documentation for complete details.