
Magento Installation and User Guide
Installation Overview
- Use composer to install the extension at this repository
- Create an Automatic FFL account
- Add a payment method
- Create a store
- Obtain a Google Maps API Key
- Configure the extension
Video Instructions
Install Magento Extension
Installation of the Automatic FFL Magento Extension should be done via Composer. See the developer installation instructions.
Create Admin Account
Visit the Automatic FFL admin home to create an account.
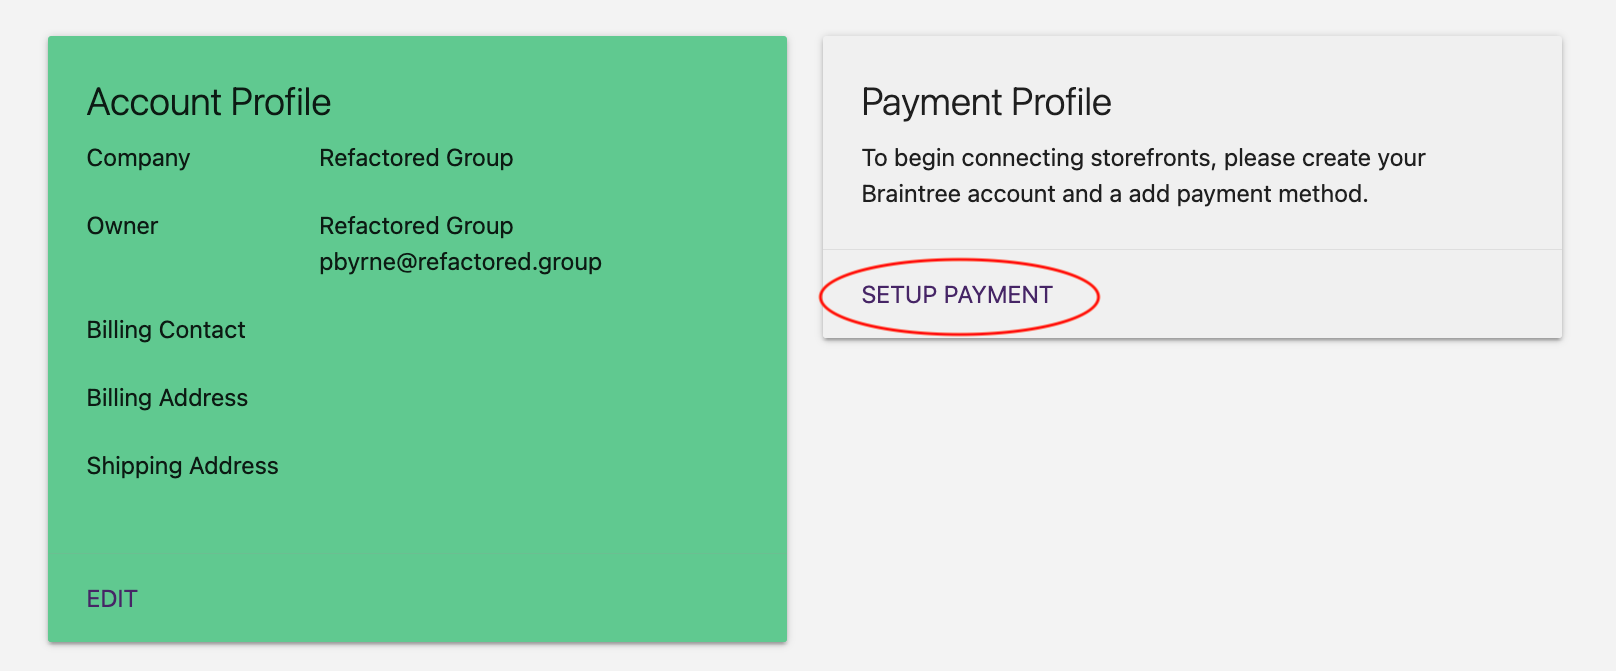
Add a Payment Method
Click the SETUP PAYMENT link and follow the instructions to save your payment method in our payment portal.
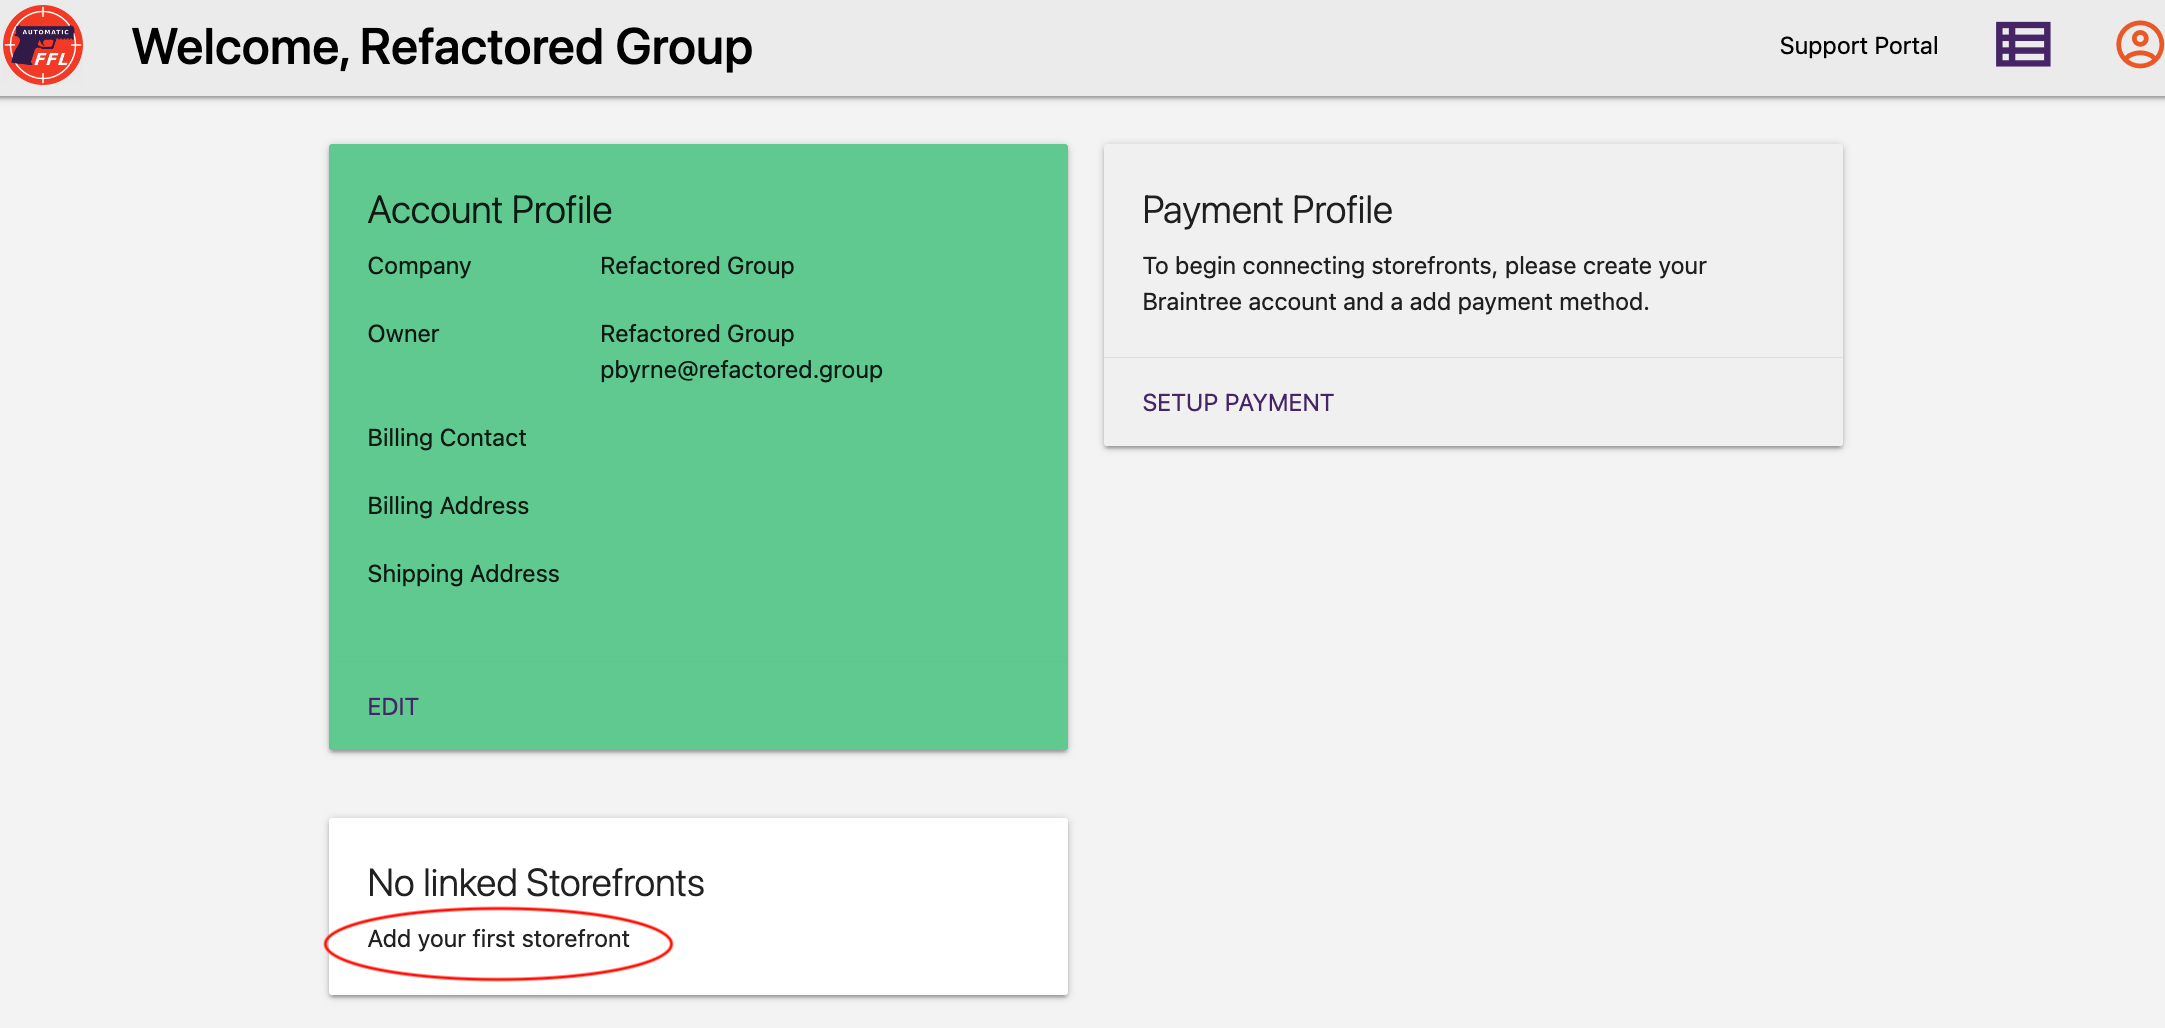
Create a Store
Click the Add your first storefront button and follow the instructions to create your first store.
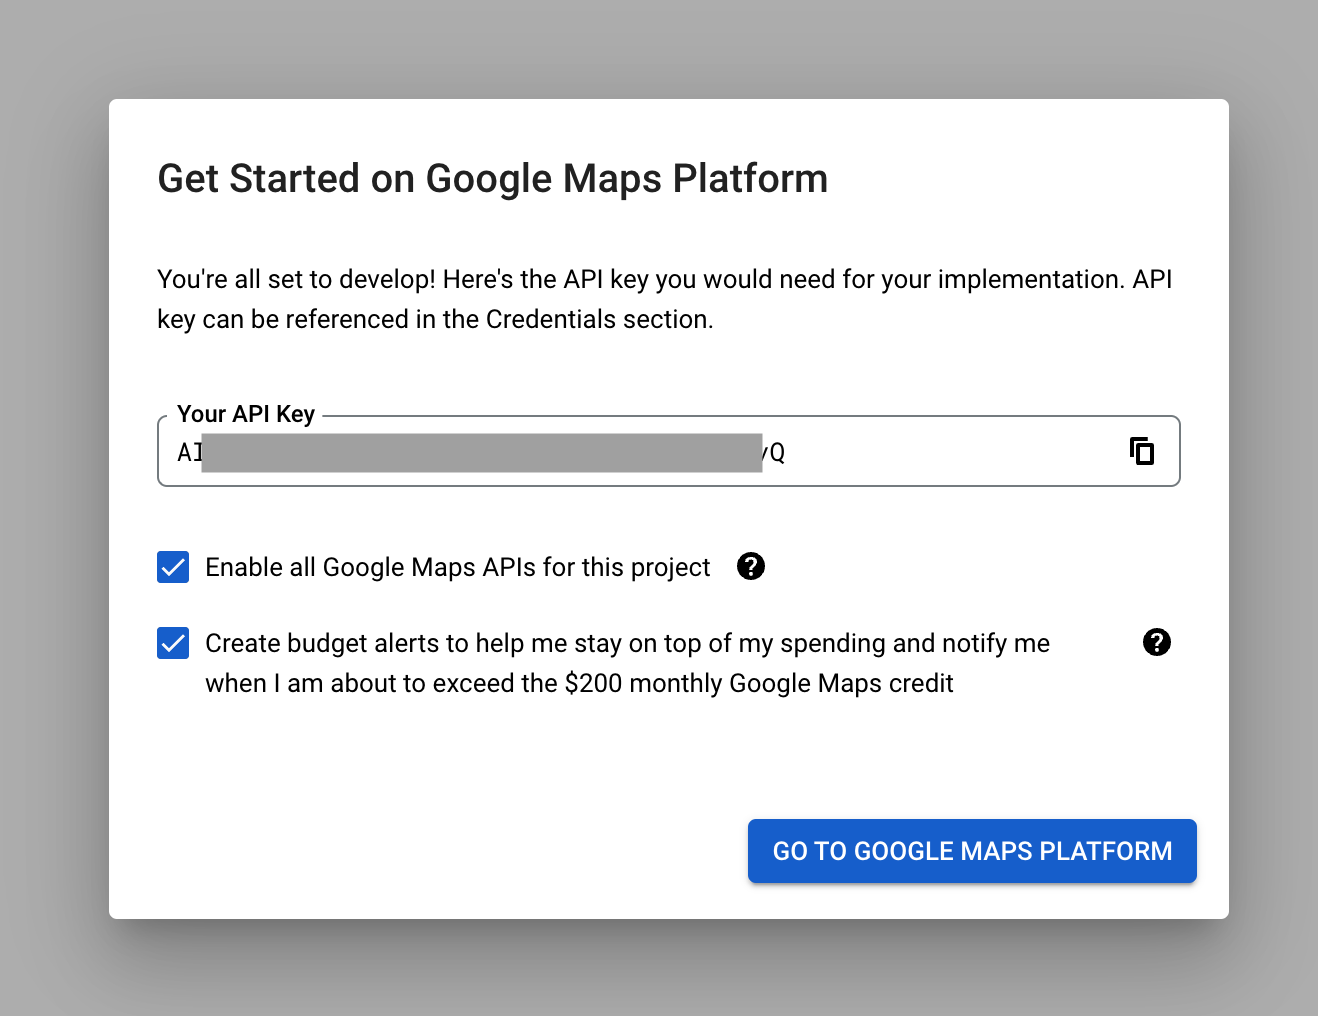
Obtain a Google Maps API Key
If you do not have a Google developer account already, visit Google Maps Platform and click the Get Started button to obtain a key.
Google offers a generous number of free requests. If your site experience extremely high traffic, you may need to pay for additional requests.
Configure Magento Extension
From the Automatic FFL admin, click the EDIT link on the store profile to give you access to the Store Hash and the Store Secret.
In the admin panel of your Magento / Adobe Commerce store, open the configuration panel. Copy and paste the Store Hash and the Google API Key into the appropriate fields.
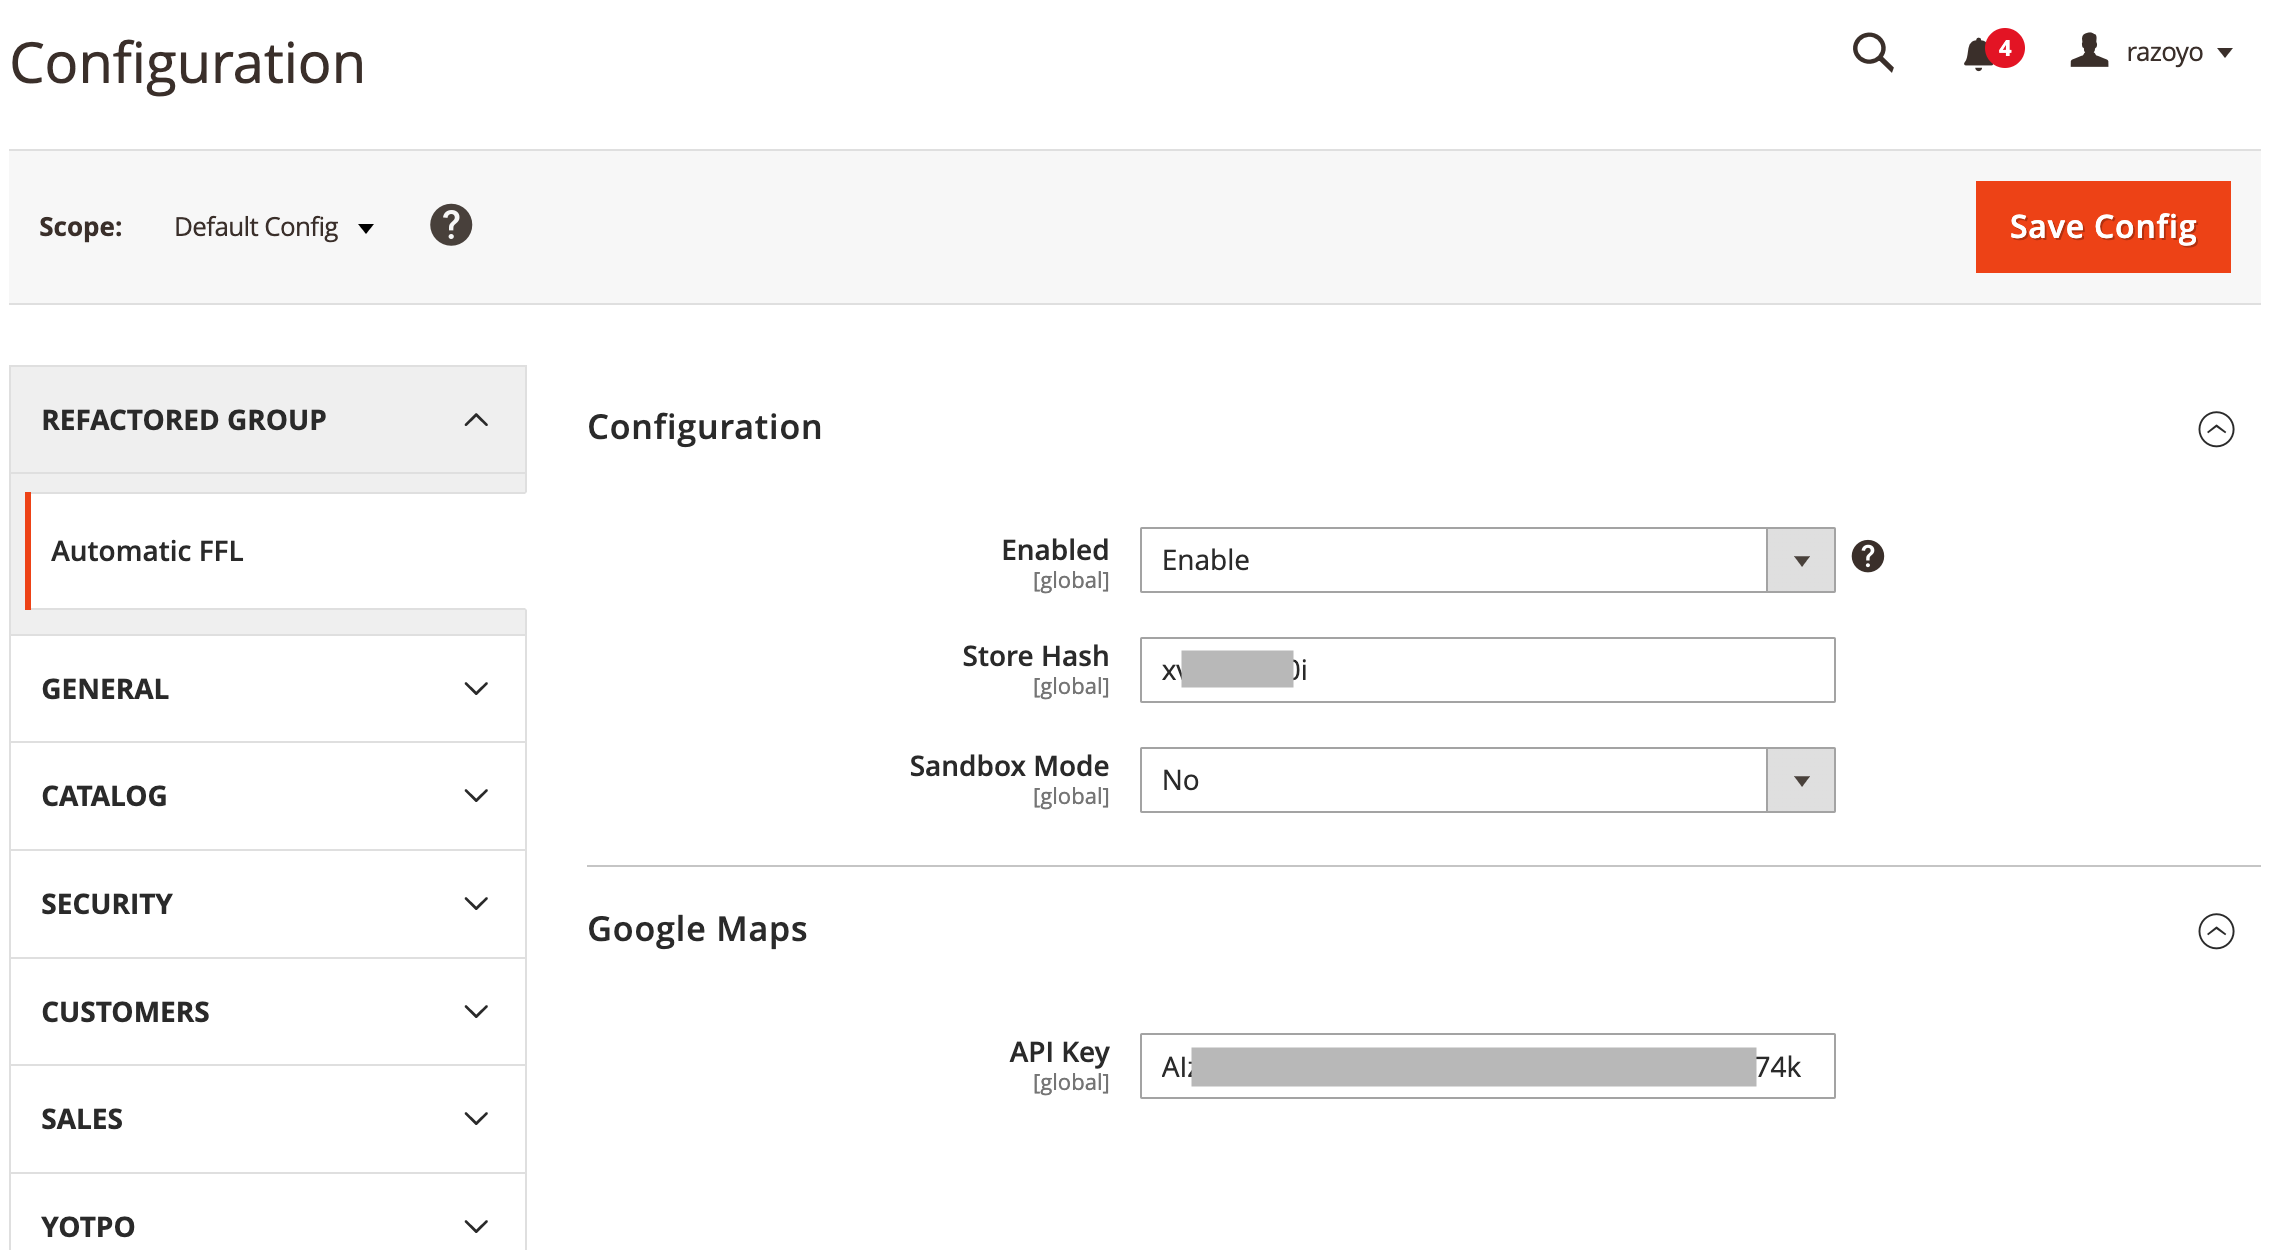
For newer versions of Magento, make sure Instant Purchase is turned off.
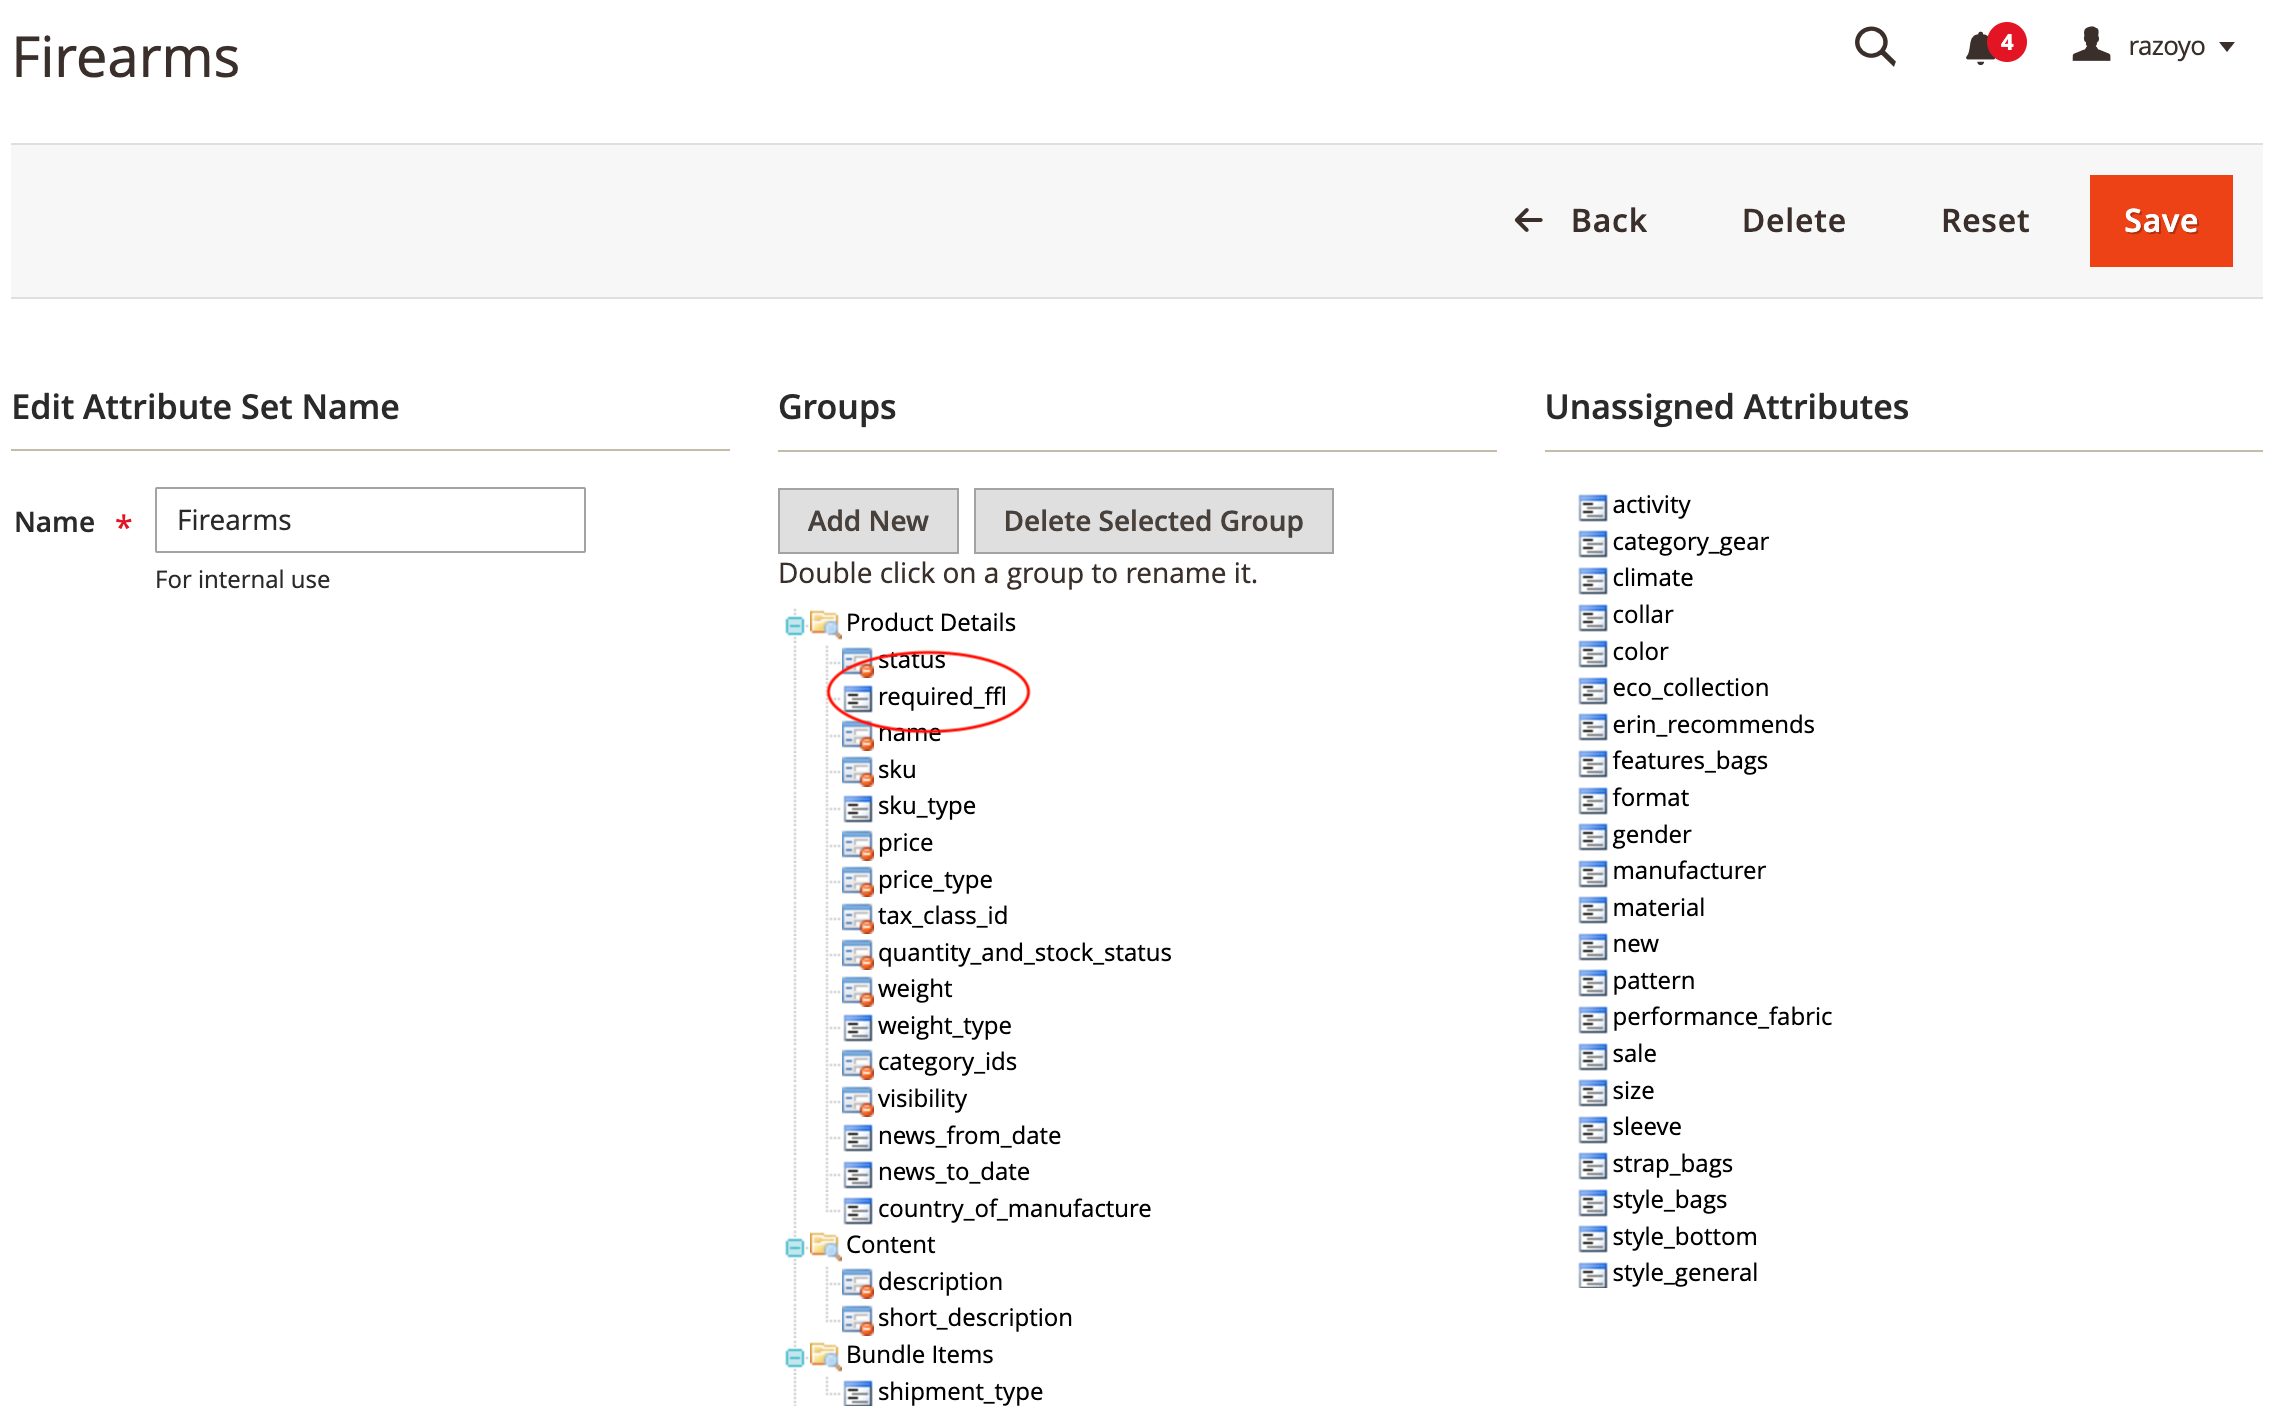
Mark Firearm Products
When you install the Magento extension, a new attribute called FFL Required will be added to your attributes.

Make sure this attribute is available in all of the attribute sets you use for firearms in your product catalog.
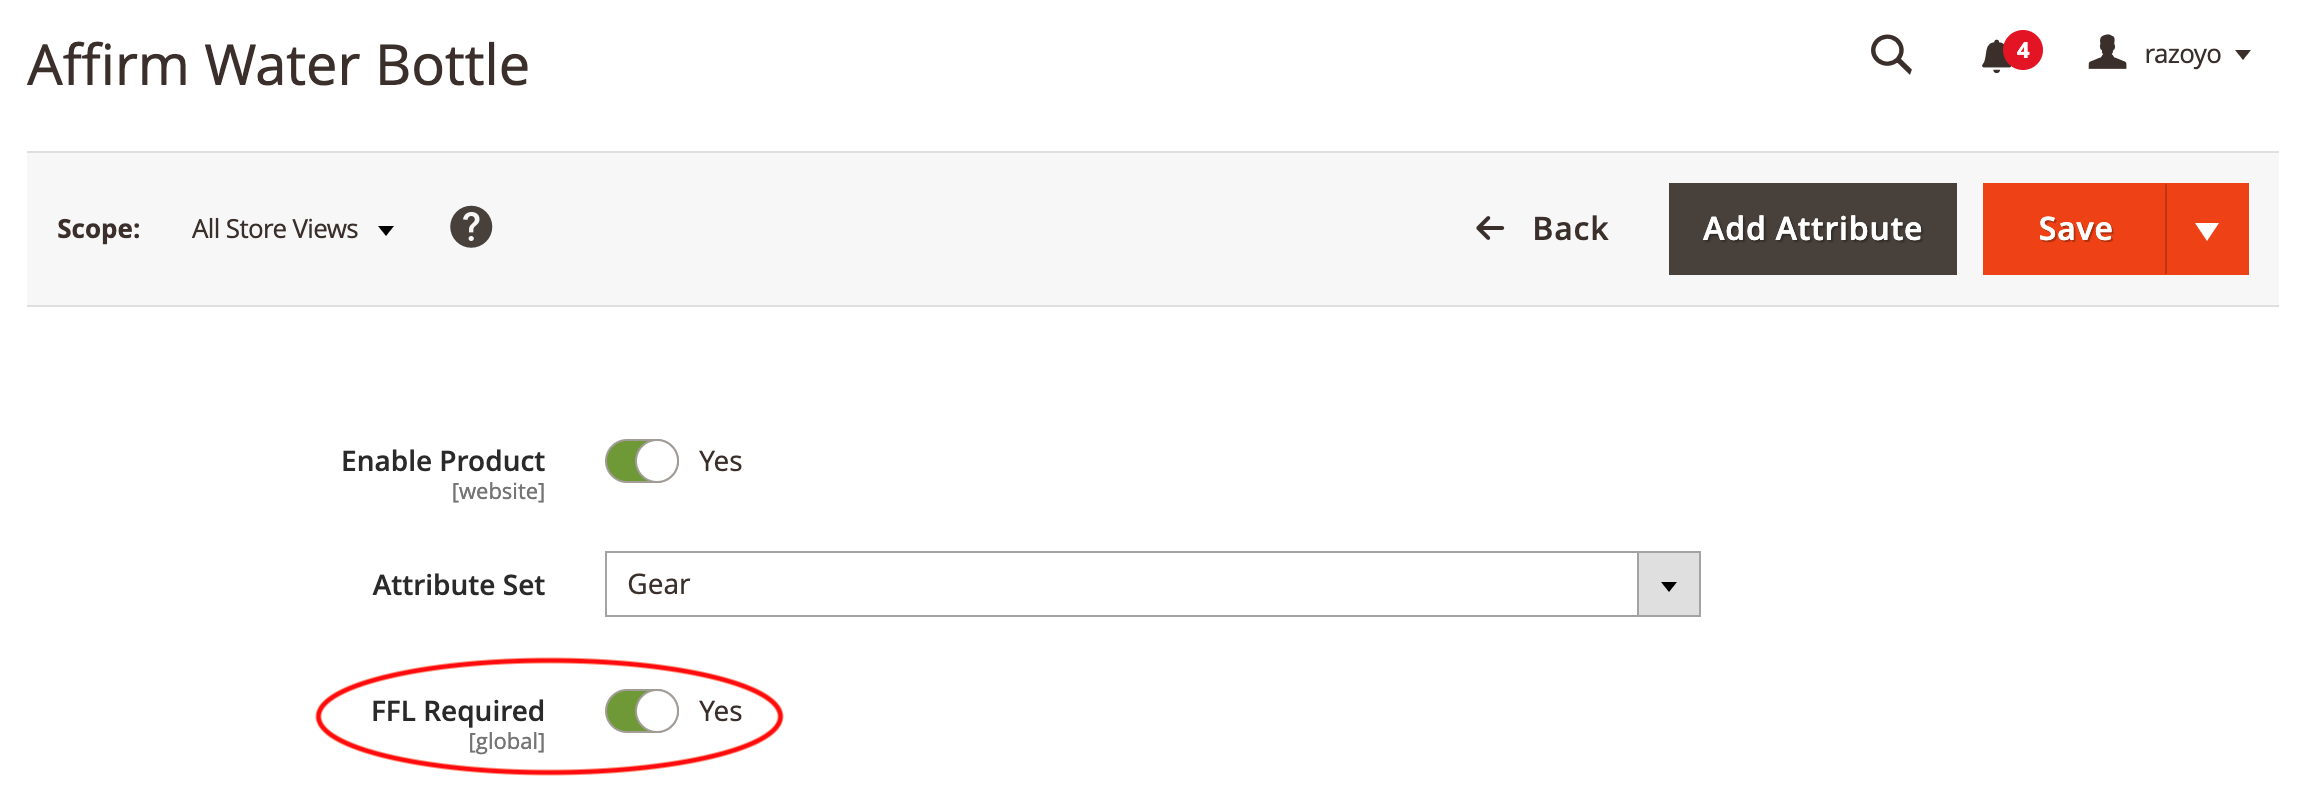
On each firearm product in your catalog, enable the FFL Required setting. This can be done in bulk as well.
Dealer Management
Automatic FFL gives you the ability to customize the list of dealers that will be available for checkout. See Documentation for complete details.