
BigCommerce Installation Guide
Installation Overview
- Download the app from the BigCommerce App Store
- Add a payment method to start your 30-Day Free Trial
- Configure the app
⚠️ Note: You must be the owner of a BigCommerce store to install apps. ⚠️
Download the App
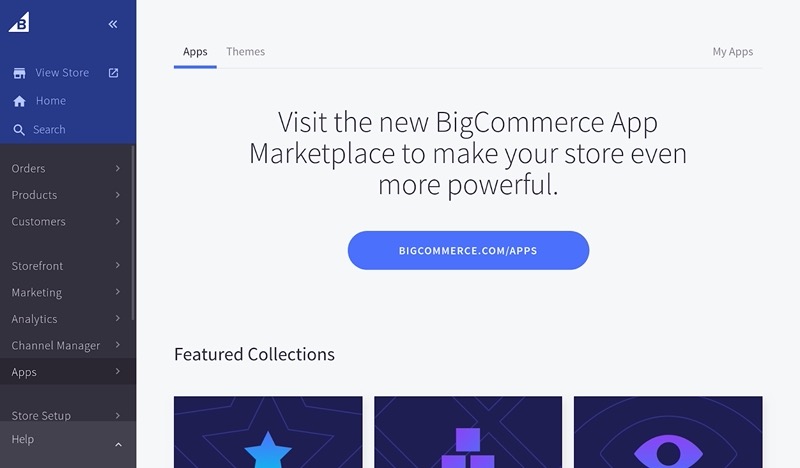
- To begin the installation process, log in to your BigCommerce storefront portal at BigCommerce.
- Locate and click on the Apps tab in the sidebar to the left.
- You should now be on the Apps page. Click the button that reads BIGCOMMERCE.COM/APPS to be taken to the BigCommerce App Store.
- Use the search bar at the top of the page to search for Automatic FFL.
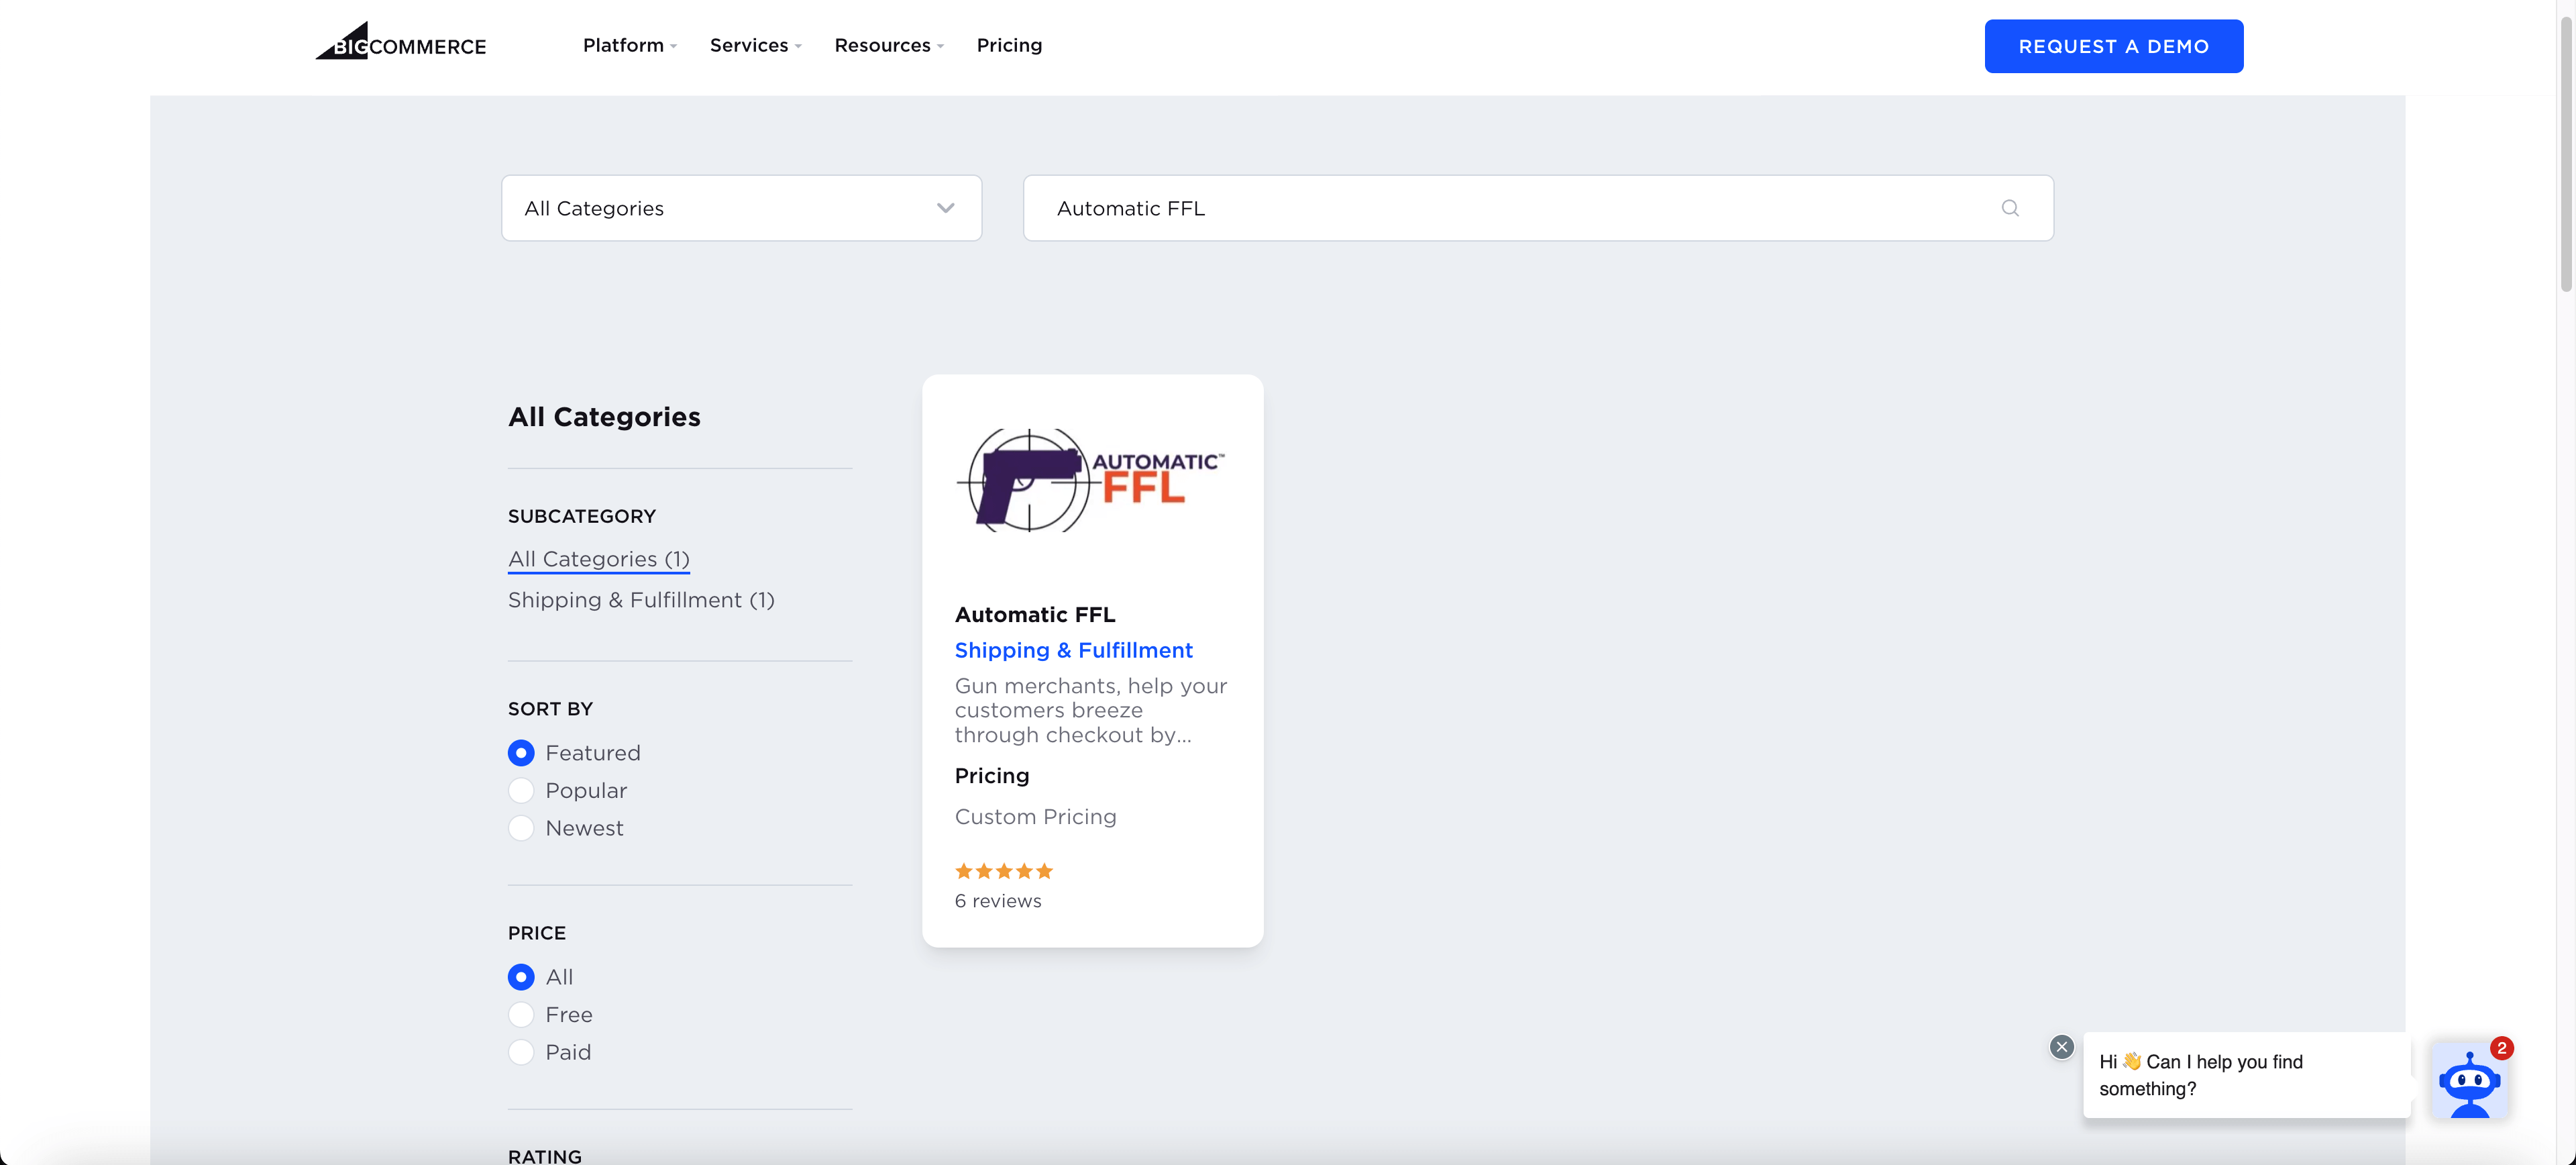
- Click on Automatic FFL and click the GET THIS APP button. You will be redirected back to your storefront portal with the option to add the application to your store.
- Click the Install button once more. The app will now request permission to access a number of store features. You must accept the terms and conditions to continue.
- Click the Continue button to complete the installation process.
Add Payment Method
⚠️ Your credit card will not be charged until the end of your 30 Day trial period
- Navigate to the Automatic FFL Dashboard by clicking on Apps > Automatic FFL.
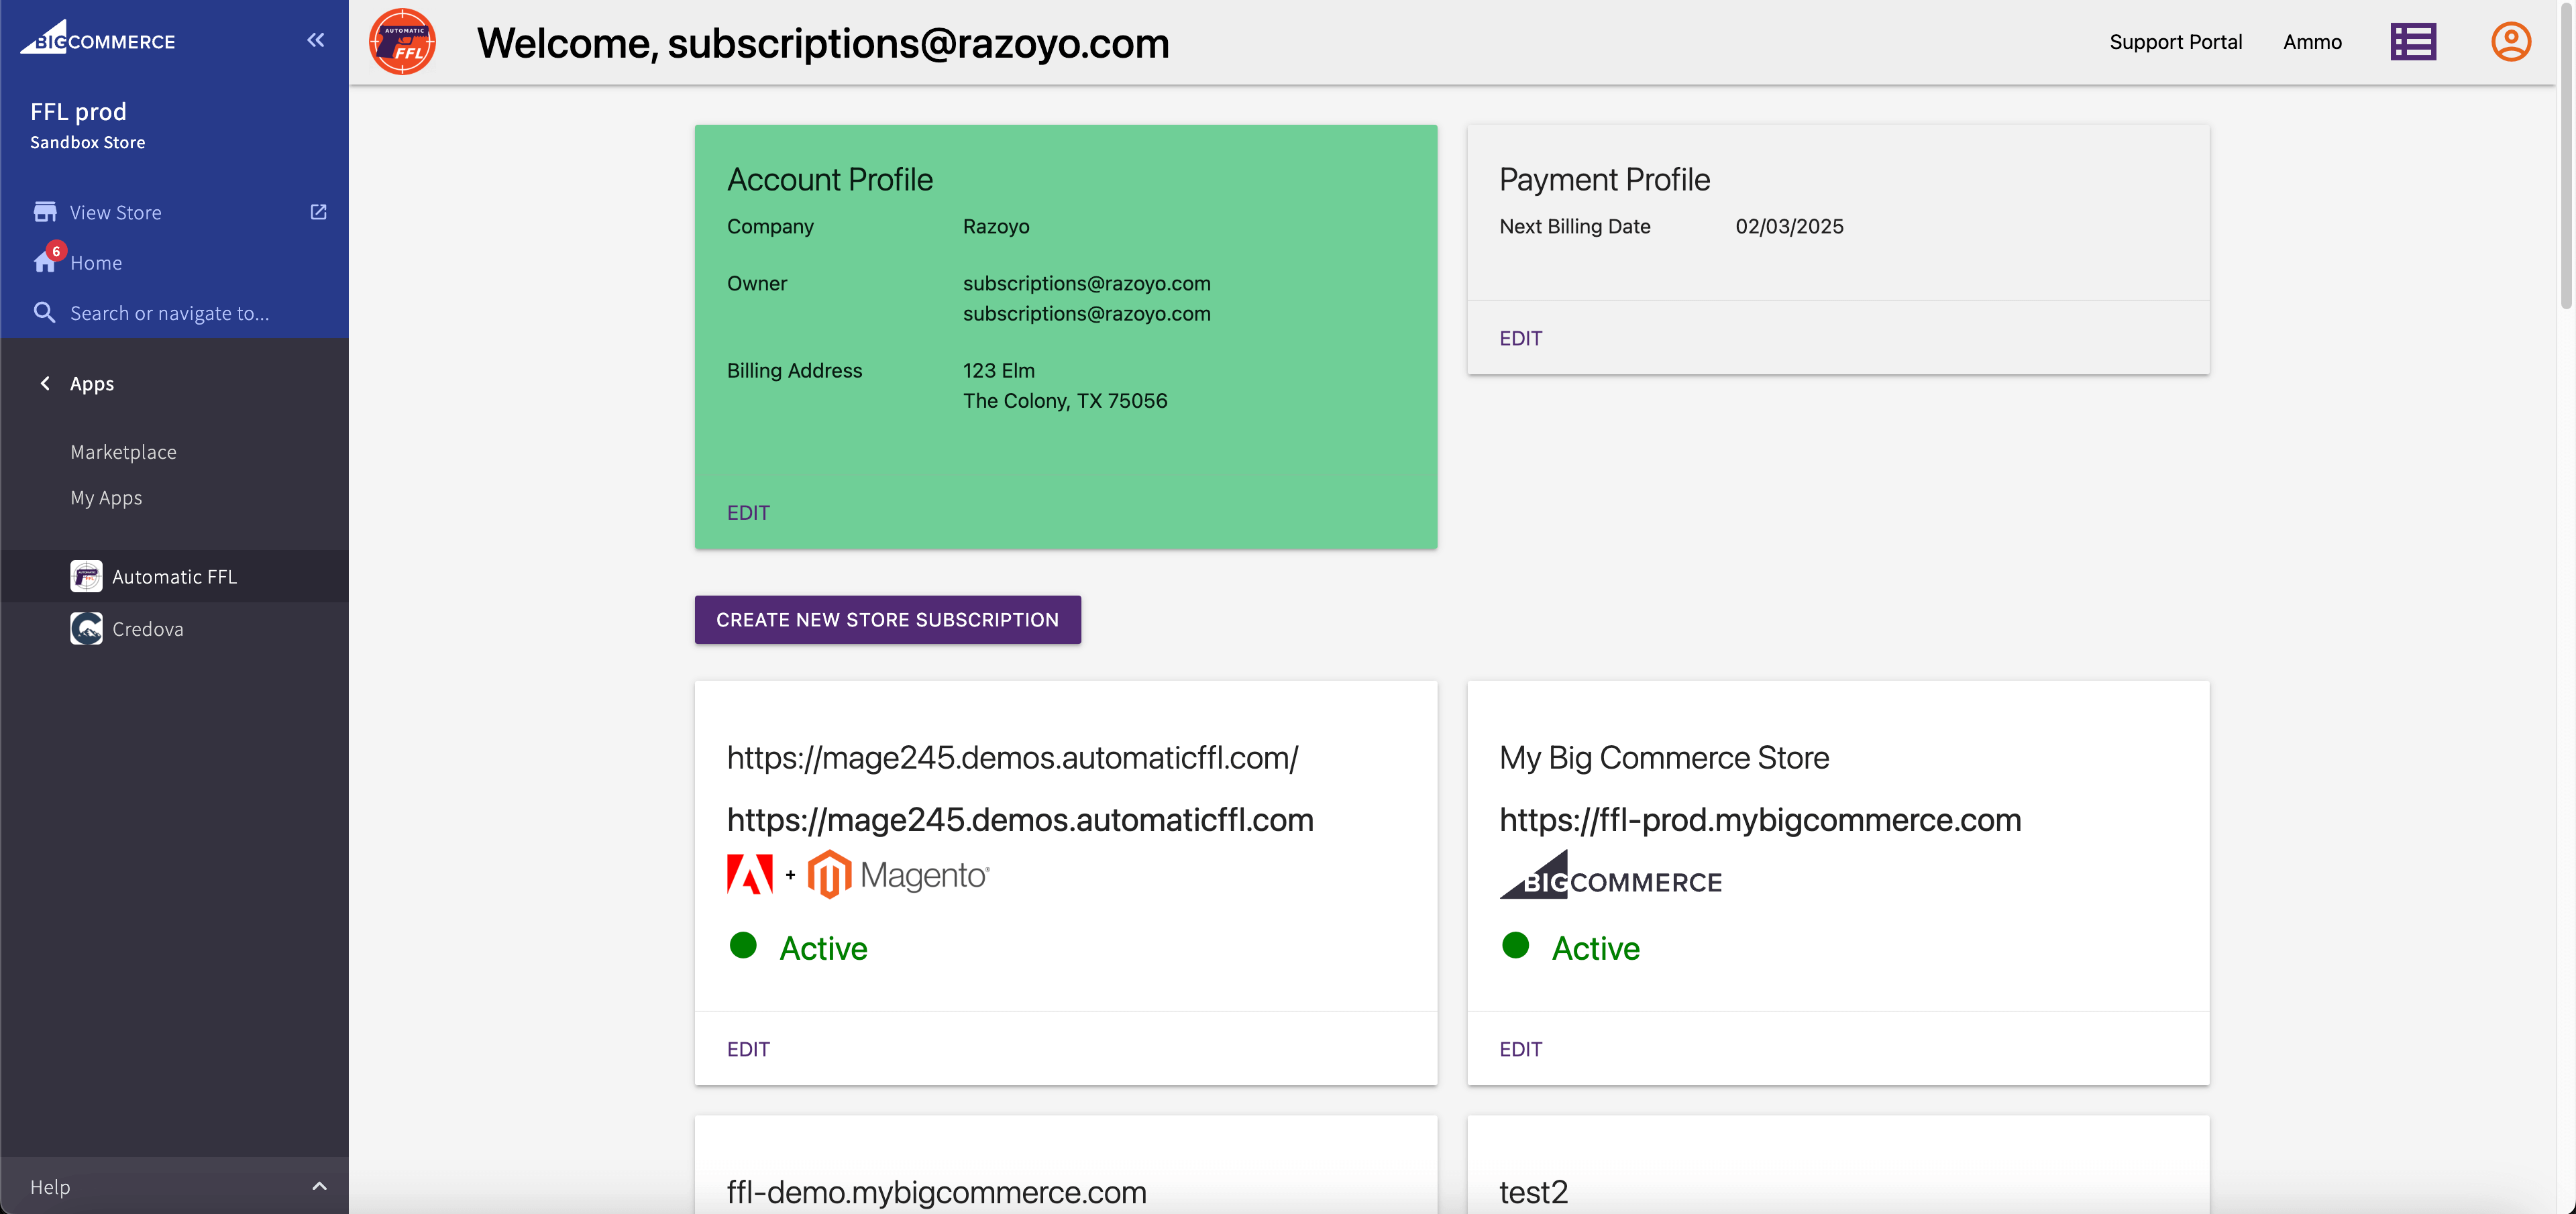
- Click EDIT under Payment Profile.
- Add a payment method and billing address in the Stripe portal. Once you’re done, you can close the tab.
Configure App
- From the BigCommerce admin, go to Settings > Checkout.
- Select Custom Checkout.
- Scroll down until you see the Custom checkout title.
- Paste this into the Script URL box.
https://static.automaticffl.com/big-commerce-checkout/auto-loader.js - Check the checkbox that says This checkout supports Optimized One-Page Checkout settings. The 2nd checkbox should be unchecked.

- Click Save in the bottom right corner.
Mark Firearms and Ammo Products
Marking Categories
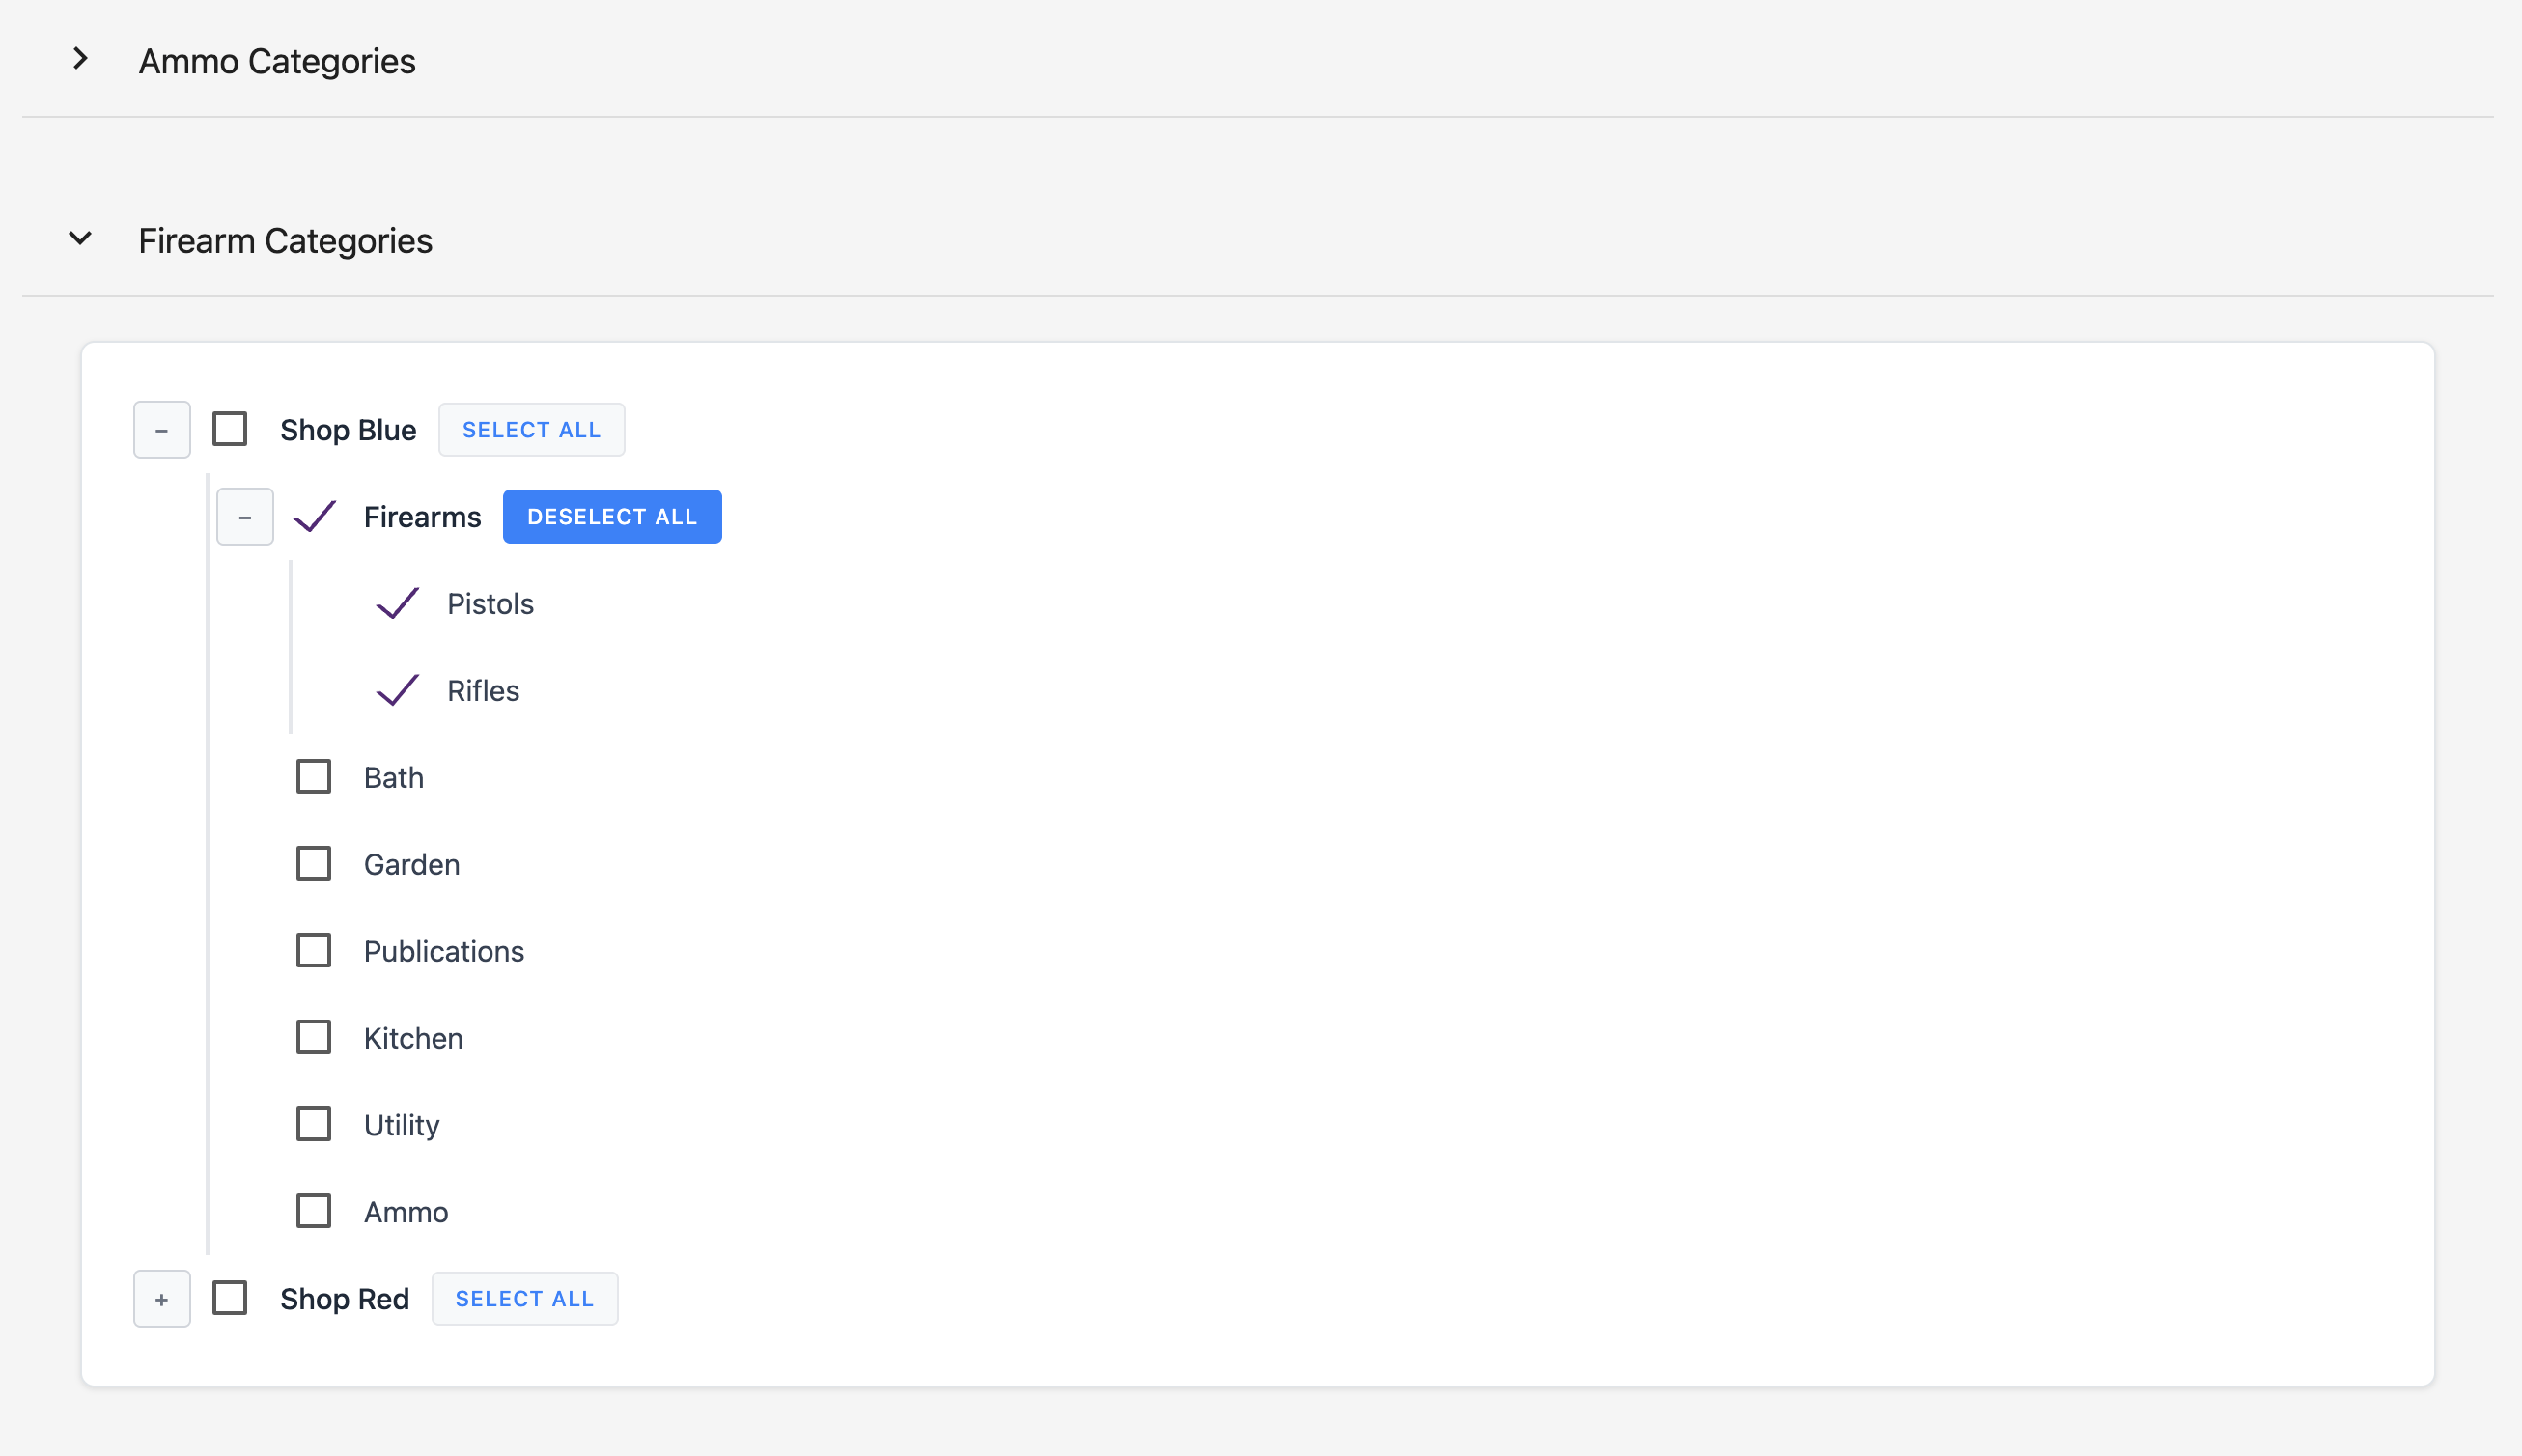
The easiest way to mark your Firearms or Ammo products as such is by marking entire categories as Firearms or Ammo.
-
Visit Automatic FFL’s dashboard.
-
Click Edit on your store.
-
Clicking on a dropdown will reveal your BigCommerce category tree where you can mark your categories.
-
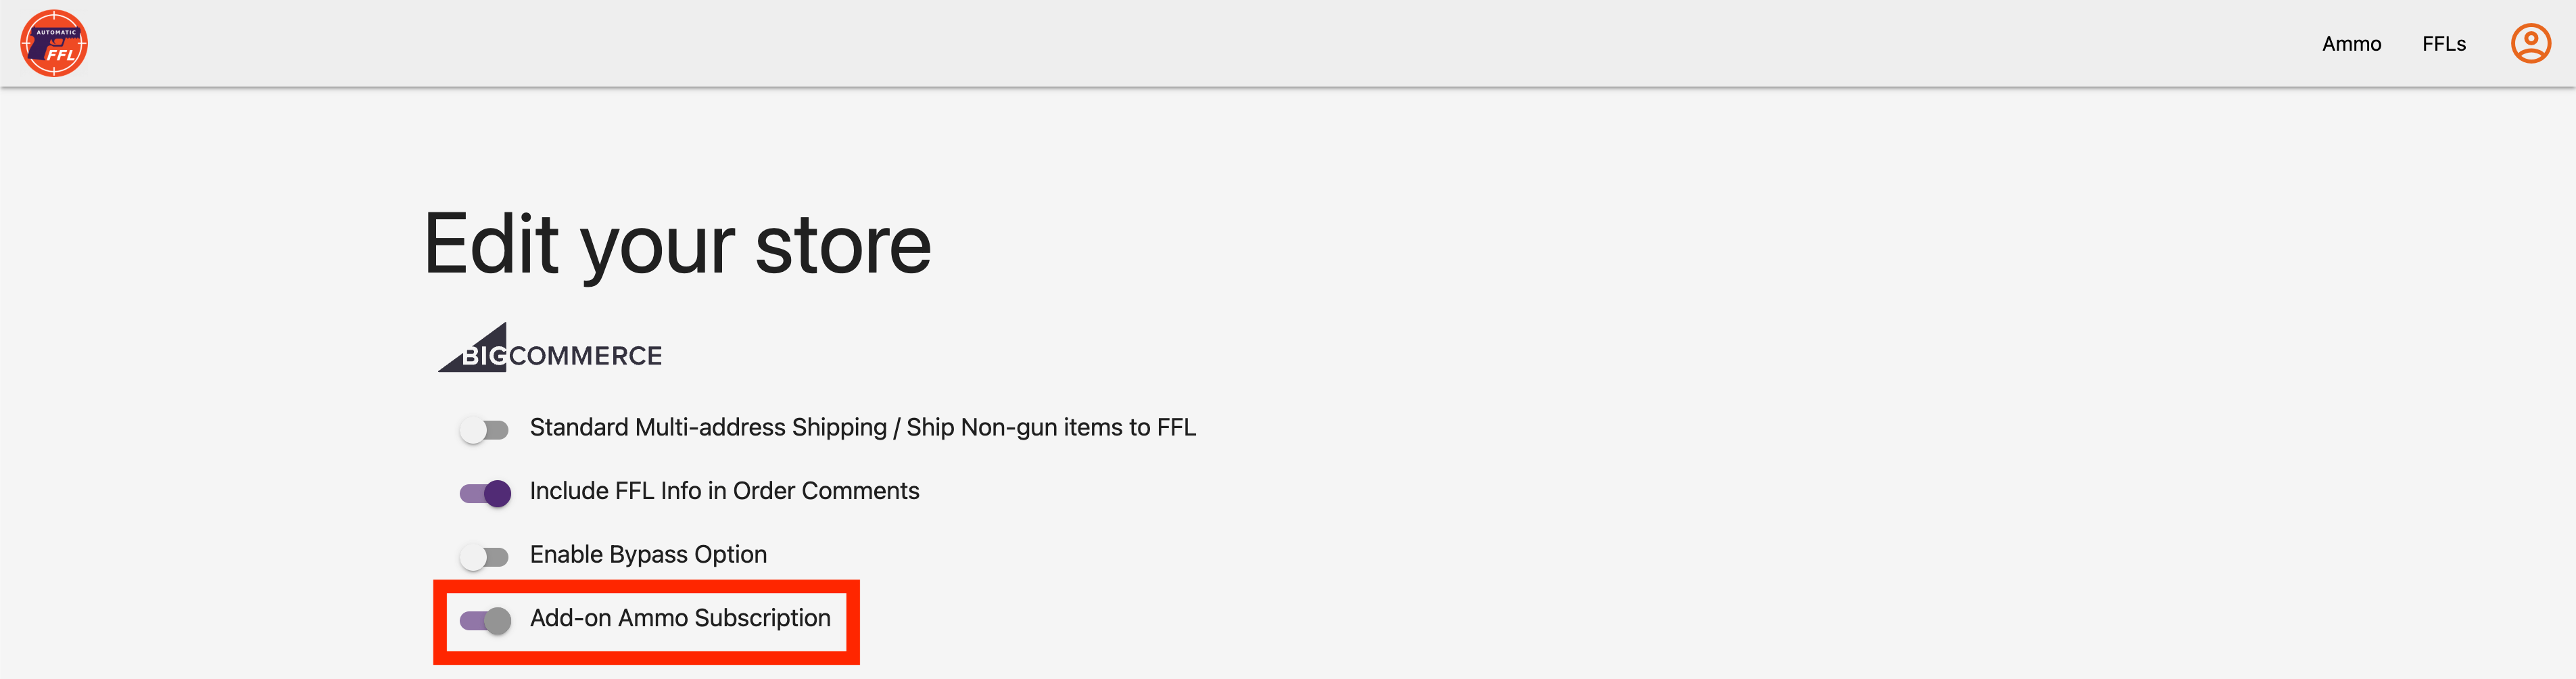
For ammo, make sure you enable the Add-on Ammo Subscription setting.
-
Don’t forget to click save at the bottom of the page!
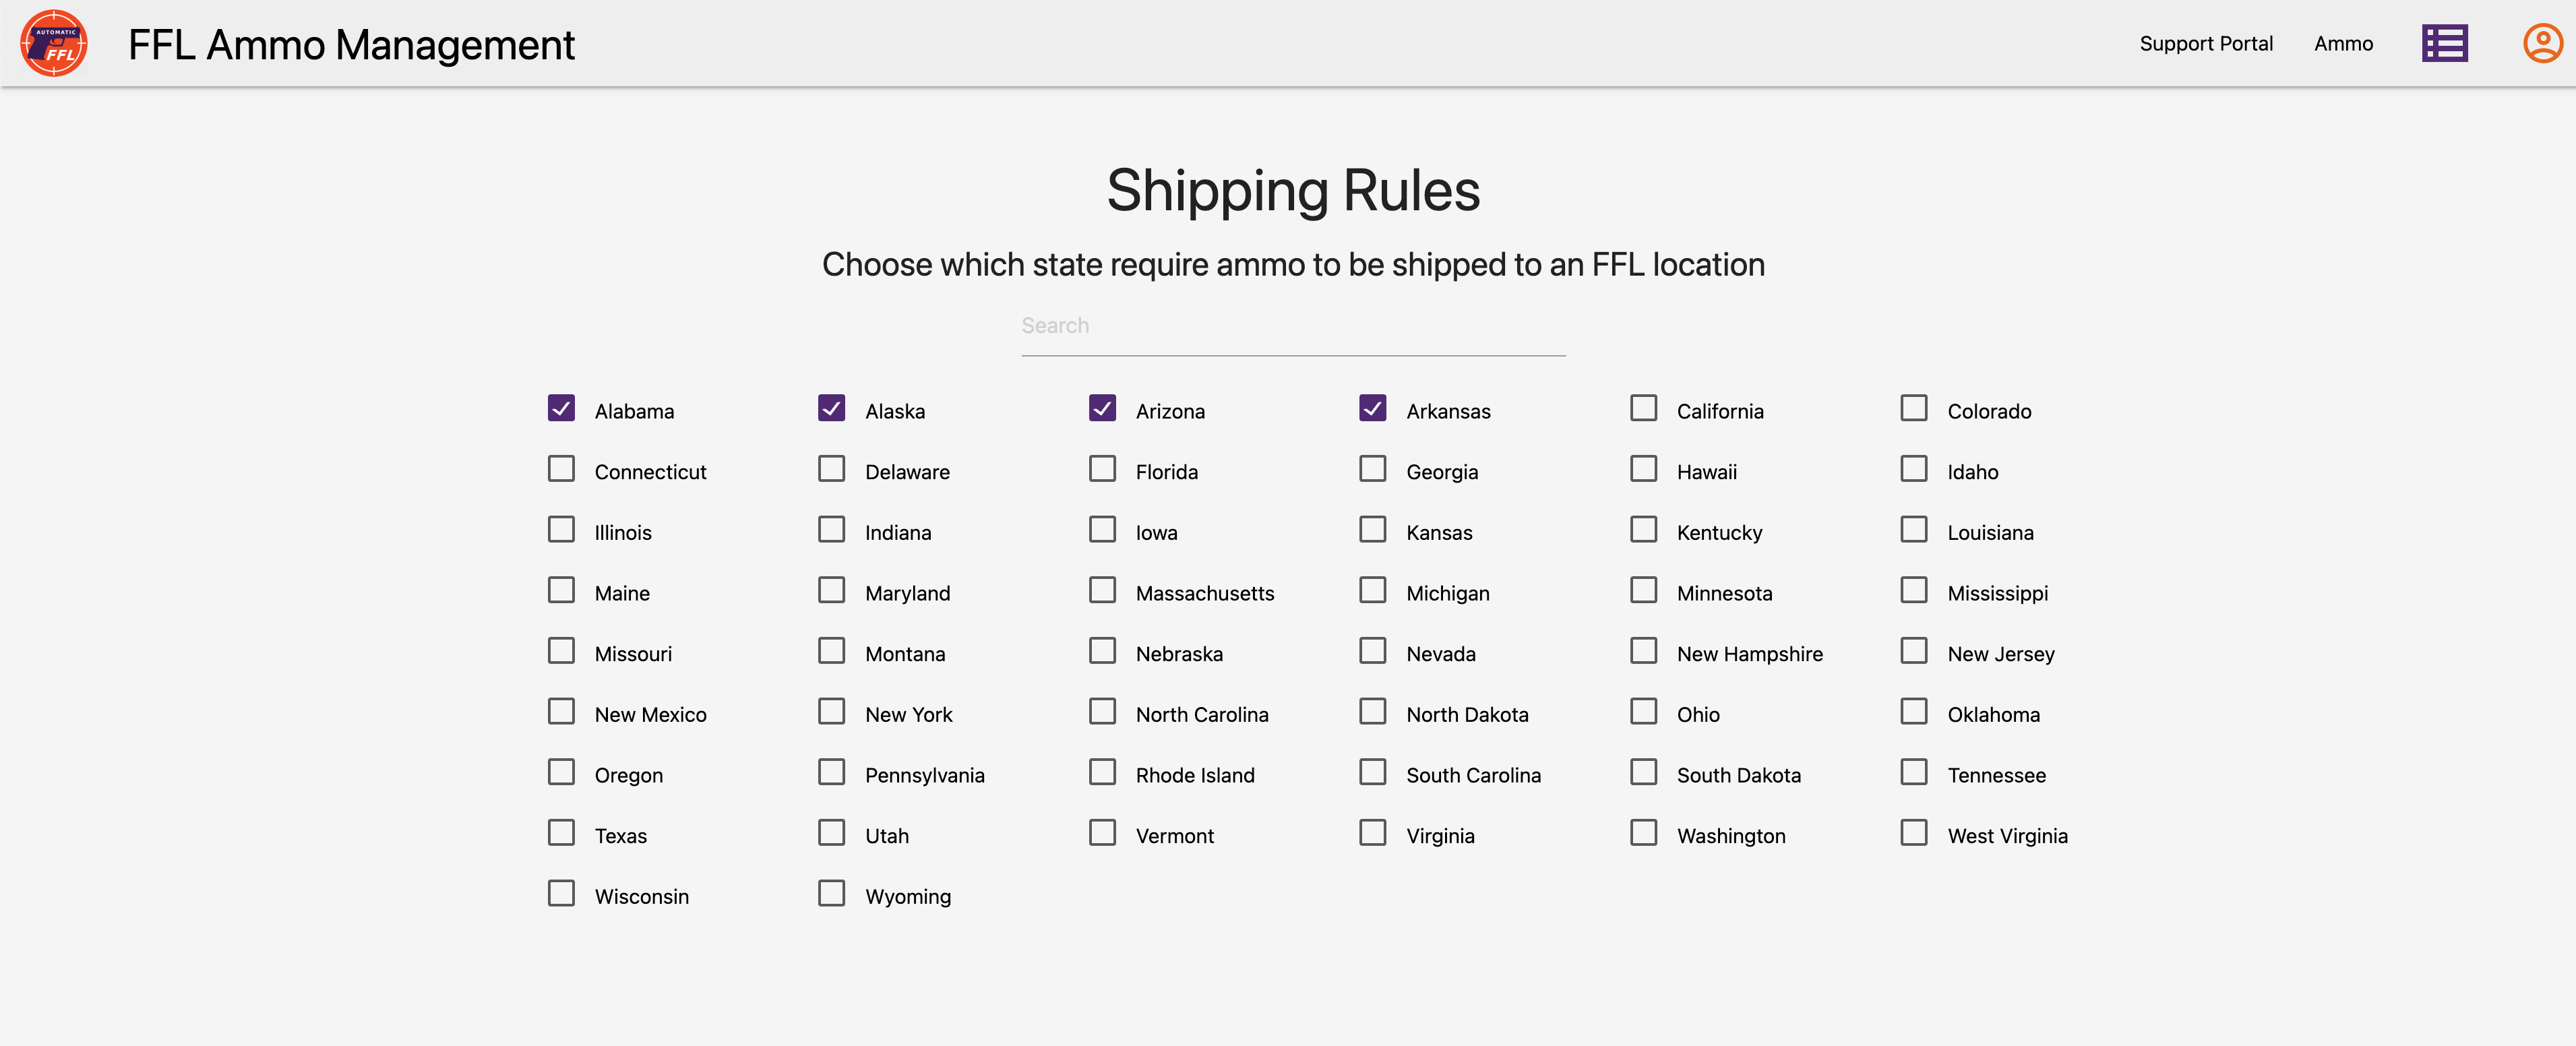
Mark Ammo States Requiring FFL Shipping
Select which states you’d like to require ammo to ship to an FFL.
Marking Individual Products
If you’ve already marked your categories, you can skip this step.
Marking individual products can be done in the store control panel under the Products tab, but if you have a large catalog, you can use BigCommerce’s bulk edit feature.
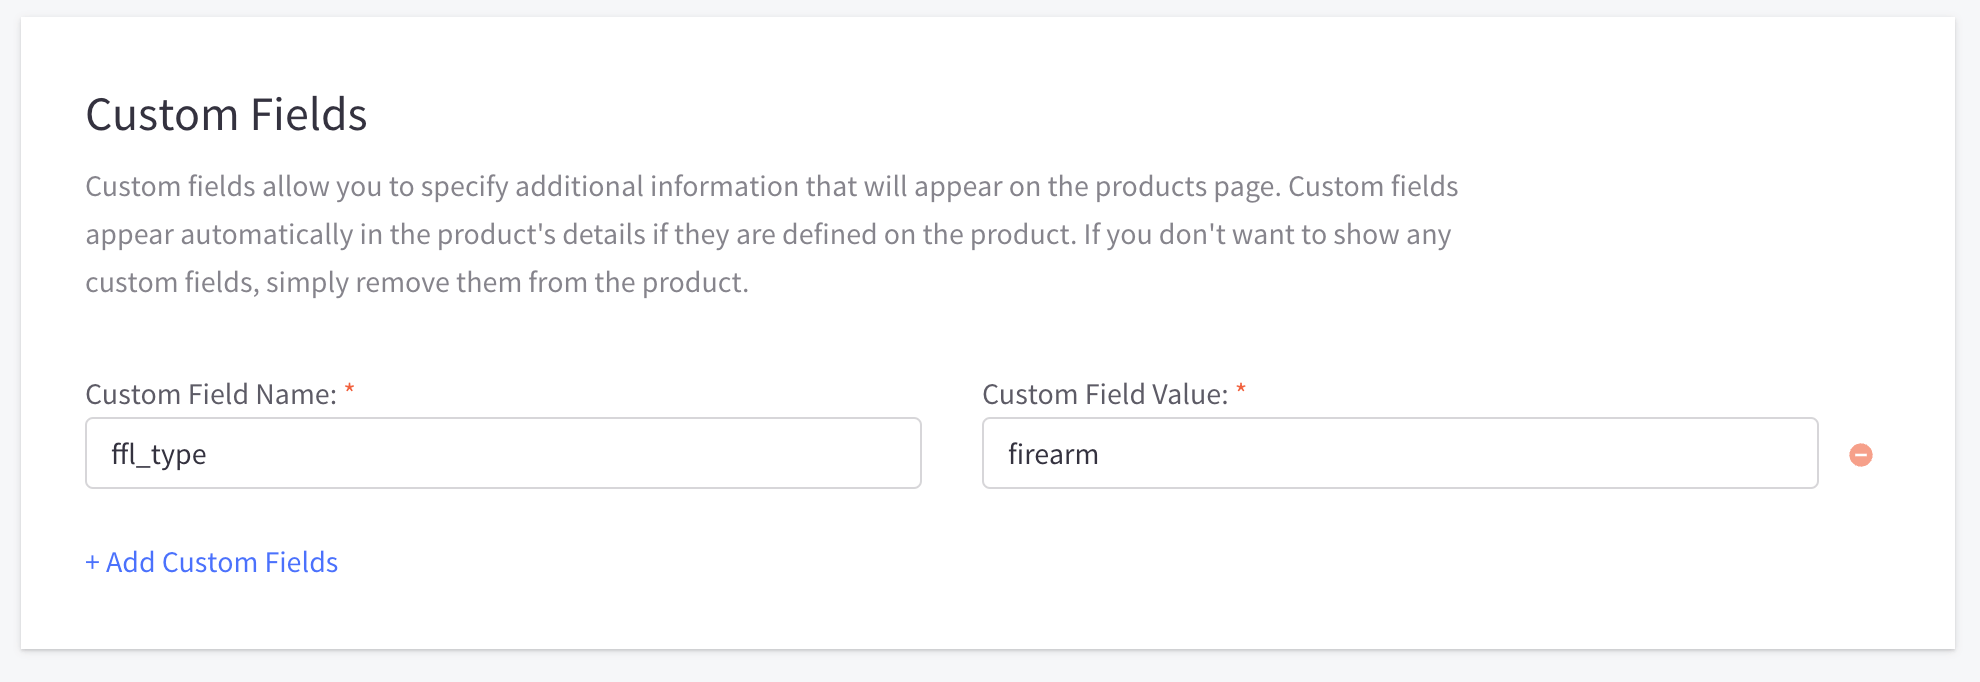
Simply click on the action menu and select Edit. Once you’ve begun editing a product, you can scroll down to the Custom Fields section.
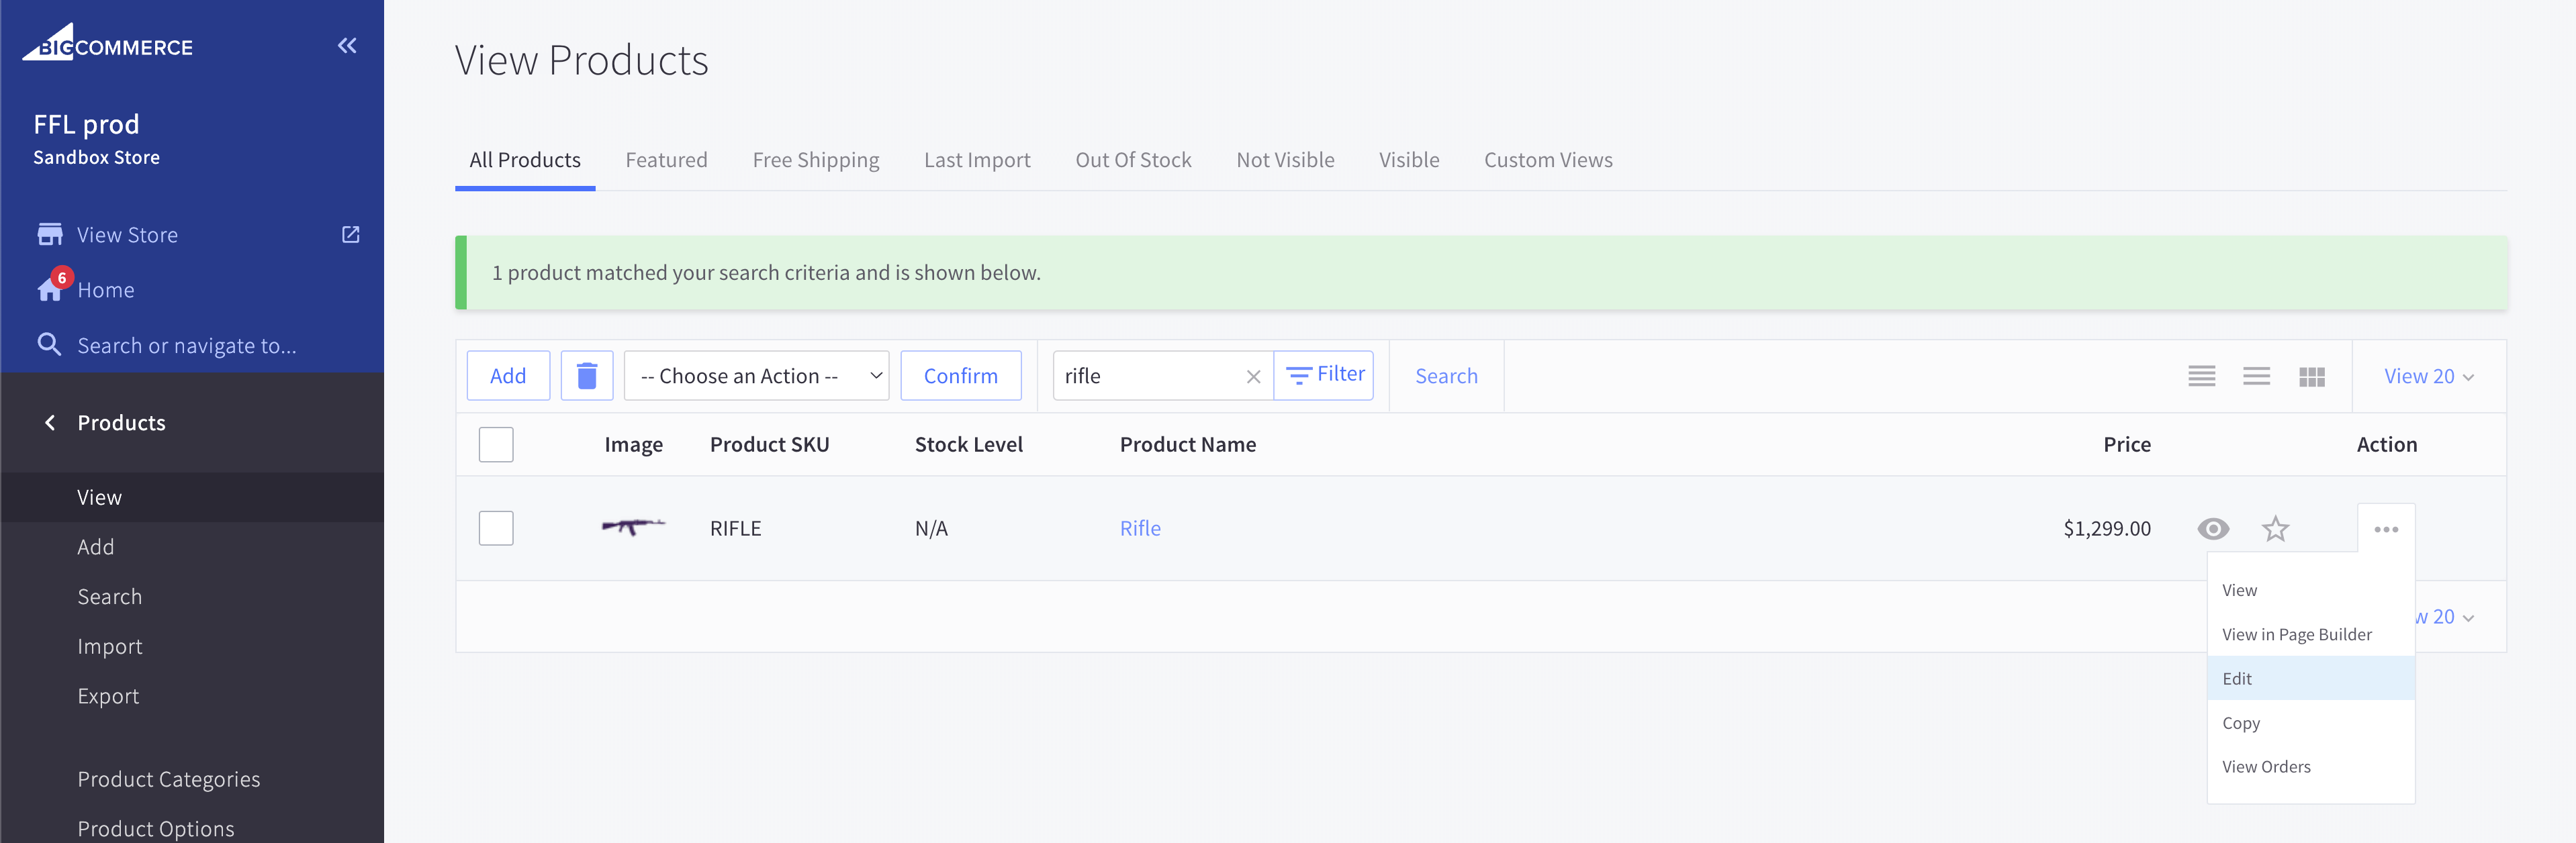
Add a custom field with the name ffl_type and the value firearm. Click the Save button to confirm your changes. It will now be restricted to FFL shipping.
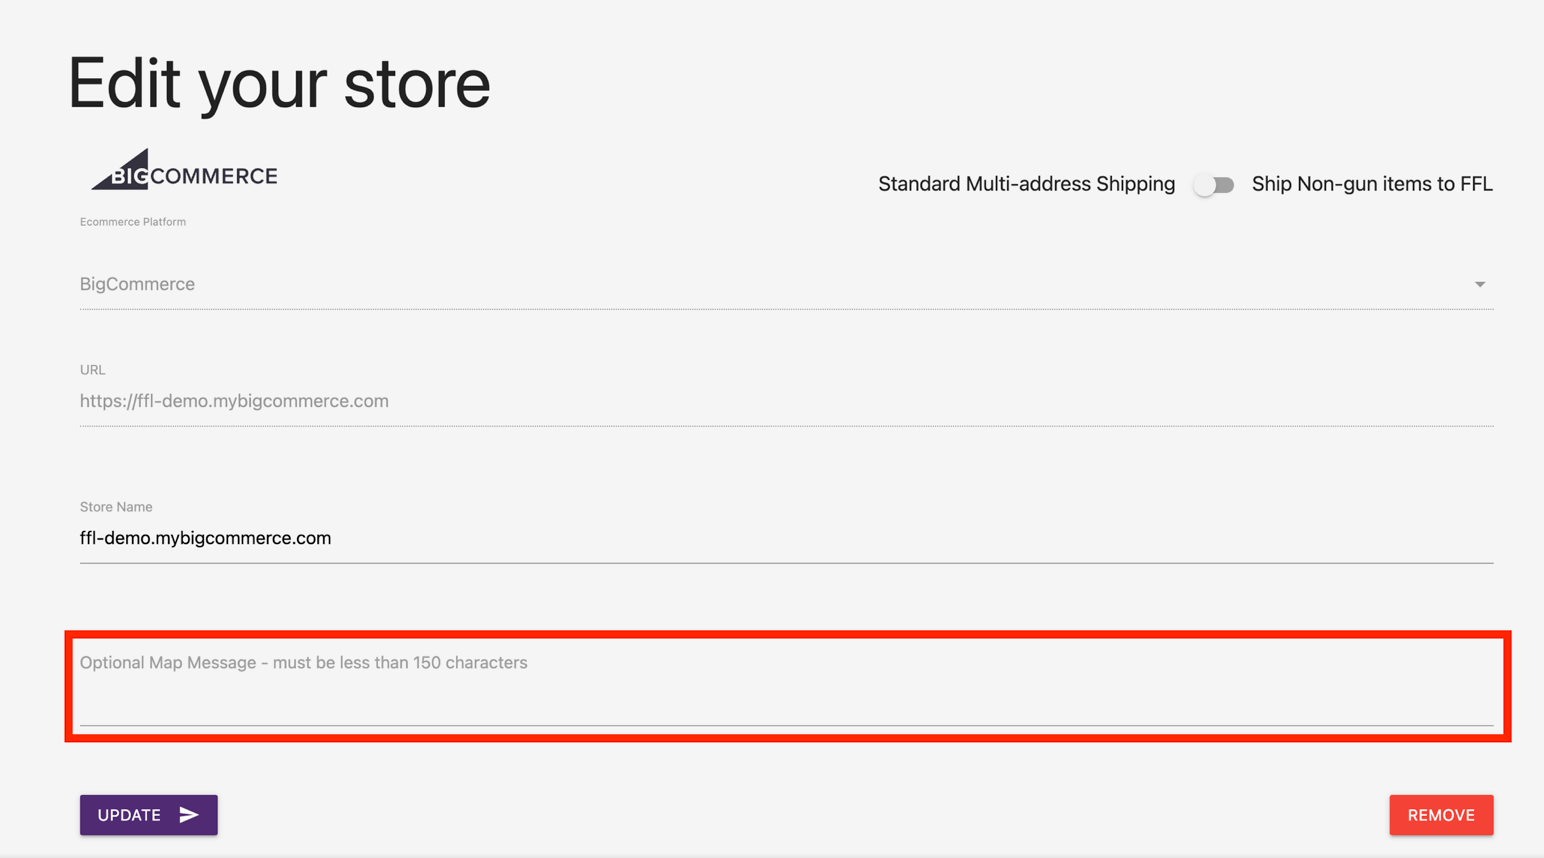
Custom Map Message
You can customize the message that appears on the FFL map by clicking EDIT on your store in the Automatic FFL app dashboard.
Styling
Automatic FFL will do its best to match the store’s styling by pulling from your theme. If you don’t like the way it looks, you can easily add your own CSS to override the styles.
Dealer Management
Automatic FFL gives you the ability to customize the list of dealers that will be available for checkout. See Documentation for complete details.